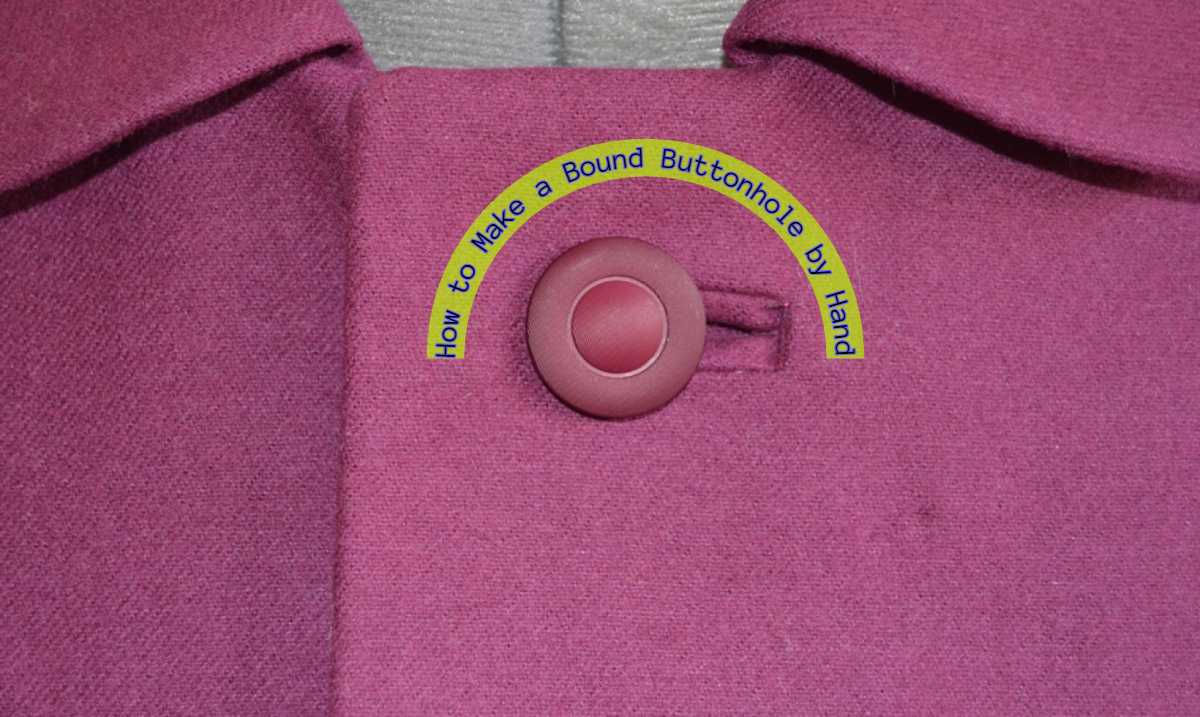
How To Make A Bound Buttonhole By Hand: 2024 Best Sew Hacks
So, you want to know how to make a bound buttonhole by hand? Well, it’s not as difficult as you might think.
In fact, it’s actually quite easy! Just follow these simple steps and you’ll be making beautiful bound buttonholes in no time.
How to Sew a Bound Buttonhole
Level: Very Easy
What You Need
- Fabric
- Interfacing
- Sewing pins
- Fabric marker
- Embroidery scissors
Pro Tip: The method used here to create a bound buttonhole is called the patch technique and involves folding a piece of scrap fabric into lips. You should practice on another piece of spare fabric first to get accustomed to the process. Once you’re content with how your bound buttonholes look they should be centered, symmetrical, and similar to a rectangle Grab some actual fabric.
Instructions
Draw and Baste the Buttonhole Box
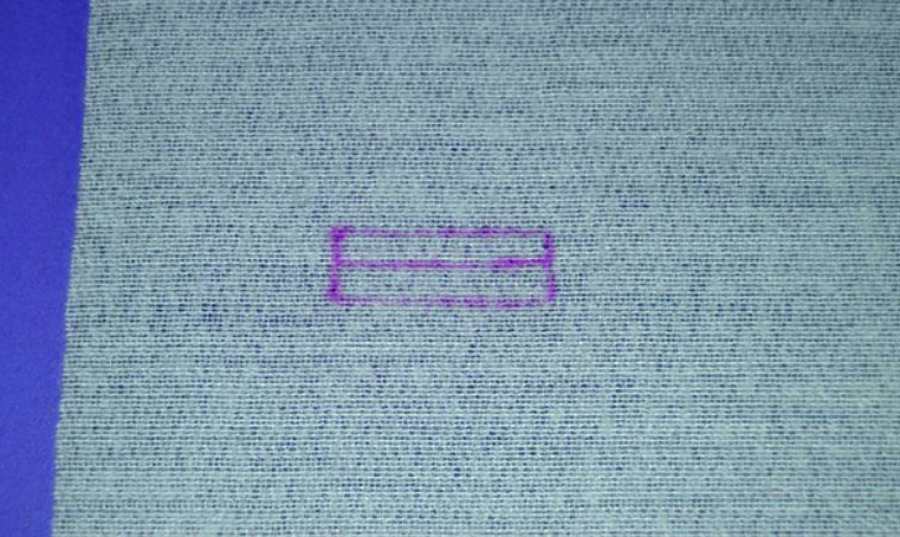
The dimensions of the box on your pattern will depend on the size of your button, and you’ll use it to mark the placement of your buttonhole.
To find the box length, add ⅜” (1 cm) to your button length. The width will be ⅜” as well, which you can then divide in half with a centered line. For example, if you have a 1⅝” button, your box is going to be 2″ x ⅜” (5 x 1 cm), with a centered horizontal line at 3/16″.
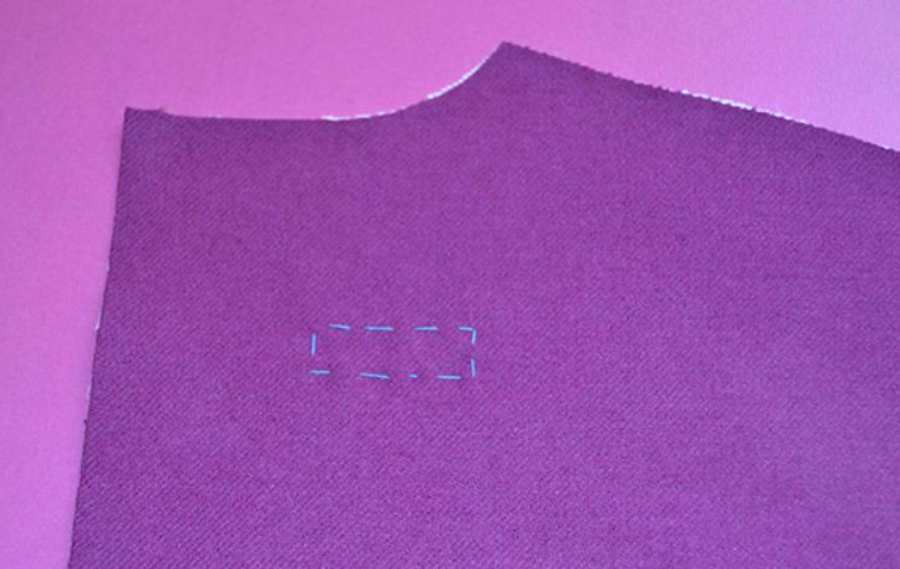
Report the box on the interfacing and baste around it. This will help keep the fabric in place while you sew.
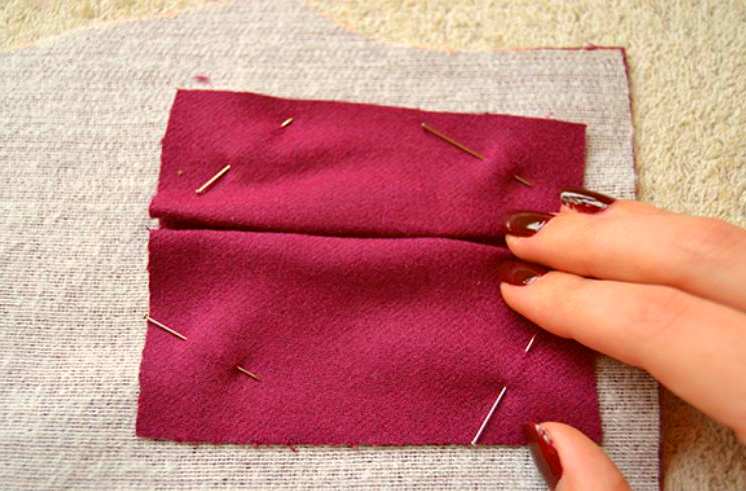
Cut and Pin Your Patch
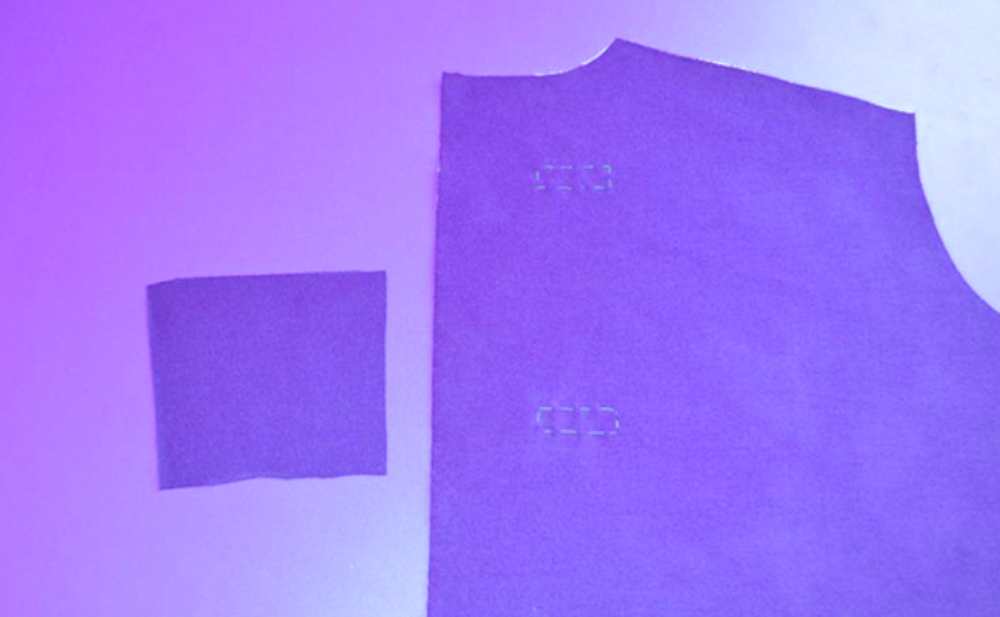
Cut a 4×4 inch square out of the fabric on the bias. You can trim the edges later, so don’t worry about making it perfect.
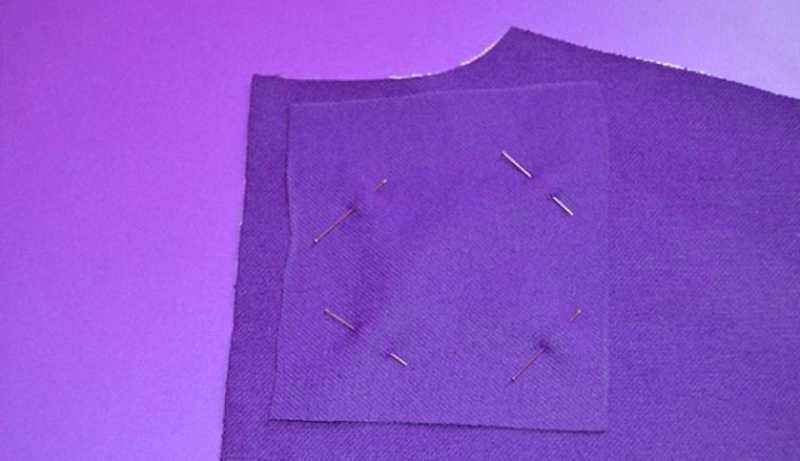
Pin the patch onto the basted box, with the right sides of the fabric facing each other.
Stitch
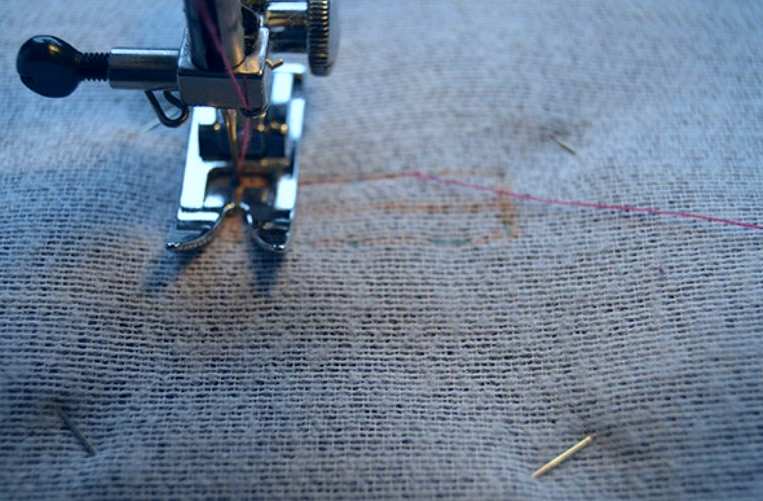
Select a short stitch length on your sewing machine. From the wrong side of the fabric, stitch around the box, starting from a long side.
Pro Tip: To ensure both ends are even, count the number of stitches you make on the shorter sides.
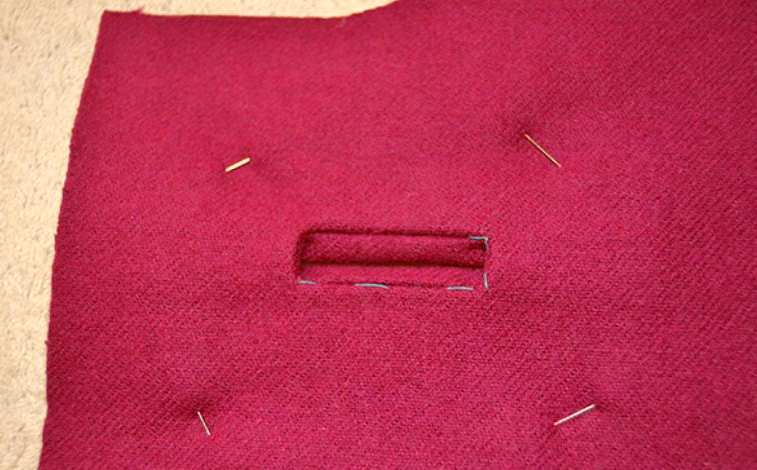
Cut Open the Buttonhole Box
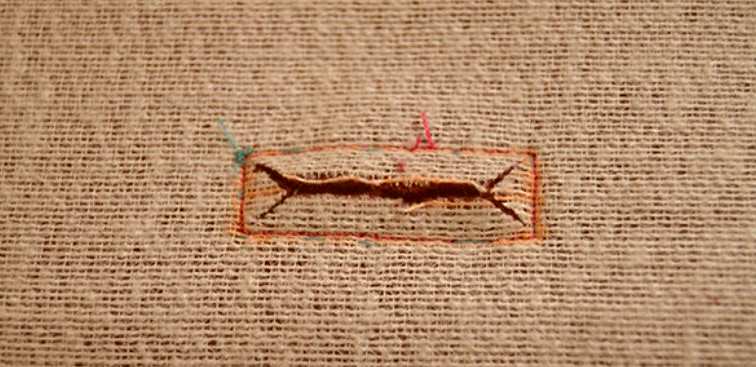
Be very careful when cutting through both layers (the front and the patch) from the center. Cut a V into the ends of the box, being as close to the stitches as possible without snipping them. (Now is the time to use your small embroidery scissors!)
Pass the Patch
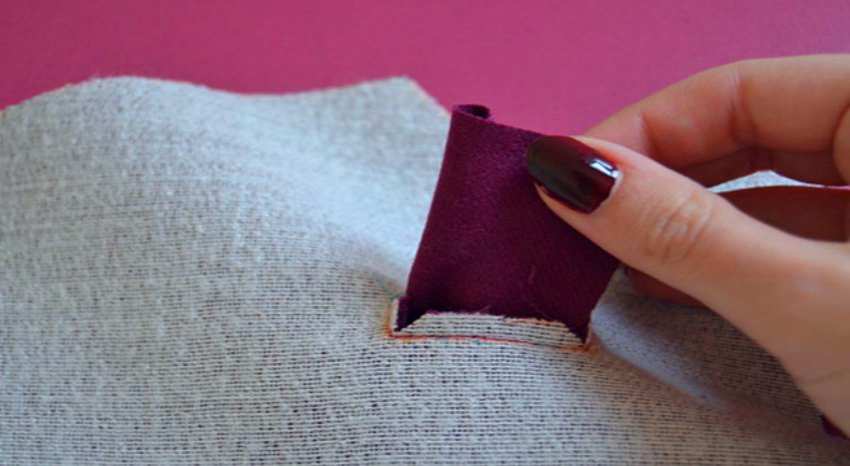
Place the patch through the open box, then lay it flat and lightly press.
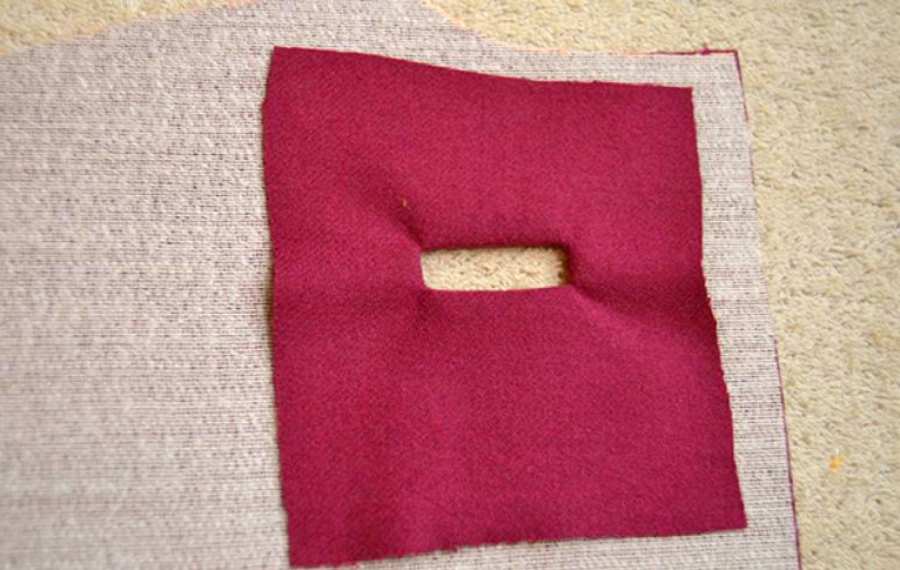
If the corners of your fabric piece are not lying flat, it means you did not cut close enough to the stitches during the previous step. To fix this issue, fold the patch back and take more time cutting closer to the stitches.
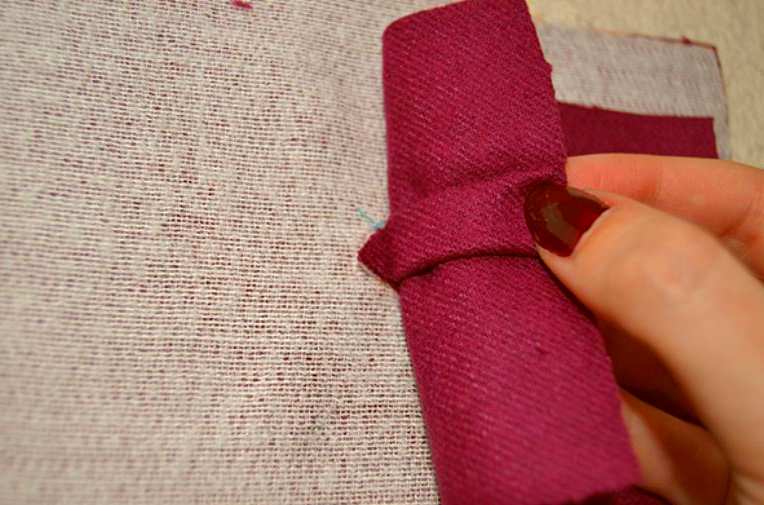
Make the First Lip
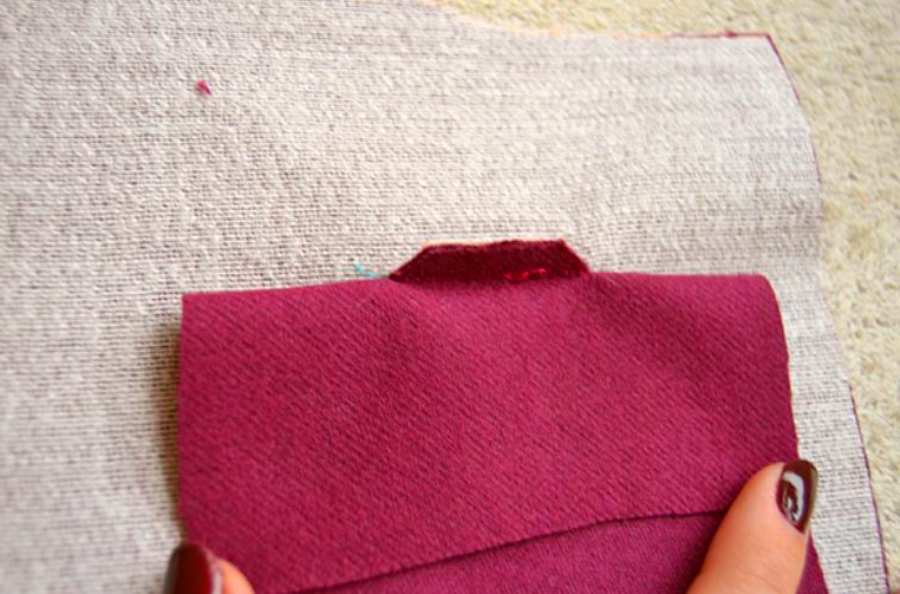
Take the top layer of the patch and fold it over so that its edge meets the bottom layer.
Pin the fabric in place so that the fold is centered.
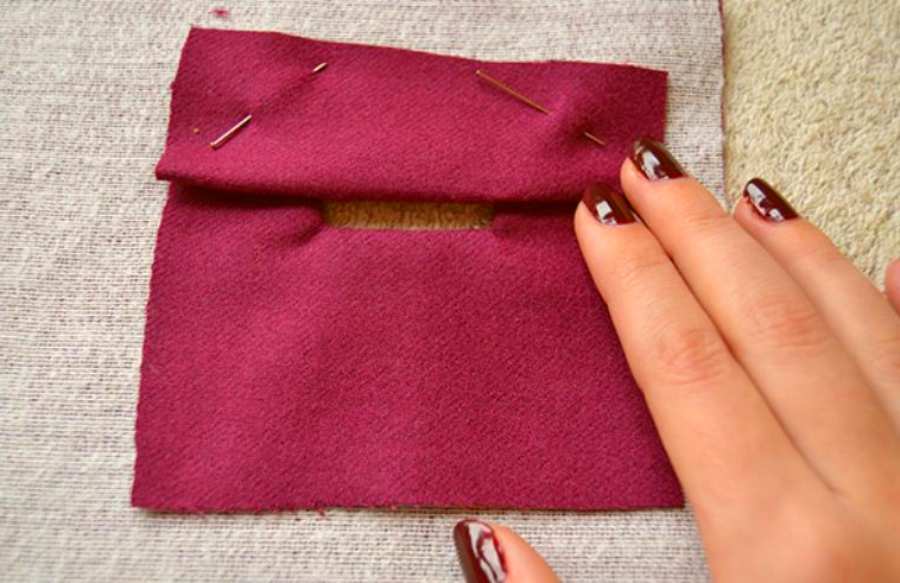
Make the Second Lip
Fold the bottom of the patch in two to form the second lip, making sure both lips meet in the middle. Pin it securely in place.
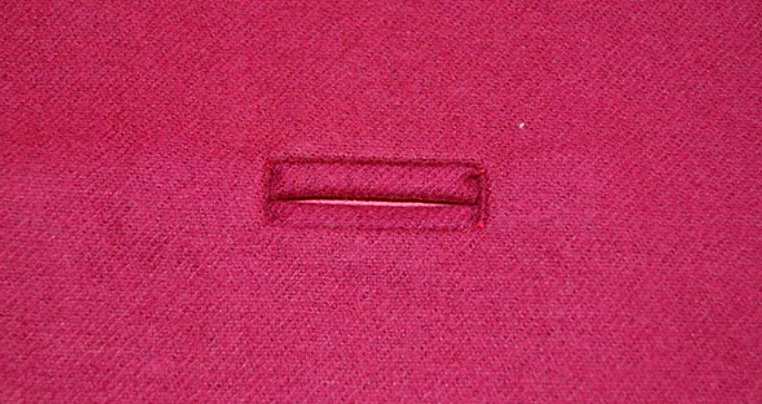
Gently press down so that it keeps its shape, but make sure the edges aren’t visible.
The buttonhole on the right side should look like the image provided.
Stitch the Triangle
The small triangles at the ends of the box need to be stitched onto the patch in order to secure the folds.
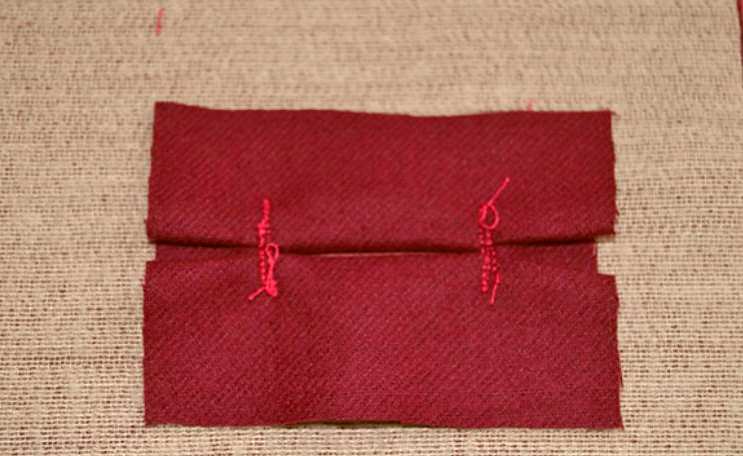
For this project, use a short stitch length and sew as close to the fold of the triangle as possible.
Complete and Repeat
Remove the basting threads. You’re now ready to create the other buttonholes! On the facing, repeat steps 3 and 4 without the patch. Doing so will create an opening on the facing that’s the size of your buttonhole. Finally, the hand stitches the opening on the facing to the completed buttonhole.
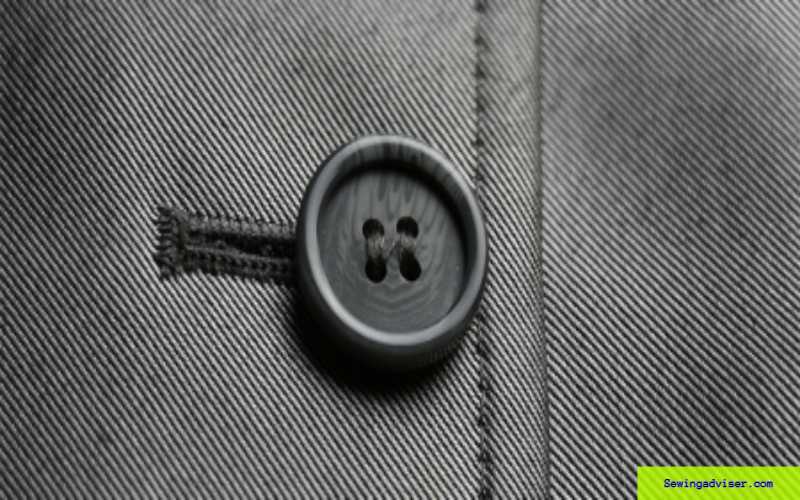
While it may take a bit more time, making buttonholes with bindings will give your jacket a clean finish that looks couture and is much stronger than jackets without this detail. You’ll be able to wear your new jacket for years!
What Is A Bound Buttonhole And Why Would You Want To Make One By Hand?
A bound buttonhole is a type of buttonhole that has a neat finish on both the front and back of the fabric. It is traditionally used on tailored garments, such as suits and jackets, where a professional finish is required.
While modern sewing machines can create bound buttonholes automatically, making them by hand can give you more control over the final result.
And, if you’re sewing a vintage garment or something that will be worn for special occasions, hand-sewn buttonholes can add an extra touch of luxury.
In this tutorial, we’ll show you how to make a bound buttonhole by hand. You’ll need some patience and a steady hand, but we promise it’s not as difficult as it looks!
List Of Materials And Tools Needed To Make A Bound Buttonhole
In order to make a bound buttonhole by hand, you will need the following materials and tools:
- Thread
- Needle
- Button
- Scissors
- Pins
- Fabric marker or chalk
- Tape measure or ruler
First, determine where you would like the buttonhole to be placed on the fabric. Mark the placement with a fabric marker or chalk. Then, cut a small slit in the fabric at the marked location. The length of the slit should be equal to the diameter of the button.
Next, thread a needle with a long length of thread. Starting from the back side of the fabric, insert the needle through the slit and come up through the front side of the fabric.
Then, insert the needle back through the slit and come up through the front side again. Repeat this process several times to reinforce the edges of the buttonhole.
Once the edges of the buttonhole are reinforced, begin making stitches around the circumference of the hole. Make sure that each stitch is close to the previous one so that there are no gaps in between.
When you reach the beginning again, make a few stitches over the top of the first few stitches to secure them in place. Then, cut off any excess thread and knot it in place.
Now it’s time to create the “bound” part of the buttonhole! On one side of the buttonhole, make a small loop with your thread and insert your needle through this loop (as if you were making a slipknot). Pull tight so that there is no gap between this loop and the edge of the buttonhole.
Continue making small loops around the circumference of their buttonhole in this manner until you reach the end again.
Secure the last loop in place by inserting the needle through it and making a few stitches over the top of the first few stitches (as you did at the beginning). Cut off any excess thread and knot it in place.
Related Article: How to Sharpen Sewing Pins
Step-By-Step Guide To Making A Bound Buttonhole.
Making your own buttonholes is not as difficult as you may think. With a little practice, you’ll be able to make bound buttonholes that are strong and look beautiful.
Tools and materials needed:
- A sharp pair of scissors
- Thread in a contrasting color
- Needle
- Buttonhole foot (optional)
- Marking pen or chalk
- Seam ripper (optional)
- Begin by marking the placement of the buttonhole on the fabric. It’s best to use a marking pen or chalk that will show up on both light and dark fabrics. If you’re using a buttonhole foot, mark the placement of the center of the foot on the fabric as well.
- Next, cut a small slit at the beginning of the buttonhole. Make sure the slit is big enough for your scissors to fit through.
- Now, thread your needle with thread in a contrasting color. You’ll want to use a thread that is strong but not too thick, so it will slide easily through the fabric.
- Starting at the top of the slit, begin sewing a zigzag stitch over the opening. Sew slowly and evenly, making sure each side of the zigzag is the same width.
- As you sew, periodically stop and check to see if your needle is lined up with the edge of the foot (if you’re using one). If it’s not, adjust your stitches accordingly.
- When you reach the end of the buttonhole, make a few stitches back and forth to secure the end before cutting your thread.
- Now, cut along the center of your zigzag stitches, being careful not to cut into your fabric. Once again, make sure your scissors will fit through the hole before you start cutting!
- To finish off your buttonhole, sew around all four edges with a small whipstitch or another type of stitch used for finishing raw edges.
Tips And Tricks For Making Bound Buttonholes
When you are ready to make a bound buttonhole, there are a few things to keep in mind that will help you achieve the best results. Use a sharp needle and thread that contrasts with your fabric. This will make it easier to see what you are doing and avoid any mistakes.
It is also important to take your time and sew slowly. This will ensure that your stitches are even and neat. Practice makes perfect, so don’t be afraid to experiment with some scrap fabric before sewing your bound buttonholes onto your final project.
Here are step-by-step instructions for how to make a bound buttonhole by hand:
- Cut a strip of fabric that is twice the length of your buttonhole plus 1 inch. Fold the strip in half lengthwise and press.
- Mark the placement of your buttonhole on the right side of your fabric, using a disappearing ink pen or chalk. Make sure that the marks are even on both sides of the fold.
- Using a sharp needle and thread that contrasts with your fabric, sew along the marked line, making small stitches (about 1/8 inch long) close together. Start at one end of the buttonhole and sew around all four sides, until you reach the other end.
- Cut along the marked line, being careful not to cut through your stitches. Clip into each corner, taking care not to cut through your stitches (this will help reduce bulk when you turn the corner).
- Turn the strip right side out and press flat. Fold in each side so that they meet in the middle and press again.
- Slip the strip over your buttonhole and pin it in place on both sides, making sure that the raw edges of the strip are aligned with the raw edges of your fabric opening. Sew in place using small stitches (about 1/8 inch long).
What to do if you Run Into Problems while Making A Bound Buttonhole.
If you’re having trouble making a bound buttonhole, there are a few things you can try. First, make sure that you’re using the right size needle and thread. Second, try adjusting the tension on your sewing machine.
If your buttonhole is still too small, you can try making it larger by cutting the opening slightly larger with a seam ripper. Finally, if all else fails, you can always hand-sew the buttonhole closed.
Different Ways To Make A Bound Buttonhole.
There are many ways to make a bound buttonhole, but the most common is to use a bias binding. This method is quick and easy, and it produces a professional-looking buttonhole.
- Cut a length of bias binding that is twice the width of the buttonhole plus 1/2 inch (1.3 cm). Fold the binding in half lengthwise with the wrong sides together and press.
- Open up the binding and attach it to the right side of the fabric at one end of the buttonhole opening, aligning the raw edges. Sew in place using a small zigzag stitch or a straight stitch set at a narrow width.
- Fold the binding over the raw edge of the fabric on the other side of the buttonhole opening and sew in place using a small zigzag stitch or a straight stitch set at a narrow width.
- Trim away any excess binding, making sure not to cut into the stitches.
Conclusion: How To Make A Bound Buttonhole By Hand
In conclusion, making a bound buttonhole by hand is a simple process that can be done with a few supplies and a little bit of time. With careful stitching and accurate measurements, you can create professional-looking buttonholes that will add a touch of class to any garment.


15 Comments