How to Use a Dress Form: Mastering Draping, Fitting & More
Looking to up your sewing game and make those outfits fit like a dream?
Then it’s time to get cozy with your new best friend: the dress form!
Whether you’re a seasoned seamstress or just starting out, knowing how to use a dress form can take your creations to the next level.
In this guide, we’ll walk you through the ins and outs of utilizing this indispensable tool, from selecting the right size to draping fabrics like a pro.
So, grab your pins, and let’s dive into the wonderful world of dress forms!
Key Takeaways
- Utilize padding techniques to achieve precision in fitting and draping on the dress form, ensuring an accurate representation of body measurements.
- Master the art of pattern drafting and draping fundamentals to create custom-fit garments that complement individual body shapes and sizes.
- Incorporate the dress form into the fitting process to streamline adjustments and achieve a tailored fit for your garments.
- Enhance your sewing experience by leveraging the dress form for creative design exploration and refining garment details.
- Upgrade your sewing toolkit by recognizing the versatile and valuable role of the dress form in honing your sewing skills and expanding your creative possibilities.
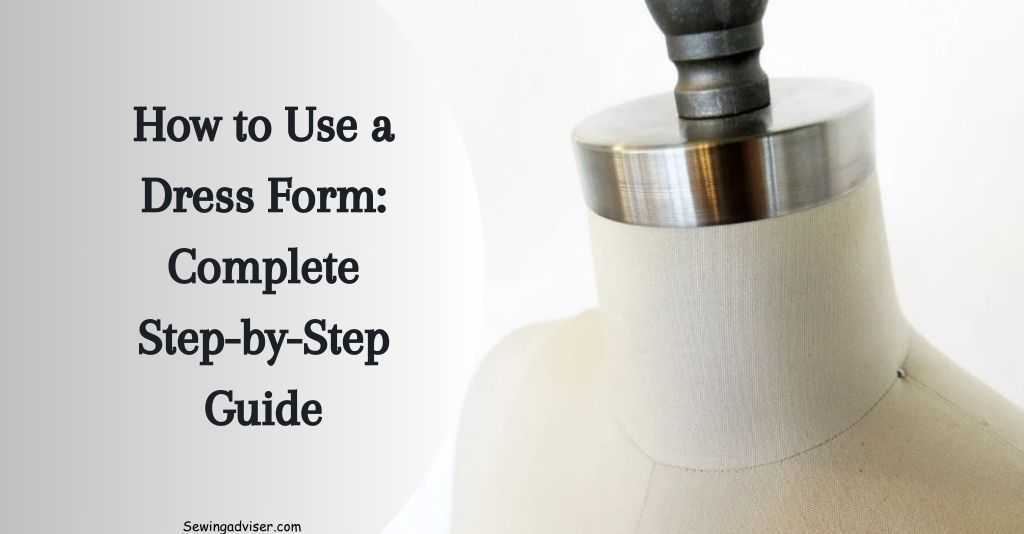
What is a Dress Form, and why do I need One?
A dress form, also known as a dressmaker’s dummy or mannequin, is a three-dimensional model of the human body used in sewing and fashion design.
It serves as a replica of the body, allowing you to drape, pin, and fit garments accurately.
Whether you’re a beginner or an experienced seamstress, a dress form is indispensable for achieving precise measurements and fitting.
See Also: Best Sewing Machines for Fashion Designers
Understanding Dress Forms
Basic Draping Methods on a Dress Form
Drapping is the process of positioning and pinning fabric pieces onto a dress form to create garment patterns. To start draping, you’ll need to gather your materials: muslin fabric, pins, marking tools, and scissors.
Begin by securing the muslin fabric at the waistline of the dress form using pins. Then, gradually smooth and drape the fabric over specific areas of the dress form to create shape and structure for your garment.
Once you have draped one side of your garment pattern, ensure that it’s symmetrical by comparing both sides. Make adjustments as needed to achieve balance in your design.
Throughout this process, remember that practice makes perfect; don’t be discouraged if your first attempts are not flawless.
Creating Different Garment Styles Through Draping
One of the most exciting aspects of draping is its versatility in creating various garment styles directly on a dress form.
Whether you’re aiming for a fitted bodice or an A-line skirt, draping allows you to experiment with different silhouettes effortlessly.
For instance, if you want to design a flowing gown with intricate pleats or ruffles, draping enables you to visualize and refine these details effectively.
Moreover, draping also facilitates experimentation with neckline designs such as V-necks or boat necks without needing complex paper patterns initially.
This hands-on approach encourages creativity and innovation in fashion design while providing immediate visual feedback on how certain elements will look when worn.
Achieving Symmetry and Balance in Draping
When using a dress form, achieving symmetry is crucial for producing well-proportioned garments.
Symmetry ensures that both sides of the pattern match accurately when draped over each half of the dress form.
To maintain balance during draping sessions, periodically step back from your work area to assess your progress from different angles.
Utilizing measuring tapes can aid in confirming that corresponding points on both sides are equidistant from key reference lines on the dress form (such as center front or center back).
By doing so regularly throughout your draping process especially when working on more complex designs you’ll develop an eye for achieving precise symmetry consistently.
Setting Up Your Dress Form
Adjusting Dimensions
When using a dress form, it’s crucial to understand how to adjust its measurements. This involves customizing the dress form to match your body dimensions accurately.
By doing so, you ensure that the dress form represents your body shape faithfully.
For instance, if you’re working on a project for someone else, adjusting the dimensions allows you to replicate their exact measurements.
To customize the dress form, start by setting the bust, waist, and hip measurements according to your body size.
Some dress forms come with adjustable dials or knobs that make this process easier. Once adjusted, double-check each measurement against your own body proportions to ensure accuracy.
Consider using padding or foam at specific areas of the dress form to mimic any unique features of your body shape.
Choosing the Right Model
Selecting a suitable dress form is essential for achieving optimal results in garment construction and draping projects. When choosing a model, consider factors such as project requirements and design preferences.
If you work on various projects with different size specifications, an adjustable dress form might be more practical than a fixed-size one.
For example:
- Adjustable Dress Forms: These models allow you to modify their dimensions easily.
- Fixed Size Dress Forms: While these are set in specific sizes (e.g., small, medium, large), they can still be useful if most of your projects fall within those size ranges.
- Specialty Dress Forms: There are also specialty dress forms designed for particular designs such as wedding gowns or children’s clothing.
Padding for Precision
Measuring Your Body
Accurate body measurements are crucial for using a dress form effectively. Taking precise measurements involves identifying the bust, waist, and hip points to ensure an exact fit.
Using measurement charts can help determine the appropriate dress form size based on these measurements.
For example, if your bust measures 36 inches, waist 28 inches, and hips 38 inches, you should select a dress form closest to these dimensions.
Understanding key points for precise measurements is essential; this includes locating the apex of the bust accurately and ensuring that the tape measure is parallel to the ground when taking hip measurements. These small details significantly impact how well garments will fit on the dress form.
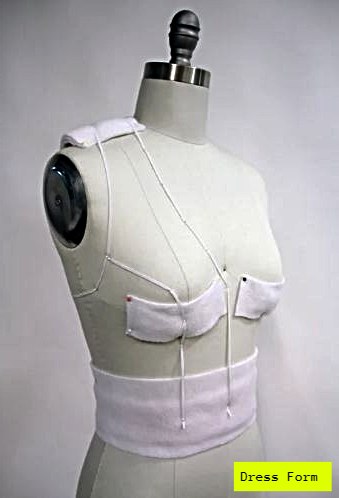
Padding Techniques
Customizing a dress form’s shape through padding techniques allows for achieving realistic body contours. By adding padding, you can adjust areas such as the bust or hips to match your unique proportions more closely.
For instance, if your natural waist measurement is smaller than that of a standard-sized dress form, you would add padding around that area until it matches your specific size.
Enhancing accuracy in fitting garments through padding means creating lifelike curves where needed so that clothes drape realistically on the finished garment.
This process ensures that any clothing made using this customized dress form will fit better and look more flattering.
Assessing Fit Accuracy
Once garments are fitted onto the padded dress form, evaluating their fit becomes crucial. You need to assess whether there are any areas where adjustments might be necessary for improved fit ensuring consistency in fit across different designs guarantees reliable results every time you use your custom-padded dress form.
Draping Fundamentals
Fabric Selection
When using a dress form for draping, it’s crucial to select the right fabric. Different fabrics behave differently when draped on a dress form.
For instance, lightweight and flowy fabrics like chiffon or silk will drape differently compared to stiffer fabrics such as denim or canvas. Understanding how each fabric behaves is essential for achieving accurate draping results.
Consider the weight and texture of the fabric; heavier materials may not drape as smoothly as lighter ones.
Fabric selection plays a pivotal role in accurately representing the final garment. For example, if you’re draping a flowing evening gown, using satin or silk would be ideal due to their ability to elegantly drape and cling to the curves of the dress form.
On the other hand, if you’re working on a structured jacket, choosing tweed or wool would help in simulating its intended look and feel.
Pinning Strategies
Mastering pinning techniques is fundamental for achieving seamless draping results on a dress form. Utilize various pinning methods based on your specific design needs; strategic pinning can make all the difference in creating smooth and well-fitted garments during the draping process.
Different garment styles require different pinning strategies; for instance, when draping a fitted bodice with princess seams, precise pinning along seam lines is essential for capturing an accurate fit.
Similarly, when creating gathers or pleats in your design, understanding how to strategically place pins ensures that these elements are accurately represented during draping.
Pattern Drafting Essentials
Transferring Designs
When transferring draped designs onto pattern paper, it’s crucial to ensure accuracy. This involves carefully tracing the pattern lines and marking key reference points on the dress form.
By doing so, you can preserve the original draping while creating precise pattern pieces.
For instance, when working on a draped bodice design, you need to transfer the unique gathers or folds accurately.
You can achieve this by using a pencil to trace along the edges of the draped fabric directly onto pattern paper. Then, mark specific points such as neckline and waistline on both the dress form and pattern paper for alignment.
Marking and Measuring
Marking key reference points on the dress form is essential for maintaining consistency in your patterns. Using measuring tools effectively during garment construction ensures that each piece matches its intended measurements accurately.
For example, when drafting a skirt pattern from a draped design, marking where pleats or darts are located helps maintain their positioning during transferal. Using measuring tape or rulers allows you to record accurate lengths and widths for each section of your garment.
The Fitting Process
Adjusting Seams
When using a dress form, adjusting seams is crucial for achieving the perfect fit. Understanding seam allowances and their impact on fit is essential. By modifying these seams based on body contours, you can ensure that the garment fits flawlessly.
For example, if a dress has princess seams, which are curved seams used to shape the bodice of a garment, you might need to adjust them to accommodate specific body shapes. This could involve making alterations to the curvature of the seam lines or shifting their placement slightly.
Refining seam lines based on body contours ensures that when garments are worn, they follow the natural curves of the body instead of pulling or bunching in unflattering ways.
Perfecting Garment Fit
Using a dress form allows for fine-tuning garment fit with precision. Common fit issues such as tightness in certain areas or excess fabric in others can be addressed through adjustments made directly on the dress form itself.
For instance, if a blouse tends to bunch up at the back due to excess fabric, it can be pinned and adjusted while on the dress form until it lays smoothly against it.
Achieving professional-looking finished garments becomes much more attainable when using a dress form as it enables meticulous adjustments that result in well-fitted clothing items.
Enhancing Your Sewing Experience
Sewing Machine Essentials
When using a dress form, it’s essential to understand your sewing machine features for garment construction. Familiarize yourself with the different stitch settings suitable for various fabric types.
For instance, delicate fabrics like silk may require a lighter stitch, while denim might need a stronger one.
Troubleshooting common sewing machine issues is crucial for a smooth sewing experience. If the thread keeps breaking, rethread both the top and bottom threads and ensure they are correctly placed in the tension disks.
Moreover, make sure to clean your machine regularly to prevent lint buildup that can lead to jamming or uneven stitching.
Custom Sewing Tips A dress form enables you to tailor garments according to individual preferences accurately.
By utilizing a dress form, you can ensure that each piece fits perfectly before finalizing it on the actual fabric. This precision helps in avoiding unnecessary alterations later in the process.
Incorporating custom details into garment construction becomes more manageable with a dress form. Whether it’s adding darts for shaping or adjusting hemlines, having an accurate representation of body measurements allows you to visualize and execute these customizations effectively.
Personalizing sewing techniques based on project needs is another advantage of using a dress form.
For example, if you’re working on creating unique patterns or draping fabrics directly onto the dress form instead of flat pattern-making, this tool serves as an invaluable aid.
Creative Uses of Dress Forms
Bridal Series Insights
When working on bridal designs, using a dress form offers several benefits. It allows for the creation of a flawless fit and finish for bridal gowns, ensuring that every detail complements the bride’s shape perfectly.
The dress form provides a three-dimensional representation of the bride’s body, making it easier to achieve an impeccable fit.
In addition to achieving the perfect fit, dress forms also enable designers to incorporate intricate details into bridal wear.
From delicate lace patterns to elaborate beadwork, the dress form serves as a canvas for bringing these exquisite elements together seamlessly.
For example, when creating a mermaid-style wedding gown with intricate draping and embellishments, designers can meticulously drape fabric over the form to visualize how each detail will look on the finished garment.
Upgrading Your Sewing Toolkit
Dress Form Tools
Having the right tools can make all the difference. Additional tools such as fabric weights and seam allowance rulers complement the use of a dress form by enhancing precision and efficiency.
For instance, fabric weights help keep the fabric in place while you pin or drape it on the dress form, ensuring accurate and consistent results.
Seam allowance rulers, on the other hand, assist in measuring and marking seam allowances directly on your garment pattern or fabric.
Investing in quality tools is crucial for achieving professional results when using a dress form. High-quality dressmaker shears enable clean and precise cutting of fabrics, contributing to well-finished garments.
Moreover, specialized tools like tailor’s chalk aid in transferring pattern markings onto fabric with ease, allowing for accurate sewing and fitting adjustments during garment construction.
Design Tool Benefits
Leveraging design tools can streamline the garment creation process when using a dress form.
Design aids like clear quilting rulers assist in creating straight and precise lines while drafting patterns or making alterations on garments draped over the dress form. These rulers are transparent, allowing you to see through them for accurate positioning.
Digital design tools offer modern solutions for garment construction with a dress form. Software programs like Garment Designer provide features that allow you to create custom-sized patterns based on measurements taken from your dress form.
This streamlines pattern-making processes by eliminating manual calculations and adjustments typically required when working with standard-sized patterns.
In addition to precision benefits, digital design tools enhance creativity by enabling experimentation with various design elements virtually before implementing them on actual garments draped over the dress form.
How to Use a Dress Form for Beginners
Using a dress form as a beginner can be a game-changer in your sewing journey. Here’s a step-by-step guide to help you get started:
- Adjusting the Dress Form: Before you begin, it’s essential to adjust the dress form to match your body measurements. Most dress forms come with adjustable dials or knobs that allow you to tweak the bust, waist, and hip measurements to match your own.
- Preparing Your Fabric: Once your dress form is adjusted, it’s time to prepare your fabric. If you’re working on a garment pattern, cut out your fabric pieces according to the pattern instructions. If you’re draping fabric directly onto the dress form, make sure to have enough fabric on hand to cover the area you’ll be working on.
- Pin or Secure Your Fabric: With your fabric ready, it’s time to start pinning or securing it to the dress form. Use straight pins to attach your fabric to the dress form, starting from the center and working your way outwards. Make sure the fabric is smooth and taut as you pin it in place.
- Create Your Design: Once your fabric is securely in place, you can start creating your design. Use the contours of the dress form to guide your fabric manipulation, whether you’re creating darts, pleats, or gathers. Take your time to experiment and see what works best for your design.
- Refining Your Fit: As you work on your design, periodically step back and assess the fit. Make any necessary adjustments to the fabric or the dress form itself to ensure a perfect fit. Don’t be afraid to make changes as you go that’s all part of the learning process!
- Finalizing Your Design: Once you’re happy with the fit and design of your garment, it’s time to finalize your work. Remove any excess fabric and secure any seams or edges as needed. Step back and admire your handiwork you’ve just created something beautiful with the help of your dress form!
How to Use an Adjustable Dress Form
Using an adjustable dress form is a fantastic way to ensure that your sewing projects fit perfectly. Here’s a step-by-step guide to help you make the most of your adjustable dress form:
- Set Up the Dress Form: Start by assembling your adjustable dress form according to the manufacturer’s instructions. Most adjustable dress forms come with various dials or knobs that allow you to customize the measurements to match your own body size and shape.
- Take Your Measurements: Before adjusting the dress form, it’s crucial to take accurate measurements of your body. Measure your bust, waist, and hip circumference, as well as other relevant dimensions like your shoulder width and back length.
- Adjust the Dials or Knobs: Using the measurements you’ve taken, adjust the dials or knobs on the dress form to match your own body dimensions. Start with the bust measurement and work your way down to the waist and hips, making sure to adjust each section of the dress form accordingly.
- Check the Fit: Once you’ve adjusted the dress form to your measurements, it’s essential to check the fit to ensure accuracy. Compare the adjusted dress form measurements to your own body measurements, making any necessary tweaks to achieve the perfect fit.
- Secure the Adjustments: Once you’re satisfied with the fit of the dress form, be sure to secure the adjustments in place. Many adjustable dress forms come with locking mechanisms or pins that you can use to prevent the dials or knobs from shifting during use.
- Start Sewing: With your adjustable dress form properly set up and secured, you’re ready to start sewing! Use the dress form as a guide to ensure that your garments fit perfectly, adjusting as needed throughout the sewing process to achieve the desired fit and shape.
- Make Adjustments as Needed: As you work on your sewing projects, don’t hesitate to make further adjustments to the dress form if necessary. Your body shape may change over time, or you may want to create garments for different body types, so it’s essential to keep your adjustable dress form up-to-date.
How to Use a Dress Form to Make a Pattern
Using a dress form to make a pattern is a practical and efficient way to ensure that your garments fit perfectly. Here’s how to use a dress form to create a pattern:
- Prepare Your Dress Form: Start by adjusting your dress form to match your measurements as closely as possible. This will serve as the base for creating your pattern. Make sure the dress form is stable and securely set up.
- Cover the Dress Form: To protect your dress form and make it easier to pin fabric to, consider covering it with a layer of muslin or another lightweight fabric. This will provide a smooth surface for draping and marking your pattern.
- Drape Your Fabric: Begin draping your fabric over the dress form, starting with the largest sections of the garment first. Use pins to secure the fabric in place, smoothing out any wrinkles or folds as you go. Pay close attention to the shape and fit of the fabric as you drape it, making adjustments as needed.
- Mark Your Pattern: Once the fabric is draped to your satisfaction, use a marking tool such as chalk or a tailor’s chalk to outline the edges of the fabric directly on the dress form. This will create the outline of your pattern pieces.
- Add Seam Allowance: After marking your pattern on the dress form, add seam allowance to the edges of each pattern piece to allow for sewing. This can typically range from 1/4 inch to 1 inch, depending on your preference and the complexity of the garment.
- Transfer Your Pattern: Carefully remove the fabric from the dress form, taking care not to disturb the pinned pattern pieces. Lay the fabric flat on a cutting surface and trace around the marked lines to create your pattern pieces. Cut out the pattern pieces along the traced lines.
- Test Your Pattern: Once you’ve created your pattern pieces, it’s a good idea to test them by sewing a mock-up or muslin version of the garment. This will allow you to make any necessary adjustments before cutting into your final fabric.
- Refine and Finalize: Based on the fit of your mock-up, make any necessary adjustments to your pattern pieces. Once you’re satisfied with the fit, your pattern is ready to use for cutting and sewing your final garment.
How do I choose the right dress form size?
When selecting a dress form, it’s crucial to choose one that closely matches your body measurements.
Look for adjustable dress forms that allow you to customize the bust, waist, and hip measurements to match your own.
Additionally, consider factors such as your height and body shape to ensure a proper fit.
How do I adjust a dress form to my measurements?
Adjusting a dress form to your measurements is relatively straightforward. Most dress forms come with dials, knobs, or other mechanisms that allow you to customize the size.
Start by setting the bust, waist, and hip measurements to match your own, then make any additional adjustments as needed. Remember to check the fit regularly and make changes as your body shape evolves.
Can I use a dress form to make patterns?
Absolutely! A dress form is an excellent tool for creating custom-fitted patterns for your sewing projects. Simply drape fabric over the dress form, pinning it in place to create your desired design.
Once you’re satisfied with the fit, mark the fabric to create your pattern pieces. Add seam allowance, transfer the pattern to paper, and voila – you have a custom pattern ready for sewing.
Is it Worth it to buy a Dress form?
Yes, Investing in a dress form can be totally worth it. It saves time, helps achieve a professional finish, and boosts confidence in sewing projects. It’s like having a reliable sidekick in your fashion adventures!
What can I Use if I don’t have a Dress form?
If you don’t have a dress form, don’t worry! You can use alternative methods like trying garments on yourself, using a well-fitting piece as a template, or even draping fabric over a padded hanger to mimic a body shape. Additionally, sewing with a friend as a fitting model can also be helpful.
How do I drape fabric on a dress form?
Draping fabric on a dress form involves pinning fabric directly onto the form to create a desired garment shape. Start with the largest sections of the garment, such as the bodice or skirt, and gradually add smaller pieces to refine the shape.
Use pins to secure the fabric in place, smoothing out any wrinkles or folds as you go. Experiment with different draping techniques to achieve the desired fit and style.
Final Remarks – How to Use a Dress Form
You’ve now grasped the ins and outs of using a dress form like a pro. From setting it up to mastering the fitting process, you’re well-equipped to elevate your sewing game. Remember, practice makes perfect!
So, grab your dress form, unleash your creativity, and bring your unique designs to life. Whether you’re a seasoned seamstress or just starting, a dress form is your trusty sidekick in the world of fashion creation. Now, go ahead and show off your newfound skills!
Frequently Asked Questions
How can I properly set up my dress form?
To set up your dress form, start by adjusting the height to match your own and making sure it’s stable. Then, use the measurements of your body to adjust the dials or pins on the dress form to match your specific size and shape.
What are some creative uses of dress forms besides sewing?
Aside from sewing, you can use a dress form as a decorative piece in your room, as a jewelry holder, or even as a display for scarves and accessories. It can also serve as an artistic canvas for draping fabrics for visual arts projects.
Is padding necessary when using a dress form?
Yes, adding padding allows you to customize the dress form to mimic your body shape more accurately. By strategically placing padding in areas that need extra support or shaping, you ensure that garments fit precisely when draped or fitted on the form.
Can I use a dress form for pattern drafting?
Absolutely! Dress forms provide an excellent 3D reference for creating patterns. You can drape fabric directly onto the form and then transfer those shapes onto paper to create custom patterns tailored specifically to your body measurements.
How does using a dress form enhance my sewing experience?
Using a dress form allows you to visualize how garments will look while being worn, enabling better fitting adjustments during construction. It also provides hands-free assistance when pinning hems or seams and helps maintain garment shape during various stages of sewing.