How to Change Needle Position on Janome Sewing Machine: 2024
Are you a proud owner of a Janome sewing machine and you want to know how to change needle position on Janome sewing machine?
So Don’t worry, you’re not alone. Many people find this task challenging, but with a few simple steps, you can change the needle position on your Janome sewing machine with ease. In this article, we will guide you through the detailed process.
Understanding the Needle Position
Before we dive into the process of changing the needle position, let’s first understand what it is. Needle position refers to the placement of the needle relative to the fabric being sewn.
On most Janome sewing machines, you can adjust the needle position to the left, center, or right of the presser foot.
Changing the needle position is essential when you need to sew different types of fabrics or use different sewing techniques.
For instance, if you want to sew a seam close to the edge of the fabric, you may need to move the needle to the left or right of the center position.
Tools Required for Changing Needle Position
To change the needle position on your Janome sewing machine, you’ll need the following tools:
- Screwdriver
- Janome Needle Set Screwdriver (optional)
- Janome Needle Clamp Screwdriver (optional)
These tools usually come with your Janome sewing machine, but if you don’t have them, you can purchase them separately from a Janome dealer.
How to Change Needle Position on Janome Sewing Machine
If you’re looking for tips and tricks on how to change needle position on Janome sewing machine, you’ve come to the right place. Here are a few things to keep in mind when changing needle position:
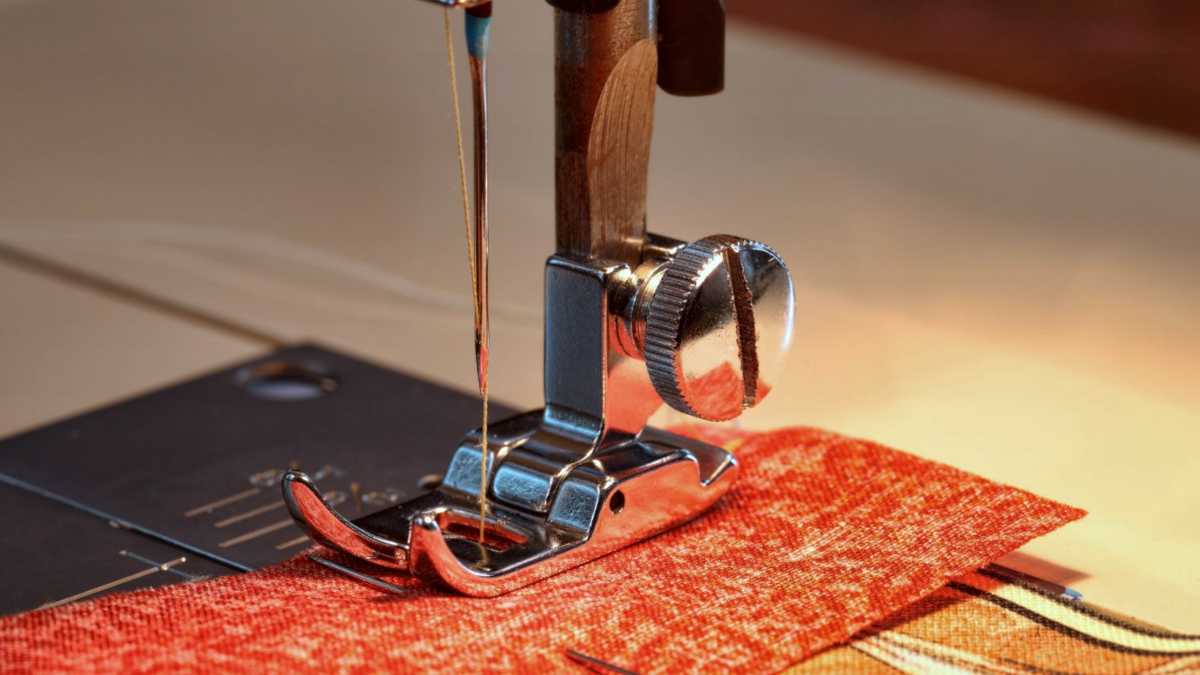
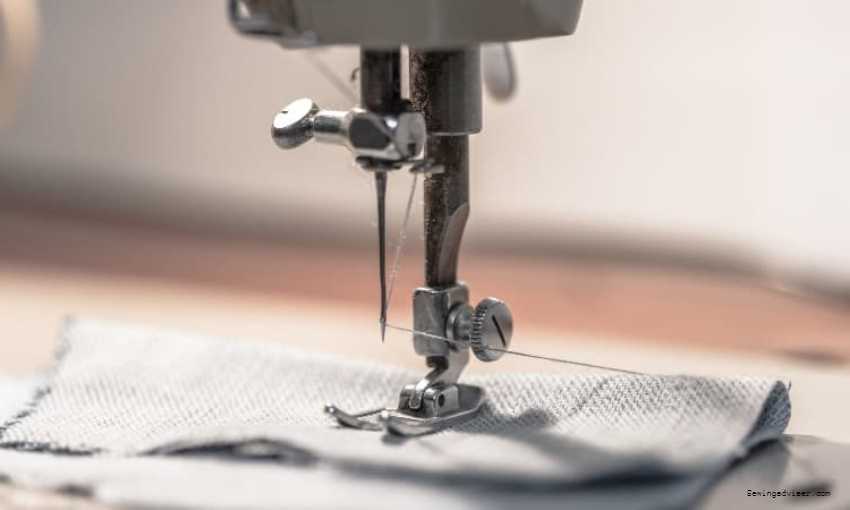
- First, make sure that the needle is in the straight up and down position before beginning.
- Next, locate the needle clamp screw and loosen it slightly.
- Gently push the needle to the left or right until it’s in the desired position.
- Finally, re-tighten the needle clamp screw and test sew a few stitches to make sure that the needle is in the correct position.
Tips for Changing Needle Position on Janome Sewing Machine
Here are some tips to keep in mind when changing the needle position on your Janome sewing machine:
- Always power off the sewing machine before making any adjustments.
- Use the correct screwdriver for loosening and tightening the needle clamp and needle set screw.
- Double-check that the needle is securely in place before starting to sew.
- If you’re unsure which needle position to use for a specific fabric or project, consult your Janome sewing machine manual or ask a professional.
Why Are Different Needle Positions Necessary?
This option allows us to use a guide on the presser foot, resulting in perfectly placed stitches every time. Maintaining a seam allowance is easy and can be customized according to your needs.
Some presser feet can’t be used without moving the needle. For example, whenever a sewer uses a zipper foot, she must shift the needle to either side. Otherwise, it could break or get damaged.
This machine is helpful for those difficult, asymmetrical stitches as well as for narrow decorative stitches. With the ability to precisely reposition the needle, we can easily achieve the perfect distance between rows without disturbing the fabric at all.
The only way to understand how beneficial this mode is – is by trying it out for yourself. With that in mind, go ahead and experiment with all the modes- doing so will help you grasp how big of a role positioning plays.
How To Adjust The Position?
If you want to do it on any stitch, first ensure that you’re not using the maximum width for your fabric. After that, simply shift the needle from the center as needed.
Depending on the clothing item you’re working with, select an appropriate needle and thread. If you’re working with thin fabric, use a thin needle; if you’re working with thick fabric, use a thick needle.
Then, wind the bobbin and thread your machine correctly. Make sure to align the presser foot in the right place before continuing. With your presser’s feet raised up, lay down the cloth You should lower the needle onto it only when everything is ready and in its proper place. Next, follow these steps:
- Create your perfect stitching line by adjusting the width of your zigzag. To do this, find the zigzag button on your device and press it. This will enable you to change the width until it is perfect for you.
- The ‘3.5’ on the LED means that the needle is currently in the middle position–but only for 7-millimeter machines. If you have a 9-millimeter model, then the center will be at ‘4.5’. Similarly, ‘2.5’ was the center of old 5-millimeter devices.
- Use the plus or minus sign on the stitch selection key to move the needle right or left. The number value on the screen will change according to which way you moved the needle. For example, it decreases when you move left and increases when you go right. Additionally, ‘0’ indicates the furthest left position while the highest number possibly represents the furthest right position.
- The on-screen needle will give you a general idea of how yours is moving. Compare that to your actual needle; if it’s going up, then it should start changing direction immediately. Unfortunately, some people don’t see the visible change because they’re already used to keeping the needle down. So, don’t be confused about it– as soon as yours goes up on the screen, watch for your selected position and move there swiftly.
- You can change your needle’s position on some Janome models up to 100 times. Just stop the needle when it arrives at your target destination, then turn on the straight stitch switch. You can keep changing the position as much as you want to adjust the seam distance. If you need to bring the needle back to the center quickly, just select another stitch; there’s no need to press (+) or (-).
- It is important to stitch straight when you’re sewing. To do this, focus on the guide and foot instead of your needle. Pay attention to your surroundings and be sure to change the needle’s position often.
- Familiarize yourself with the machine settings by practicing on scrap pieces of fabric. After you get comfortable with the design process, you can move on to your main project. If you use a high-quality presser foot and set the needle correctly, your stitches will be amazing.
Why You Might Want To Change Needle Position
There are a few reasons you might want to change the needle position on your Janome sewing machine. For example, if you’re sewing a curved seam, you’ll want to move the needle over so that it’s closer to the edge of the fabric. By doing this, the fabric will lay flat.
If you’re sewing a buttonhole, you’ll want to move the needle over so that it’s in the correct position for making the buttonhole. And if you’re topstitching, you might want to move the needle over so that it’s closer to the edge of the fabric, which will give you a neater top stitch.
What Does Effect Changing Needle Position Has On Your Sewing
Sewing with the needle in the center position is called straight stitch sewing. The needle penetrates the fabric from above and sews a straight line.
When you need to sew a seam that will be under stress, such as a seam on a side of a garment, you should use this type of stitch. The needle should be in the center position when you sew on buttons and buttonholes also.
Sewing with the needle in the left position is called zigzag sewing. The needle moves from side to side as it sews, making a zigzag stitch.
This type of stitch is used when you need to sew fabrics that will stretch, such as knit fabrics. It is also used for decorative stitching and to prevent the unraveling of fabric edges.
Sewing with the needle in the right position is called blind hem stitches. The needle moves from side to side as it sews, making a blind hem stitch. This type of stitch is used when you need to sew fabrics that will not stretch, such as wool fabrics.
How To Change Needle Position For Different Types Of Stitching
Different types of stitching require different needle positions. The most common needle positions are center, left, and right. To change the needle position on your Janome sewing machine, simply turn the knob at the top of the machine to the desired position.
The center position is best for general sewings, such as straight or zigzag stitches. If you are unsure which position to use, always start with the center position.
The left needle position is best for buttonholes, zippers, and topstitching.
The right needle position is best for blind hemming and appliqueing.
When To Change Needle Position
The answer to this question depends on what sort of sewing you are doing. If you are sewing straight seams, you can leave the needle in the center position.
If you are sewing a curved seam or working with a fabric that is prone to fraying, you may want to change the needle position.
There are three needle positions on most Janome sewing machines: left, center, and right. To change the needle position, simply turn the knob on the side of the machine until the needle is in the desired position.
Related Article: How To Change A Machine Needle In 1 Minute
Also, Read this article if you have any problem with your sewing machine motor belt
Conclusion
I hope to know that you are well aware of how to change needle position on Janome sewing machine. In conclusion, Changing the needle position on your Janome sewing machine is a simple process that can make a significant difference in your sewing projects.
By following the steps outlined in this guide and keeping the tips in mind, you can adjust the needle position with ease and sew your projects with precision and accuracy.
Remember to always use the appropriate needle position for the fabric and technique you’re using, and consult your Janome sewing machine manual or a professional if you’re unsure.
With these steps and tips, you can now confidently change the needle position on your Janome sewing machine and take your sewing skills to the next level.
FAQs: How to Change Needle Position on Janome Sewing Machine
How do I change the needle position on my Janome sewing machine?
The process for changing the needle position on a Janome sewing machine is relatively simple. First, raise the presser foot lever to raise the presser foot. Next, use the needle position lever to select the desired position. Finally, lower the presser foot lever to lower the presser foot.
How do troubleshoot problems with the needle position
Erratic or incorrect needle position is usually the result of a timing problem, a bent needle, an incorrect type of needle for the fabric, or an incorrect size of needle for the thread.
Can I change the needle position while the machine is running?
No, you should never adjust the needle position while the machine is running. Always turn off the machine and unplug it from the power source before making any adjustments.
What is the correct needle position for sewing different fabrics?
The correct needle position depends on the type of fabric you’re sewing and the technique you’re using. In general, a centered needle position is suitable for most sewing projects, but you may need to move the needle to the left or right for specific sewing techniques or fabrics.


20 Comments