How To Sew A Button On Pants In 2 Minutes: 2024 Full Guide
Sewing a button onto a piece of clothing or a bag can be a simple and useful skill to have. Whether you are fixing a button that has come off or adding a decorative touch to your handmade item, learning how to sew a button is easy and only requires a few basic materials.
In this blog post, we will walk you through the steps on how to sew a button on Pants, including what tools you will need, how to thread your needle, and how to attach the button securely. With a little practice, you’ll be able to sew buttons onto any project in no time.
Because I know it’s a difficult task for some, but with the right tools and instructions, it can be done relatively easily. So without further ado, let’s get started!
How Do You Put Buttons On Your Pants?
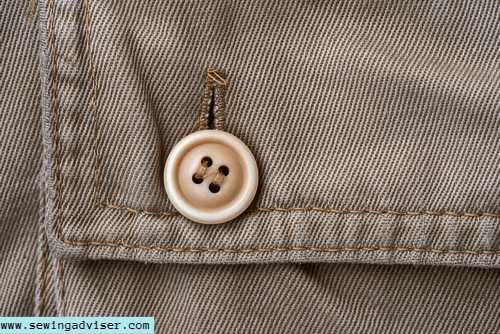
There are a few easy ways to put a button on your pants that only require some hand-sewing skills.
The type of stitch you use will depend on the style of button you choose for your pants. Some common styles include four-hole, two-hole, or shank buttons.
Try to keep the original button that fell off your pants so you can ensure it fits in the buttonhole on the trousers. If you can’t find it, don’t stress!
This easy method will help you make sure you buy a new button that fits your pants just as well as the old one.
Measure the length of the buttonhole horizontally, starting at the inside stitching and ending where the other side’s stitching begins. In other words, measure only the space.
By subtracting ⅛” from your original measurement, you now have the diameter of the button for your pants!
Why does this work? It’s simple most sewing machines usually include an extra ⅛” in a buttonhole to ensure that the left has enough space to maneuver.
The typical button size for many types of pants, like khakis, is ⅝”, but since there is no standardized practice, the best solution is to measure your pants to find the right size.
Online button shopping can be Tailor-Made for your sewing needs by measuring the gap, finding the right shape and style, and making sure they match well with your pants.
See Also: How to Shorten Straps on a Dress
How to Sew a Button on Pants: 8 Methods
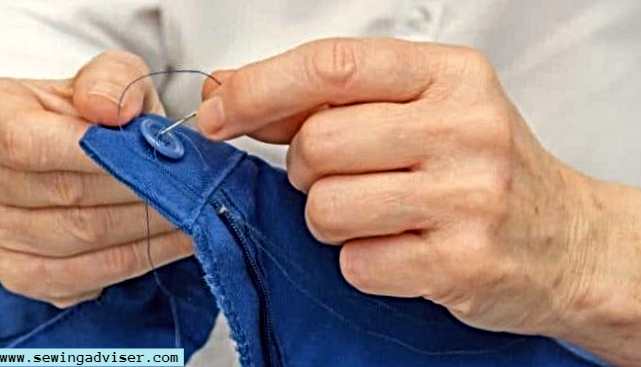
The method you employ to sew a button onto your pants will depend on the sort of button that works best for your trousers.
You can hand-sew, use a sewing machine, or even opt for more intricate embroidery methods.
By Hand
Sewing a button is a simple task that can be done by hand or with a sewing machine. Here’s a step-by-step guide for sewing on a button by hand:
- Choose the correct thread: When selecting thread, choose a color that matches the garment, and use a thread that is strong enough to withstand frequent use.
- Thread the needle: Cut a length of thread about 18 inches long and thread it through the needle. Tie a knot at the end of the thread.
- Mark the placement: Use a ruler or your eye to mark the placement of the button. Make sure the button is centered and at the correct height.
- Position the button: Place the button on the fabric and secure it in place with a pin.
- Start sewing: Insert the needle through the back of the fabric and through one of the buttonholes. Pull the thread through until the knot catches.
- Create a shank: To create a shank, which allows space for the button to sit on top of the fabric, insert a toothpick or a second needle between the button and the fabric. Sew around the shank until it is the desired height.
- Secure the button: Once the shank is the correct height, sew through the fabric a few times to secure the thread. Tie a knot on the back of the fabric and trim the thread.
Related Article: How to Make a Bound Buttonhole by Hand
Shank Button
The best way to sew on a shank button is by adding an anchor button on the inside of the clothing piece. This helps keep the original button in place.
What is a Shank Button?
A shank button, also called a rounded or no-hole button has a loop protruding from its back that you can use to attach it to a garment.
Shank buttons often have a decorative, rounded surface and children’s pants or blouses as well as coats usually sport them more than adult-sized pants do.
Here’s a step-by-step guide for sewing a shank button:
- Cut a piece of thread to your desired length. Then, put the needle through the eyelet at the end of the thread and tie it in a knot. To begin sewing on the button, insert the needle into the underside of the fabric from inside The article pants so that several small stitches mark where you want to place It.”
- Insert a small button through the holes on the inside of the waistband. Sew this button to keep it attached securely to the pants.
- Now, take the shank button and bring it outside of the waistband. Hold onto the button with one hand while using your other hand to insert a needle back through one of the holes in the clear button. Once you’ve done that, thread it up through the waistband of the pants until it comes out right beneath where the shank of the button is placed.
- To attach the button, push the needle through the shank in the same way you would thread beading wire through a bead.
- To thread the needle, start by pushing it through to the inside of the waistband. Make sure it comes out through one of the holes in the small button.
- Repeat this process five times to create five loops of thread holding the button in place on the pants.
- Lastly, tie a knot with the thread on the inside of the waistband.
Two Hole Button
Double-thread your needle and make multiple loops through the holes of the button to firmly fix it in place. Two-hole buttons aren’t as common as four-hole buttons, but this method will work for both.
- Measure out 24” of thread and fold it in half. Thread the eye of your needle through the folded end, then knot it together at the other end.
- To attach a button to your pants, insert the needle from the inside of the fabric and take two stitches. This will mark where you want to place the button.
- Press and hold the button to the location, then bring the needle up through the pants’ fabric and out of one of two holes in the said button.
- Find the second hole in the button and thread it through from the waistband’s exterior to its interior.
- After you repeat this step six or seven times, you will have multiple loops of thread between the two holes of the button, holding it to the pants.
- Lastly, tie a strong knot on the inside waistband.
Four Hole Button
The best way to sew on a four-hole button is by hand, using the thread to create a sturdy shank behind the button.
Although this takes more time than machine sewing, it will provide you with a solidly attached button that won’t fly off the next time you pull your pants up!
- Start by threading your needle and tying a knot at its ends, as described in the section on “how to sew on a button by hand.”
- Start on the inside of the waistband and push the needle through to the outside so that your knot is hidden on the inside of the pants.
- Place a small knot where you would like the button to go. This will help to keep the button in place and give it some extra security.
- Set things up differently here. Pinch the button in place with your thumb, and at the same time, lay a small cylinder horizontally between the four holes on top of the button. You can use another needle, a large sewing pin, or a small rounded toothpick for this purpose.
- Now, thread your needle up through one of the holes in the button. Move the needle and thread over the top of your small cylinder. Put the needle back down through a hole that’s vertical to the first one. You will make a loop with your thread over the top of the cylinder.
- After you put the thread through one hole on the button, repeat this process with the other two holes. This will form a loop over half of the cylinder on the button.
- Repeat the button holes and loop process two more times.
- Now, gently pull the cylinder out and tug the button up as far as it will go on the loops of thread.
- For the final step, take the needle from the inside of your pants to the outside, but don’t pierce through any holes. Instead, wrap the thread around 5 times; under the button. Doing this creates a long “shank” out of the thread!
- Make sure to pull the thread taunt with no slack, then insert the needle back into the pants and pull it through to the inside of the waistband one last time.
- Make another small overhand knot on the inside of the waistband to secure the thread.
Jeans Button
To sew a button onto jeans, you will need a needle, thread, and a button. Here is a simple guide to follow:
- Thread the needle and tie a knot at the end of the thread.
- Place the button on the jeans where you want them to be sewn.
- Insert the needle through the button and the fabric of the jeans, and bring it up through the other side of the fabric.
- Repeat this process several times, going through the same holes each time, until the button is securely attached to the jeans.
- Tie a knot on the back side of the fabric to secure the thread.
- Trim the excess thread from the knot.
- You can also use a sewing machine to sew a button onto jeans. To do this, set the machine to a zigzag stitch and adjust the width and length to match the size of the buttonholes. Place the button in the correct position and sew it onto the jeans using the zigzag stitch.
- Remember to always use a sturdy thread that matches the color of your jeans when sewing a button onto any clothing item.
With Sewing Machine
Sewing a button onto pants with a sewing machine is a relatively simple process that can be accomplished with a few tools and a bit of practice. Here are the steps you can follow to sew a button onto pants using a sewing machine:
- Gather your materials: You will need a button, a needle, thread that matches the color of the pants, and a sewing machine.
- Thread the sewing machine: Follow the instructions for your sewing machine to thread it properly. Make sure the thread is properly tensioned and the needle is inserted correctly.
- Mark the button placement: Place the pants on a flat surface and mark the spot where you want to sew the button. You can use a fabric pen or chalk to mark the spot.
- Attach the button: Place the button on the marked spot and secure it in place using a few straight pins.
- Sew the button: Set the sewing machine to a medium-length straight stitch and lower the presser foot. Position the fabric under the presser foot so that the needle is aligned with the button. Slowly start sewing, making sure to keep the thread taut as you go. Sew around the button a few times, making sure to secure it firmly in place.
- Finish the button: Once you have sewn around the button a few times, lift the presser foot and cut the thread. Tie a knot in the thread on the backside of the fabric to secure the button in place.
- With a bit of practice, you’ll be able to sew a button onto pants quickly and easily using your sewing machine.
Without Sewing
To sew a button on pants without using a sewing machine, you will need a needle and thread, scissors, and a button. Here is a step-by-step guide on how to do it:
- Cut a piece of thread about 18 inches long and thread it through the eye of the needle.
- Tie a knot at one end of the thread to secure it.
- Place the button on the spot where you want to attach it to the pants.
- Push the needle through the fabric from the back to the front, making sure it goes through one of the holes on the button.
- Push the needle back through the fabric, going through the other hole on the button.
- Repeat this process several times, going through the holes in the button and the fabric, until the button is securely attached.
- Once you have sewn the button on securely, tie a knot at the end of the thread to secure it.
- Trim any excess thread with the scissors.
That’s it! You have successfully sewn a button onto your pants without using a sewing machine.
Read Also: How Much Does it Cost to Hem Pants
With Embroidery
To sew a button on pants with an embroidery machine, you will need the following materials:
- An embroidery machine
- Embroidery thread color with your choice
- A button
- A needle
- A pair of pants with a buttonhole
To begin, start by threading the embroidery machine with the embroidery thread. Next, place the pants on the embroidery machine’s embroidery hoop, making sure that the buttonhole is centered in the hoop.
Next, attach the button to the machine’s embroidery arm using the needle. You may need to adjust the position of the button depending on the size of the buttonhole.
Once the button is in place, start the embroidery machine and let it run until the button is securely attached to the pants.
When the machine has finished embroidering, carefully remove the pants from the hoop and cut the excess thread. Your button should now be securely attached to the pants.
If you are unfamiliar with how to use an embroidery machine, it is recommended that you consult the manual or seek the assistance of someone who is familiar with the machine.
What Type of Thread Should You Use to Sew a Button?
When sewing on a button, it is best to use a strong and sturdy thread such as all-purpose or button thread.
These types of thread are made to withstand the stresses of being pulled and tugged on, which is necessary when attaching a button.
It is also a good idea to choose a thread color that matches the button as closely as possible. This will help to hide the stitches and create a more cohesive look.
If the button is being sewn onto a garment that will be laundered frequently, it may be helpful to use a thread that is treated to be more resistant to fading and wear, such as polyester or nylon thread.
Regardless of the type of thread you choose, be sure to use a needle that is appropriately sized for the thickness of the thread and the fabric you are working with. This will help to ensure that the button is securely attached and will not come undone.
What’s The Simplest Way to Sew on a Button?
Here is a simple method for sewing a button onto a piece of fabric:
- Gather your materials. You will need a needle, thread, scissors, and a button.
- Cut the length of the thread and thread your needle. Tie a knot at one end of the thread to secure it.
- Place the button in the desired location on the fabric.
- Push the needle up through the fabric and the button, leaving a small tail of thread on the underside of the fabric.
- Create a loop with the thread by bringing the needle back down through the fabric and the button, about 1/8 inch from the first hole.
- Bring the needle back up through the fabric and the button, this time through the second hole.
- Repeat this process, sewing back and forth between the two holes, until the button is securely attached. You can also add a few extra stitches for added strength.
- When you are satisfied with the number of stitches, tie a knot on the underside of the fabric to secure the thread. Trim the excess thread, and you’re done!
Note: If you are sewing a button onto a thick or bulky fabric, you may want to use a thicker thread or multiple strands of thread to ensure that the button is securely attached. You may also want to use a thimble to push the needle through the fabric if it is particularly difficult to sew.
Conclusion: How To Sew A Button On Pants
Sewing a button on pants is a simple process that can be easily achieved with the right tools and techniques. By following our step-by-step guide, you can confidently sew on a button, ensuring that your pants look great and are functional.
FAQs: How To Sew A Button On Pants
What materials do I need to sew a button on Pants?
To sew a button on your pants, you’ll need a few basic materials: a needle, thread (matching the color of your pants), a button, scissors, and a thimble (optional).
How do I choose the right button for my pants?
Select a button that matches the size and color of the one you’re replacing. If you’re adding a decorative button, choose one that complements your pants’ style.
Where should I place the new button on my pants?
Align the new button with the buttonhole on the opposite side of the fabric. This ensures a snug fit when you fasten your pants.
How do I sew the button securely?
Start by pushing the needle up through the fabric from the inside, bringing it up to where you want to attach the button. Pass the needle through one of the buttonholes, then back down through the opposite hole. Repeat this process several times for a secure hold.
Should I reinforce the button with extra stitches?
Yes, reinforcing the button is a good idea. After sewing it through the buttonholes, make a few additional stitches behind the button to reinforce it.



2 Comments