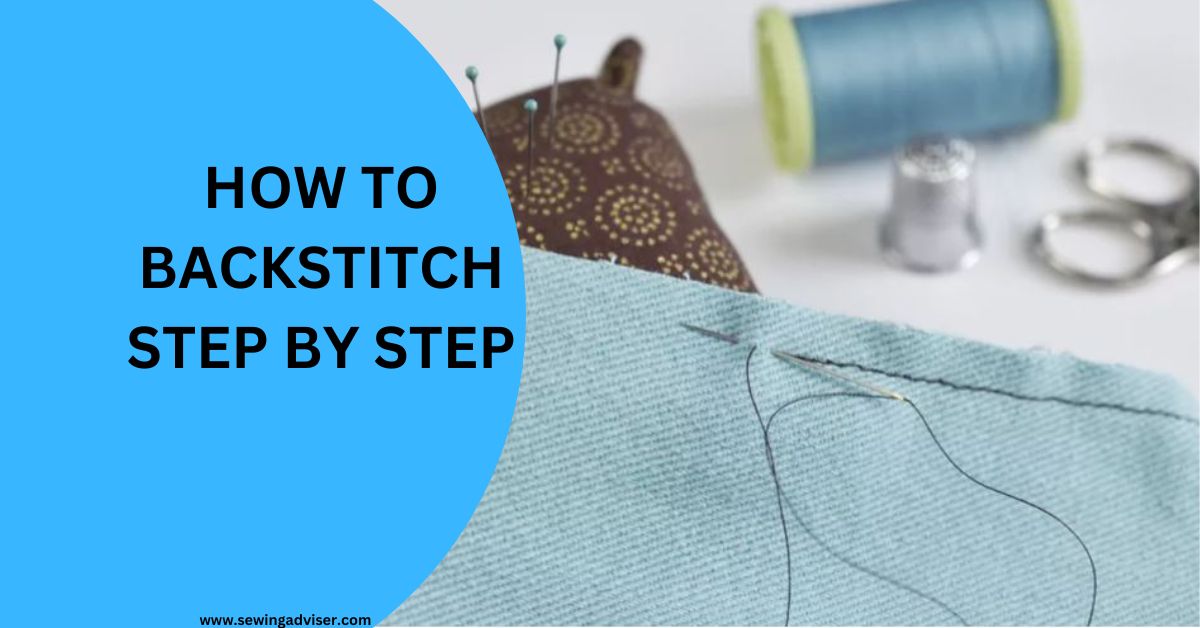
Tips For How To Backstitch By Hand: A 2024 Complete Guide
If you’ve been searching for the easiest, most efficient way to create strong seams by hand then look no further! Backstitch is a sewing technique that can be used on almost any fabric, and it requires only basic supplies.
In this blog post, I am going to walk you through the steps of how to backstitch by hand so that you can create garments with heirloom quality stitching.
Whether you are looking to repair torn clothing or revamp an old dress, learning the basics of backstitching will help upgrade your garment without breaking a sweat!
What Is Backstitch And What Is It Used For?
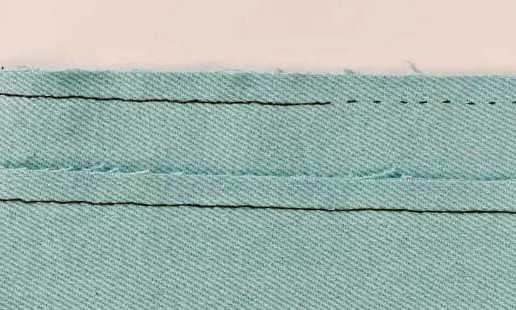
Backstitch is a hand-sewing stitch used in needlework and tailoring. It is often used for hemming, seams, and outlines, especially when a more decorative or permanent stitch is desired.
The backstitch is made by taking small stitches that pass through the fabric from the front to the back, then coming up again a little distance away and taking another stitch that overlaps the previous one.
This creates a strong, almost invisible line of stitches that can be used to join two pieces of fabric or reinforce a seam.
Backstitching can also be used for hand embroidery, where it can be used to create outlines and details in designs.
Because it is strong and flexible, it is well-suited to this type of work, where other stitches might break or become distorted over time.
How To Backstitch By Hand
The backstitch is a strong, durable hand-sewing stitch that is often used to join two pieces of fabric or to reinforce an existing seam. Here is the step-by-step guide on how to hand-sew a backstitch:
What You’ll Need
| Tools Required | Materials |
| Needle | Thread |
| Pencil | Fabric |
| Scissors | |
| Ruler |
Prepare the Needle and Mark the Seam
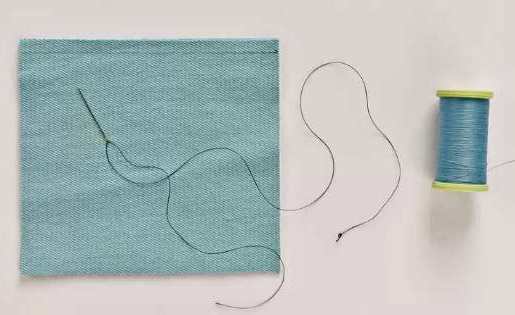
The thread used for needlework should be no longer than a yard. Securely knot the end of your thread, creating a large loop that won’t slip through the fabric. For extra strength, double the thread by tying both ends together.
To keep your seams neat and tidy, it’s wise to trace a thin pencil line on the desired stitching. For straight edges, utilize a ruler for accuracy; however, when dealing with curves, measure out the seam allowance first before marking short intervals along the area and then connecting them you will have an effective guideline this way!
Make the First Stitch
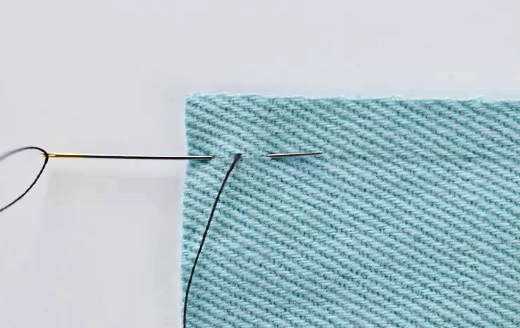
To start your seam, plunge the needle into the fabric at your desired beginning point. Draw it through both layers of material just preceding where you tied a knot.
Now, push the needle back in between that same spot and where it previously exited to create your first stitch!
Continue to Stitch
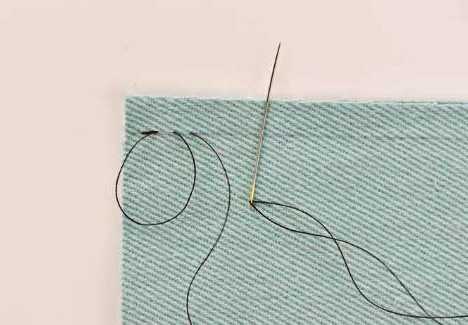
As you are sewing, remember to bring the needle back up through your fabric at the same distance from which it first plunged.
You can choose whether or not your stitches should be pressed together side by side, or if you’d like them spaced farther apart for a more decorative effect. Continue this technique until you have sewn across each seam line.
If a strong seam is desired, take your time to ensure each stitch is close together. This concept applies especially in areas of the garment which require strength and reliability; for instance, crotch seams.
Alternatively, when speed is necessary or durability isn’t demanded from the project at hand, you can make larger stitches to work faster but with less security.
Finish the Seam
After you have stitched an area together, the threads will overlap on the back side of your fabric. When stitching small stitches, they look almost like a complete line.
To secure and finish this seam in place, make a couple of extra passes over it with your needle just like tying off a knot! Once completed, trim any remaining thread at its origin point to keep things neat and tidy.
Variations on the Basic Backstitch
In addition to the basic backstitch, there are several variations you can use depending on the fabric and type of seam. Some popular variations include:
* Blanket stitch: A looped stitch used to join two pieces of fabric together. It is often used as an edge finish for blankets or quilts.
* Overcast stitch: This variation starts like a regular backstitch but instead of repeating the same pattern, each subsequent stitch is placed over the previous one in a spiral-like fashion. This creates a smooth and secure seam that won’t fray easily.
Related Post: What Is An Overcast Stitch & How to Sew
* Whip stitching: Popularly known as the “overhand stitch” this technique involves sewing in small circles around the edges of two pieces of fabric. Whip stitching is often used for hemming and edging, as it creates a decorative edge and ensures that the seam won’t fray or unravel.
When to Use Backstitch Instead of Other Stitches
Backstitching is a great option when you need to reinforce a seam or prevent fraying. It is especially useful for fabrics that are difficult to sew, such as leather and vinyl.
You can also use backstitch in place of other stitches when mending tears or holes in clothing. If the fabric is thin enough, you may even be able to hide the stitching by using matching thread and tiny stitches!
It is well-suited for creating outlines and curves, as well as holding thick fabrics securely together. Use backstitch when an area needs reinforcement or abundant coverage of stitches, such as pocket flaps or waistbands it’s an incredibly strong stitch.
Backstitch is also a fantastic option for times when seam allowance may be tricky to follow, as this allows you to stay on the seam lines easily without measuring.
Furthermore, backstitching prevents irregular edges at the beginning and end of seams by preventing the seams from pulling apart during wearing and laundering. Essentially, if strength and neatness are desired, backstitch should be used!
How to Make a Backstitched Seam
Once you’ve selected your supplies and chosen the right variation of backstitching for your project, it’s time to get stitching! To complete a backstitched seam, follow these steps:
- Thread one end of the needle with at least 18 inches of thread. Leave the other end unthreaded so that you can easily tie a knot when finished.
- Place the two pieces of fabric together, making sure that their edges are aligned and secure.
- Insert the threaded needle through both layers of fabric from the right side, starting about 1/4 inch in from one edge. Pull the thread all the way through until there is an equal length on both sides of the fabric.
- Insert the needle back into the fabrics, about 1/4 inch away from your starting point and at a 90-degree angle. Pull the thread through until it is taut but not stretched tight.
- Repeat steps 3 and 4 until you reach the end of your seam or desired area of coverage, then tie a knot with both ends of the thread to secure it in place.
And that’s it! Follow these simple steps to master this versatile technique and gain a valuable skill for any sewing project!
Alternatives To Backstitch
If the back-and-forth motion of the backstitch is proving to be troublesome for you, a simpler solution may be found in the running stitch.
It’s one of the easiest hand-stitching techniques out there; all it requires is an up-and-down pattern that can surprisingly result in great strength if done with small stitches. Give it a try your finished project won’t be disappointed!
Compare the running stitch with the backstitch and observe how it looks different due to its spacing. Obtain a better understanding of what distinguishes them as you focus on the gaps between stitches in the former.
- RUNNING STITCH: Quick and straightforward for beginners, yet not as powerful.
- BACKSTITCH: Powerful yet steady.
Read More: RUNNING STITCH
Conclusion
I hope now that you are well aware of how to backstitch by hand. In Conclusion, Backstitch is a versatile hand-sewing stitch that every sewer should know how to do. It’s strong and durable, making it perfect for reinforcing seams in heavy-duty projects like denim jeans or canvas bags.
Additionally, the backstitch can be used to mend tears in fabric or clothing. It’s also a great decorative stitch for adding details to embroidery projects. If you’re looking for a simple but sturdy hand-sewing stitch, backstitch is the way to go!
FAQS
What are the benefits of Backstitch?
Backstitching is a sewing technique that involves sewing backward and forwards over a section of stitching to strengthen and secure it. Some benefits of backstitching include preventing the seam from unraveling, increasing the durability of the stitching, and providing a neat and professional finish to the sewing project. Backstitching can also be used to secure the beginning and end of a seam, preventing it from coming undone.
What are some common mistakes when backstitching?
Some common mistakes when backstitching include not backstitching at the beginning and end of a seam, backstitching too much or too little, backstitching unevenly or off-center, and not using the correct length of backstitch for the fabric being used. Another mistake is not properly securing the thread tails after backstitching, which can result in loose threads or knots. It is important to practice good backstitching techniques to ensure a strong and secure seam.

10 Comments