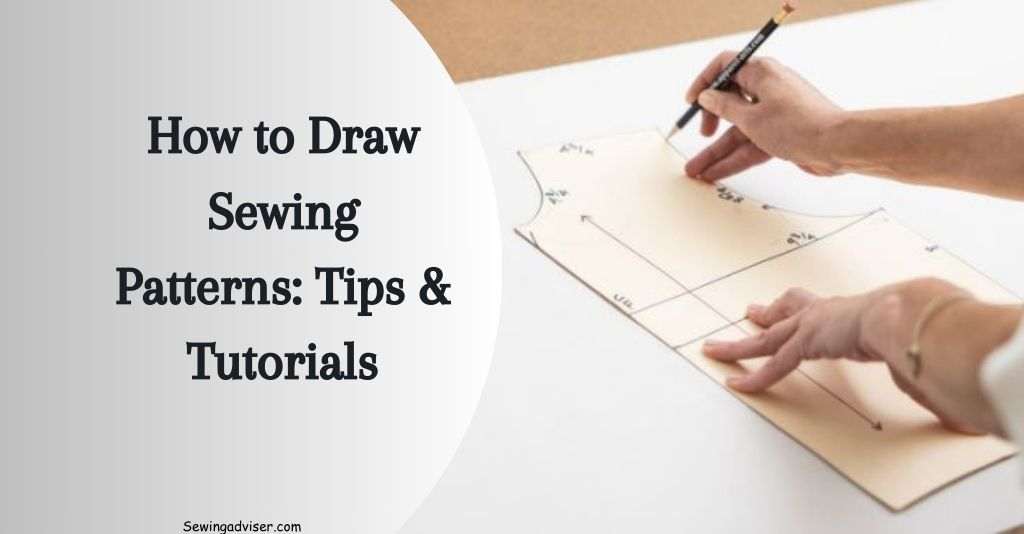
How to Draw Sewing Patterns Easily: 2024 Tips & Tutorials
The process can seem daunting at first. We’ve got you covered with a comprehensive guide that will take you through all the essential tips and tutorials for drawing sewing patterns like a pro.
Whether you’re a beginner looking to delve into pattern making or an experienced sewist wanting to expand your skills, this post is packed with valuable insights tailored just for you.
From understanding the basics of pattern drafting to mastering intricate details, we’ll walk you through each step. You’ll discover how historical context has influenced modern pattern design and gain practical knowledge that will empower you in your creative journey.
So, grab your pencils and paper because, by the end of this post, you’ll be equipped with everything you need to confidently craft beautiful sewing patterns from scratch.
Understanding Sewing Pattern Symbols and Markings
Recognize Symbols
When drawing sewing patterns, it’s crucial to understand the various symbols used. These include lines for different sizes, dots for matching pattern pieces, and triangles indicating where to align pieces. For instance, a single notch might signify the front of a garment, while a double notch indicates the back.
Understanding these symbols is essential as they guide you through the process of creating your garment accurately. When you see a circle on your pattern piece, it typically signifies an important point such as where to attach a strap or button.
Notches and Grainline
Notches are small marks on the edge of your pattern that help ensure all your fabric pieces fit together perfectly. They come in different shapes like diamonds or triangles and indicate how multiple fabric pieces should be aligned during sewing.
The grainline arrow is another critical marking; it shows you how to position your pattern piece concerning the fabric’s grain.
By understanding these markings, you can effectively match up sections of fabric when assembling your garment. This ensures that everything fits together seamlessly without any unnecessary tugging or stretching.
See Also: Tips For How To Backstitch By Hand
Significance of Symbols
Each symbol on a sewing pattern serves an important purpose in guiding you through creating your desired item of clothing. Whether it’s indicating dart placement for shaping or denoting fold lines for certain elements like collars or cuffs, each symbol plays a vital role in ensuring accuracy and precision in construction.
Recognizing these symbols allows you to interpret instructions correctly and execute them with confidence. It helps prevent mistakes that could lead to ill-fitting garments or confusion during assembly.
Essential Tools for Drawing Sewing Patterns
Learning Patternmaking Without Fashion School
If you aren’t going to fashion school, there are alternative ways to learn patternmaking. You can explore online resources that offer comprehensive tutorials and guides on creating sewing patterns. Websites like Craftsy and YouTube channels dedicated to sewing provide step-by-step instructions for beginners. These platforms offer a wide range of courses, from basic pattern drafting to advanced techniques in garment construction.
Another way to enhance your skills in pattern-making is by seeking mentorship or apprenticeship opportunities within the industry. Connecting with experienced patternmakers or designers can provide invaluable insights into the intricacies of creating precise and well-fitted patterns. By observing their work and learning directly from professionals, you can refine your understanding of garment construction and design principles.
Utilizing Online Resources
Online resources play a vital role in self-learning patternmaking. They offer an array of instructional materials such as e-books, webinars, and video tutorials that cater to different learning styles.
These resources cover various aspects of pattern drafting, including taking accurate measurements, visualizing shapes and patterns from scratch, understanding fabric properties, and incorporating seam allowances.
You may also find specialized forums or communities where individuals share their experiences with sewing, providing valuable tips on tackling common challenges encountered during pattern creation.
Engaging with these communities allows you to seek advice from seasoned practitioners who have overcome similar hurdles in their journey toward mastering the art of pattern making.
See Also: How To Wash Cotton Fabric Before Sewing
Selecting the Right Paper for Pattern Drafting
Importance of Sturdy Paper
Using sturdy paper is crucial. It provides durability and stability, ensuring that your pattern pieces remain intact during the drafting and cutting process. By utilizing sturdy paper, you can prevent tearing or distortion, ultimately leading to more accurate and reliable pattern pieces.
It’s important to consider the weight and thickness of the paper when selecting one for creating pattern pieces. Thicker papers are less likely to tear or warp, offering a smooth surface for drawing precise lines and curves. This ensures that your patterns are consistent in shape and size, contributing to a better fit for your garments.
Types of Suitable Paper
Several types of paper are suitable for pattern making. One common choice is kraft paper, known for its strength and resilience. Tracing paper is another popular option due to its transparency, allowing you to overlay multiple designs while maintaining accuracy.
Moreover, grid or dot-patterned paper can be beneficial in achieving symmetrical designs and precise measurements. These grids assist in aligning elements such as darts or seam lines accurately.
Tips for Choosing the Right Paper
When choosing the right paper for accurate pattern drafting, there are several factors to keep in mind. Consider the type of garment you’re creating heavier fabrics may require sturdier paper compared to lighter materials.
Ensure that there’s ample space on the chosen paper size for your entire pattern piece without compromising any details or dimensions. Pay attention to grain lines if working with woven fabrics as they dictate how fabric will drape on the body.
Furthermore, securing your fabric onto the selected drafting surface with sewing pins helps prevent shifting while tracing an essential consideration when choosing your pattern-making material.
Creating a Basic Bodice Block Step-by-Step
Taking Accurate Measurements
When creating sewing patterns for garments, the basic bodice block serves as the foundation. To ensure a well-fitted bodice block, it’s crucial to take accurate body measurements. Pay close attention to key points such as the bust line, waistline, hips, and shoulder slope. These measurements are essential for drafting a precise bodice block that will serve as the basis for various garment patterns.
To create an accurate basic bodice block, make sure to measure your bust line correctly and mark it at 10 inches from the edge. This accuracy is vital in ensuring that your pattern fits perfectly when translated into a garment.
Understanding Key Points
Understanding key points like the bust line and shoulder slope is essential when learning how to draw sewing patterns. By mastering these fundamental elements, you’ll be equipped with the necessary knowledge to create well-constructed garments with precise fitting.
For instance, if you’re aiming to design a dress or shirt with sleeves, understanding how to incorporate sleeve construction into your pattern is crucial. Inserting sewing pins along the edge of your pattern piece helps prevent any shifting while tracing it onto paper.
Using Bodice Blocks as Templates
Once you’ve successfully drafted your basic bodice block using accurate measurements and an understanding of key points, this foundational piece can be utilized as a template for creating various styles of tops and dresses.
Whether you want to design different necklines or experiment with varying sleeve lengths, having a well-drafted basic bodice block allows you to easily manipulate existing patterns without starting from scratch each time.
By utilizing this method, not only do you save time on pattern-making but also ensure consistency in fit across different designs based on one standard template the basic bodice block.
Learn How to Manipulate Existing Patterns
Now that you have mastered creating a basic bodice block step by step, it’s time to delve into manipulating existing patterns!
Discover techniques for altering existing patterns according to individual preferences or specific design requirements. Explore methods for adjusting patterns so they fit different sizes seamlessly this skill opens up opportunities for catering to diverse body shapes and sizes in fashion design.
Mastering the art of modifying patterns enables designers not only to tailor clothing pieces but also to unleash their creativity by crafting unique designs tailored specifically to individual preferences or fashion trends.
Techniques for Drafting Skirt and Sleeve Patterns
Understanding Skirt Pattern Drafting
It’s crucial to learn the fundamental techniques. Start by taking accurate body measurements, including waist, hip, and desired length. Then, use these measurements to create a basic skirt block pattern on drafting paper.
Once you have your block pattern, you can manipulate it to design various skirt styles such as A-line, pencil, or pleated skirts.
To ensure a smooth curve for the hemline or waistband of your skirt pattern, consider using a French curve or the curved edge of a pattern master tool. This will help you achieve professional-looking curves without any jagged edges.
When creating more complex designs like asymmetrical skirts or high-low hems, having a clear understanding of how to modify your basic block is essential.
Exploring Advanced Sleeve Pattern Design
Creating various sleeve patterns involves understanding the different types of sleeves and their construction methods. For example: set-in sleeves are commonly found in tailored garments; raglan sleeves provide ease of movement; while kimono sleeves offer a relaxed fit with no shoulder seam.
As you progress in designing sleeve patterns for different styles and functions whether for formal blouses or casual tops remember that each type requires specific measurements and shaping techniques.
To refine your skills further in this area, presenting technical sketches before preparing the draft can be beneficial as they allow you to visualize how the sleeve will look once completed.
Utilizing Special Tools for Pattern Drafting
In addition to mastering fundamental techniques for designing skirt and sleeve patterns, utilizing specialized tools can greatly enhance precision in your work. When looking for drafting paper and French curves essential items used by both beginners and experienced designers consider visiting art supply stores or browsing online retailers specializing in fashion design tools.
Remember that as an aspiring designer seeking custom-fit clothing options beyond standard sewing patterns that may not cater well to individual body shapes having access to quality materials such as drafting paper is crucial.
Tips for Adjusting Patterns to Body Measurements
Importance of Accurate Measurements
Accuracy is key. Your unique body shape and size require precise adjustments for a perfect fit. Without accurate measurements, the pattern won’t reflect your body shape, resulting in an ill-fitting garment. To ensure a flawless outcome, take the time to measure yourself correctly.
Start by using a flexible measuring tape to measure various parts of your body such as the bust, waist, hips, and inseam. Remember that each measurement contributes to achieving the ideal fit for different garments.
For instance, when making adjustments for a skirt pattern, accurate hip and waist measurements are crucial. By understanding the significance of precise measurements, you can tailor patterns effectively.
Mastering Custom Adjustments
Mastering custom adjustments involves utilizing techniques like Tru-Grid with printed one-inch squares that facilitate drawing straight lines and right angles effortlessly. This tool enhances precision when transferring your measurements onto paper or fabric while adjusting patterns accurately according to your unique proportions.
To achieve an impeccable fit with custom adjustments, consider using pivot points on patterns where alterations are needed based on specific measurements. For example: if you need more room in the bust area but not in other areas of a bodice pattern, pivot from the side seam near the bust apex when spreading or overlapping sections for adjustment.
Utilize resources such as tutorials and guides that offer step-by-step instructions for adjusting basic pattern blocks or commercial sewing patterns according to individual body measurements. These resources provide valuable insights into altering darts’ placement and lengthening or shortening pattern pieces based on personalized requirements.
Transferring Drafted Patterns to Fabric
Different Methods
When transferring drafted patterns to fabric, there are various methods you can use. One common technique is tracing the pattern onto the fabric using a tailor’s chalk or a washable fabric marker.
Another method involves using paper weights to keep the pattern in place while cutting around it with scissors. Some crafters prefer using transfer paper that can be placed between the pattern and the fabric for easy tracing.
Another popular approach is to pin the pattern directly onto the fabric and then carefully trace around it with a pencil or pen. This method allows for precise placement of the pattern on your garment.
Precision Significance
Precision is crucial when transferring patterns onto your fabric. A small error in transferring could result in misaligned pieces, leading to an ill-fitting garment. For example, if darts or seams are not accurately transferred, it can affect how well your garment fits.
Ensuring accuracy during this stage will save you time and frustration later on in your sewing process. It’s important to take your time and double-check each piece as you transfer them onto your chosen fabric.
Tools and Techniques
To achieve accurate pattern transfer, there are specific tools that can greatly assist you in this process. Tailor’s chalk comes in handy for marking fabrics without causing damage, as it easily brushes off once you’re done sewing.
Alternatively, washable markers provide clear lines but remember they must be completely removed before washing your finished garment; otherwise, they may leave permanent marks on your project.
Moreover, investing in a good set of paper weights will help keep everything steady while working with delicate fabrics such as silk or chiffon. These weights prevent any shifting during tracing or cutting out pieces from the material.
In addition to these traditional tools, consider utilizing specialized transfer papers designed specifically for sewing projects like Swedish Pattern paper/fabric available online or at local stores like Joann Fabrics.
Finishing Touches for Professional-Looking Patterns
Attention to Detail
Paying attention to detail is crucial. By ensuring that your patterns are meticulously crafted, you elevate the overall quality of your work. From refining the edges of your pattern pieces to perfecting the design from scratch, every small detail contributes to a professional-looking end product.
To achieve this level of precision, take the time to inspect each element of your pattern. Are the lines clean and sharp? Do the edges align perfectly? Ensuring that every aspect of your patterns is flawlessly executed demonstrates a commitment to excellence in design.
Techniques for Enhancing Quality
There are various techniques you can employ to enhance the quality of your sewing patterns. For example, using tracing paper or specialized pattern paper can help create durable templates that withstand repeated use without tearing or warping. This not only ensures longevity but also adds a professional touch to your work.
Moreover, incorporating clear and concise labeling on each pattern piece can significantly improve its usability and presentation. By clearly marking key points such as grainlines, notches, and seam allowances directly on the pattern itself, you make it easier for others (or yourself) to understand and follow along with the instructions accurately.
Importance of Presentation
The importance of attention to detail in pattern presentation cannot be overstated. A well-presented pattern not only looks more appealing but also conveys professionalism and reliability.
When customers or fellow sewists encounter a neatly presented set of patterns with meticulous details such as labeled pieces and comprehensive instructions, they are more likely to trust in its accuracy and ease-of-use.
Final step: get some books
Expand Your Knowledge
Getting your hands on some educational books can be incredibly beneficial. These resources offer valuable insights and advanced techniques that can help you take your pattern-making skills to the next level. By investing in these books, you’ll have access to a wealth of knowledge that goes beyond basic pattern drafting.
Whether you’re looking to delve into complex garment construction or understand intricate mathematical concepts related to pattern making, there are books tailored to various aspects of sewing pattern design.
For instance, some books focus on creating patterns for specific types of clothing, such as dresses or tailored jackets. Others may cover the use of advanced tools and software for digital pattern drafting.
Valuable Resources at Your Fingertips
Exploring recommended books on advanced pattern making techniques allows you to tap into the expertise of experienced professionals in the field. These authors often share their tried-and-true methods and tips for overcoming common challenges encountered during pattern creation. Many educational resources provide comprehensive illustrations and step-by-step tutorials that cater to different learning styles.
By immersing yourself in these educational materials, you’ll gain a deeper understanding of how body measurements translate into precise patterns and learn about specialized techniques for achieving a perfect fit. Moreover, these resources can serve as go-to references when encountering specific problems or seeking inspiration for innovative designs.
Invest in Educational Books
Investing in educational books is an effective way to further enhance your skills in drawing sewing patterns. While online tutorials and videos offer convenience, having a collection of well-researched books at your disposal provides a structured approach to learning advanced pattern making techniques. You can easily refer back to specific chapters or diagrams whenever needed without relying solely on internet connectivity.
Moreover, with instructional texts at hand, you’ll have the opportunity to deepen your understanding through repeated readings and practical application exercises. As you work through each book’s content systematically, complex concepts gradually become more accessible while reinforcing foundational principles essential for accurate pattern drafting.
Final Remarks: How to Draw Sewing Patterns
You’ve now gained a solid understanding of sewing pattern symbols, essential tools, paper selection, and drafting techniques. You’ve also learned how to adjust patterns to fit your measurements and transfer them onto fabric with finesse.
Remember, the key to mastering pattern drawing lies in practice and patience. Don’t be afraid to make mistakes; they’re crucial for your growth as a pattern maker. As you embark on this creative journey, keep refining your skills by seeking inspiration from books and other resources.
Now that you’ve armed yourself with these valuable insights, it’s time to put them into action. Grab your drafting tools, unleash your creativity, and start sketching those fabulous sewing patterns. Embrace the process, learn from each attempt, and revel in the joy of bringing your unique designs to life. Happy pattern drawing!
Frequently Asked Questions
How can I learn pattern making easily?
Learning pattern making can be made easier by starting with basic tutorials and practicing regularly. There are many online resources, books, and courses available that break down the process into manageable steps.
What are the steps in pattern drafting?
Pattern drafting involves taking body measurements, creating a basic block or sloper, modifying it to create different styles, transferring the patterns onto paper or fabric, and adding seam allowances and markings.
How to easily make patterns?
To make patterns more easily, use essential tools like rulers, curves, and tracing paper. Start with simple projects before progressing to complex designs. Following step-by-step tutorials and seeking guidance from experienced sewers can also help simplify the process.
How do you write a sewing pattern?
Writing a sewing pattern involves detailing each step of construction in a clear and understandable manner. It should include accurate measurements, materials required, cutting layouts, and sewing instructions with illustrations or diagrams for clarity.
What are the techniques in pattern making?
Pattern-making techniques include creating basic blocks such as bodice and skirt blocks; adjusting patterns for fit; understanding darts, gathers & pleats; manipulating seams & shapes for design variations; grading sizes; adding seam allowances & notches for assembly.
What is a basic pattern?
A basic pattern serves as a foundation for creating various garment styles. It typically includes front/back bodice/skirt blocks without style elements like darts or design features. This standard template is modified according to specific designs during the patterning process.

2 Comments