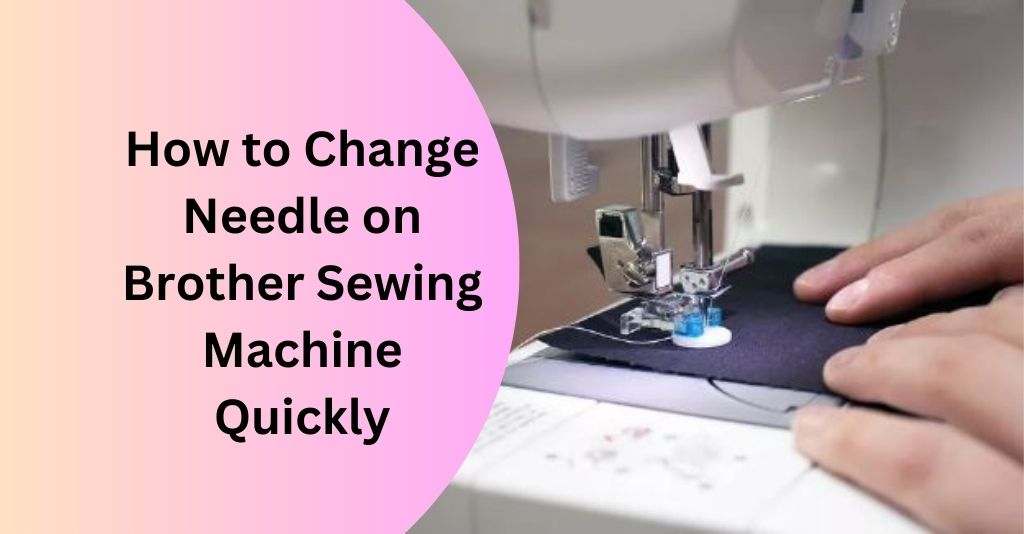
How to Change Needle on Brother Sewing Machine Quickly: 2024
Welcome to our comprehensive guide on how to change needle on Brother sewing machine.
As experts in the sewing industry, we understand the importance of providing clear and concise instructions to help you maintain and optimize your sewing machine.
In this article, we will walk you through the step-by-step process of replacing the needle, ensuring that you can complete the task with ease and confidence.
In this guide, I will provide you with detailed information based on your needs.
Why Needle Change is Important?
The needle is a vital component of your sewing machine, responsible for puncturing the fabric and creating stitches.
Over time, needles can become dull, bent, or damaged due to regular use. Changing the needle regularly ensures smooth sewing, prevents skipped stitches, and reduces the risk of fabric snags or breakage.
It is recommended to change the needle after every project or approximately every 8-10 hours of sewing.
Why Should You Change the Needle?
Before we dive into the procedure, let’s briefly discuss why changing the needle is crucial for your sewing machine’s performance.
Over time, sewing machine needles can become dull, bent, or even damaged due to prolonged use.
A worn-out needle can cause skipped stitches, fabric snags, and uneven seam lines, leading to frustration and a decrease in sewing quality.
By replacing the needle regularly, you can prevent these issues and maintain the overall health of your Brother sewing machine.
How to Change Needle on Brother Sewing Machine: Step-by-Step Guide
Sewing machine needles may become dull, bent, or broken with extended use, leading to stitching issues and fabric damage.
Regularly changing the needle will prevent such problems and ensure your sewing machine operates smoothly.
What You’ll Need
Before we dive into the process, let’s make sure you have everything you need for a successful needle change. Here’s a quick checklist of the essentials:
- Replacement Needle: Ensure you have the correct needle type and size compatible with your Brother sewing machine. Refer to your user manual for the specific needle requirements.
- Screwdriver: You’ll need a screwdriver to loosen the needle clamp.
- Lint Brush: To clean any dust or debris around the needle area.
- Needle threader (optional but helpful)
- Tweezers (for better grip)
Step 1: Safety First
When changing the needle or performing any maintenance on your sewing machine, follow these safety tips:
- Always turn off and unplug the machine before handling needles or performing maintenance.
- Use caution when handling needles to avoid accidental pricks.
Step 2: Identify the Correct Needle Type
Brother sewing machines support various needle types depending on the fabric and project.
Check your machine’s manual to identify the correct needle type for your specific needs.
Using the wrong needle can lead to poor stitching results and potential damage to your machine
Step 3: Remove the Old Needle
- Position the Needle: Raise the needle to its highest position by rotating the handwheel towards you.
- Loosen the Needle Clamp Screw: Use the screwdriver to carefully loosen the needle clamp screw in the counterclockwise direction.
- Remove the Old Needle: Gently pull down on the old needle and slide it out from the needle clamp.
Step 4: Prepare the New Needle
- Check the Needle Size: Before inserting the new needle, ensure that it matches the size recommended for your sewing project.
- Insert the New Needle: With the flat side of the needle facing the back, gently push the needle up into the needle clamp as far as it will go.
- Tighten the Needle Clamp Screw: Using the screwdriver, tighten the needle clamp screw in the clockwise direction to secure the new needle in place. Be cautious not to over tighten.
Step 5: Checking Needle Alignment
Proper needle alignment is crucial for optimal sewing results. Follow these steps to check the alignment:
- Lower the presser foot of your machine.
- Rotate the handwheel towards you (toward you) to lower and raise the needle.
- Observe the needle’s position and ensure it passes through the needle plate’s hole smoothly.
Step 6: Adjusting Needle Position
In some cases, you might need to adjust the needle’s position for specific sewing tasks. Refer to your machine’s manual for instructions on adjusting the needle position if necessary.
Step 7: Testing the New Needle
- Turn on the Machine: Plug in your sewing machine and turn it on to test the newly inserted needle.
- Run a Test Stitch: Load the machine with a piece of scrap fabric and run a test stitch to check if the needle is functioning correctly.
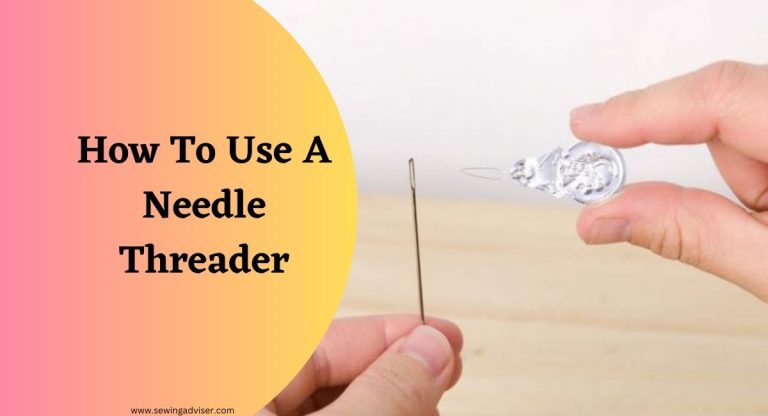
How to Thread A Needle on a Brother Sewing Machine?
Threading a needle on a Brother sewing machine is a simple process. Here’s a step-by-step guide to help you with it:
- Raise the Needle: Turn the handwheel (usually on the right side of the machine) toward you to raise the needle to its highest position.
- Open the Needle Plate: Most Brother sewing machines have a hinged needle plate. Lift it up gently to expose the bobbin area.
- Identify the Needle: Look for the needle on the machine. It should be near the presser foot, and its position is usually slightly tilted.
- Loosen the Needle Clamp: On the top side of the machine, there is a needle clamp screw. Turn it counterclockwise to loosen it. The needle should now be loose enough to move up and down.
- Insert the Needle: Take your new sewing machine needle, ensuring that it’s the correct type and size for your project. Check the packaging or your machine’s manual for the recommended needle type. Insert the flat side of the needle into the clamp with the rounded side facing the back of the machine.
- Tighten the Needle Clamp: Once the needle is inserted properly, hold it in place with one hand and use the other to turn the needle clamp screw clockwise to secure the needle in place. Make sure it’s snug but not overly tight.
- Thread the Needle: Take your thread and pass it through the needle from front to back. You can use a needle threader if your machine comes with one. Otherwise, you can wet the tip of the thread slightly to help it go through the eye of the needle.
- Pull the Thread Through: Pull the thread until you have a tail of a few inches hanging from the needle.
- Close the Needle Plate: Lower the hinged needle plate back into place, ensuring it clicks shut properly.
- Turn on the Machine: Now that your needle is threaded, you can turn on your Brother sewing machine.
- Test the Stitch: To check if the needle is threaded correctly, use the handwheel to make a few stitches manually. Ensure that the thread flows smoothly and there are no tangles or issues.
Additional Tips for Brother Sewing Machine Needle Maintenance
To keep your sewing machine in top-notch condition, consider the following tips:
- Regular Checks: Inspect your needle before each sewing session to look for signs of wear or damage. Replace it if you notice any issues.
- Correct Needle Type: Always use the right needle type for the fabric you’re working with. Different fabrics, such as denim or silk, require specific needle types to prevent damage.
- Cleaning: Regularly clean your sewing machine and remove any accumulated lint or debris, as these can affect needle performance.
- Replace When Needed: Even if your needle appears fine, consider replacing it after every 6-8 hours of sewing to maintain optimal performance.
- Use Quality Thread: Low-quality threads can cause lint buildup and break more easily, leading to potential needle and machine issues.
- Sewing Speed: Avoid sewing at high speeds on thick fabrics, as it can put unnecessary strain on the needle and cause it to bend or break.
Brother Sewing Machine Needle Sizes?
Certainly! Brother sewing machines use various needle sizes depending on the type of fabric and the sewing project. The most common needle sizes for Brother sewing machines are:
- Size 75/11: This is a general-purpose needle suitable for lightweight fabrics like silk, rayon, and lightweight cotton.
- Size 80/12: Another general-purpose needle, suitable for medium-weight fabrics like cotton, linen, and satin.
- Size 90/14: A needle designed for medium to heavyweight fabrics such as denim, twill, and corduroy.
- Size 100/16: This needle size is best for heavy fabrics, like upholstery materials and thick denim.
- Size 110/18: An extra-strong needle for very heavy and dense fabrics, like heavy canvas and leather.
How to Remove Broken Needle from Brother Sewing Machine?
To remove a broken needle from a Brother sewing machine, follow these steps:
- Safety First: Before attempting to remove the broken needle, turn off the sewing machine and unplug it from the power source to avoid any accidents.
- Gather Supplies: You’ll need a pair of tweezers or needle-nose pliers, a flashlight (optional), and a replacement needle that matches the type and size of the broken one.
- Locate the Broken Needle: Using the handwheel, manually raise the needle to its highest position. If you can see the broken needle clearly, proceed to step 4. If not, use a flashlight to get a better view of the needle and its position.
- Remove the Bobbin and Needle Plate: Open the bobbin cover and remove the bobbin. Next, remove the needle plate, which is the metal plate that covers the bobbin area. This will provide better access to the broken needle.
- Remove the Broken Needle: Gently grip the broken end of the needle with tweezers or needle-nose pliers. Be careful not to push the needle further into the machine. Slowly and steadily pull the broken needle out in the same direction it would move during normal sewing.
- Check for Any Remaining Debris: After removing the broken needle, inspect the needle area and make sure there are no loose needle fragments or other debris. Clean any remaining debris if necessary.
- Install a New Needle: Insert a new needle into the needle holder, ensuring it is pushed up and as far as it will go. Make sure to insert the needle with the flat side facing the back of the machine.
- Reassemble the Machine: Put the needle plate back in place and secure it. Reinsert the bobbin and close the bobbin cover.
- Test the Machine: Turn on the sewing machine and test it by running it slowly with a piece of scrap fabric. Ensure that the needle is properly aligned and doesn’t hit the needle plate or any other parts.
- Dispose of the Broken Needle Safely: Dispose of the broken needle in a sharps container or a secure container with a lid. Do not throw it in the regular trash, as it can pose a hazard to others.
How Do You Align the Needle on a Brother Sewing Machine?
To align the needle on a Brother sewing machine, follow these steps:
Note: It’s essential to ensure your sewing machine is turned off and unplugged before attempting any adjustments.
- Check the Needle Type: Make sure you have the correct needle for your sewing project. The needle should match the fabric type and thickness you are using.
- Insert a New Needle: If you need to replace the needle, make sure to insert it correctly. Raise the presser foot, remove the old needle, and insert the new needle with the flat side facing the back of the machine. Push it up as far as it will go, and then tighten the needle clamp screw securely.
- Needle Position: Most Brother sewing machines allow you to adjust the needle position. Check your machine’s manual to find out how to do this. Generally, there is a setting that lets you move the needle to the left, center, or right position.
- Use the Handwheel: Turn the handwheel toward you (counter-clockwise) to lower the needle to its lowest position. This is important to avoid any accidents while adjusting the needle.
- Align the Needle: If you want to align the needle to a specific position, you can adjust it using the needle position settings on your machine. Align the needle so that it is perpendicular to the needle plate and the presser foot.
- Test the Alignment: Once you have adjusted the needle position, turn on your sewing machine and do a test stitch on a scrap piece of fabric. Ensure the needle is in the correct position for your sewing needs.
- Fine-tuning: If the needle alignment isn’t perfect, you may need to make minor adjustments until you achieve the desired result.
Troubleshooting Tips for Changing Needles on Brother Sewing Machine
Needle Keeps Falling Out
If the needle keeps falling out, ensure that you are tightening the screw firmly enough. If the problem persists, the needle clamp may be damaged, and you should seek professional repair.
Needle Hits the Bobbin Case
If the needle hits the bobbin case, it might be inserted incorrectly or bent. Double-check the needle’s position and replace it if it is bent.
Skipping Stitches
Skipping stitches may indicate that the needle is dull or bent. Replace the needle even if it appears to be in good condition, as it may be causing the issue.
Needle Breaks Frequently
Frequent needle breakage can be a result of using the wrong needle for the fabric type or size. Make sure you are using the appropriate needle for your sewing project.
How often should I change the needle on my Brother sewing machine?
Ideally, you should change the needle after every 8-10 hours of sewing or at the start of a new project. Regularly changing the needle ensures smoother stitching and prevents damage to your fabrics.
What Moves the Needle Up and Down on a Sewing Machine?
On a sewing machine, the needle is moved up and down by a mechanism that is powered by the machine’s motor. The main components responsible for this movement are:
- Needle Bar: The needle bar is a vertical rod that holds the sewing machine needle in place. It is connected to a crankshaft or cam system, which helps convert the rotary motion of the machine’s motor into vertical motion.
- Crankshaft or Cam System: The crankshaft is a mechanical component that converts the rotational motion of the sewing machine’s motor into a reciprocating (back-and-forth) motion. As the crankshaft rotates, it moves the needle bar up and down, causing the sewing needle to go through the fabric.
- Motor: The motor in the sewing machine provides the necessary power to drive the crankshaft or cam system, which, in turn, moves the needle up and down at a high speed.
- Timing Belt or Timing Mechanism: In some sewing machines, there might be a timing belt or other precise mechanisms that ensure the needle and other components move in sync, avoiding collisions and ensuring accurate stitching.
- Presser Foot: The presser foot is another important part of the sewing machine. It presses the fabric against the feed dogs and needle plate while sewing. The combination of the presser foot, feed dogs, and needle movement allows the fabric to be guided through the machine at a steady pace, creating uniform stitches.
When you press the foot pedal or the machine’s power switch, the motor is activated, and it drives the needle bar up and down through the crankshaft or cam system.
This continuous up-and-down movement of the needle, along with the synchronized motion of the feed dogs and the fabric being guided by the presser foot, results in the sewing process.
What Is the Best Position for a Sewing Machine?
The best position for a sewing machine is one that provides comfort, good visibility, and stability while you are sewing.
Here are some guidelines to help you set up your sewing machine in an ideal position:
- Sturdy Surface: Place your sewing machine on a sturdy and level surface, such as a sewing table or desk. Avoid using wobbly or uneven surfaces as they can affect the stability of the machine during sewing.
- Good Lighting: Ensure that you have adequate lighting in your sewing area. Proper lighting is essential for reducing eye strain and making it easier to see the details of your sewing projects.
- Ergonomic Height: The sewing machine’s surface should be at a comfortable height for you to work on. Your arms should rest naturally on the table, and your hands should comfortably reach the needle and the controls without having to strain or stretch.
- Chair Height: Choose a chair with an adjustable height or one that allows you to maintain a 90-degree angle at your elbows while sitting at the machine. This will help you maintain a good posture and reduce the risk of discomfort or injury.
- Foot Pedal Position: Position the foot pedal where you can easily reach it with your foot. Make sure it stays in place and doesn’t slide around while you are sewing.
- Clear Workspace: Keep the area around the sewing machine clear of clutter and unnecessary items. This will provide you with enough space to maneuver the fabric and maintain a smooth sewing process.
- Machine Manual: Refer to your sewing machine’s manual for any specific recommendations or guidelines provided by the manufacturer regarding its setup and positioning.
- Consider Your Dominant Hand: If you are right-handed or left-handed, position the machine and other sewing tools in a way that suits your dominant hand’s natural movements and preferences.
- Ventilation: If possible, set up your sewing machine in a well-ventilated area to ensure a comfortable working environment.
What Is the Right Position of Needle in a Sewing Machine?
The right position of the needle in a sewing machine depends on the type of sewing project you are working on.
Generally, for regular sewing tasks, the needle should be in the center position. However, there are some variations and considerations to keep in mind:
- Center Position: For most standard sewing tasks like straight stitching, keeping the needle in the center position is appropriate. This ensures that the machine creates even stitches and that the fabric is fed through the machine evenly.
- Left or Right Position: Some sewing machines allow you to move the needle position to the left or right. This feature is particularly useful for tasks like topstitching, edge stitching or creating specific seam allowances. By adjusting the needle position, you can achieve precise stitching placement.
- Zigzag or Decorative Stitches: When using zigzag or decorative stitches, the needle position is often adjusted to create various patterns. For example, moving the needle to the far left or right will change the width of the zigzag stitch.
- Twin Needle: Some sewing machines support the use of twin needles. When using a twin needle, the needle positions are set side by side, allowing you to create parallel rows of stitches simultaneously.
To adjust the needle position on your sewing machine, you can usually do one of the following:
- Refer to your sewing machine’s manual: The manual will provide specific instructions on how to adjust the needle position for different stitching options.
- Use the machine’s controls: Modern sewing machines often have buttons or dials that allow you to move the needle left or right.
- Change the needle plate: In some machines, you may need to switch the needle plate to align the needle properly for specific tasks.
It’s essential to check your sewing machine’s capabilities and features to understand how to adjust the needle position correctly.
Can I use any needle for my Brother sewing machine?
No, you should always use needles that are compatible with your specific Brother sewing machine model. Using the wrong needle may cause stitching issues and can damage your machine.
Why does my needle keep breaking?
Needles may break due to various reasons, including incorrect needle insertion, using the wrong needle type or size, or sewing through thick fabrics without an appropriate needle.
What type of needle should I use for denim fabric?
For sewing denim fabric, it’s best to use a heavy-duty or denim needle. These needles have a stronger shaft and can easily penetrate through thicker materials.
How can I tell if my needle is dull?
A dull needle may cause skipped stitches, uneven stitches, or snagging of the fabric. If you experience any of these issues, it’s time to replace your needle.
Can a bent needle be fixed?
No, once a needle is bent, it cannot be fixed and should be replaced immediately. Using a bent needle can lead to further damage to your sewing machine and fabrics.
Is it normal for the needle to vibrate while sewing?
Some minor vibration is normal, but excessive vibration may indicate an issue with the needle or machine. Double-check that the needle is installed correctly and the machine is properly threaded. If the problem persists, consider having your machine checked by a professional.
How to move the needle left and right on a Brother sewing machine?
The method for moving the needle left and right on a Brother sewing machine may vary depending on the model and features of the machine.
However, I can provide you with general instructions that are commonly applicable to many Brother sewing machines. For more precise guidance, always refer to your specific sewing machine’s manual.
Here’s a general way to adjust the needle position on a Brother sewing machine:
- Identify the Needle Position Controls: Look for buttons, dials, or levers on your sewing machine that control the needle position. These are typically labeled with icons like “L,” “R,” or “Needle Position.”
- Select the Desired Stitch: Before adjusting the needle position, choose the stitch you want to use. Some stitches may require specific needle positions, so it’s essential to have the stitch selected first.
- Needle Position to the Left: To move the needle to the left, press the “L” or “Left” button or turn the relevant dial or lever in the left direction. Keep pressing or turning until the needle reaches the desired left position.
- Needle Position to the Right: To move the needle to the right, press the “R” or “Right” button or turn the relevant dial or lever in the right direction. Keep pressing or turning until the needle reaches the desired right position.
- Center Needle Position: If you want to return the needle to the center position, look for a button or setting that represents the center position. Pressing this button or adjusting the control appropriately will bring the needle back to the center.
- Test on Scrap Fabric: Whenever you change the needle position, it’s a good idea to test the stitch on a piece of scrap fabric before sewing on your actual project. This will ensure that the needle is in the correct position for your intended stitching.
Always remember to turn off your sewing machine or press the “Stop” button before adjusting the needle position to prevent any accidents.
Additionally, if you are unsure about how to adjust the needle position on your specific Brother sewing machine, consult the user manual provided with your machine or visit Brother’s official website for further assistance and support.
How do I fix the needle holder on my Brother sewing machine?
Here are the general steps to fix the needle holder on a Brother sewing machine:
- Power off the machine: Before attempting any repairs, make sure the sewing machine is unplugged or turned off to avoid any accidents.
- Remove the needle: Gently unscrew or release the needle clamp to remove the needle from the needle holder.
- Inspect the needle holder: Examine the needle holder and surrounding area for any visible damage or misalignments. Look for bent parts, loose screws, or any foreign objects that might be obstructing the holder’s movement.
- Tighten screws: If you notice any loose screws on the needle holder or surrounding components, use a screwdriver to carefully tighten them. Be cautious not to overtighten, as this could cause damage.
- Align the needle holder: Check if the needle holder is properly aligned with the needle bar. It should be straight and not tilted. If it appears misaligned, adjust it gently by hand until it is straight.
- Clean the area: Dust and lint can accumulate around the needle holder, affecting its performance. Use a small brush or compressed air to clean any debris around the needle holder and the needle bar area.
- Lubricate moving parts (if applicable): Some sewing machines may require occasional lubrication. Check your user manual to see if your model needs lubrication and, if so, use the appropriate sewing machine oil sparingly.
- Reassemble the needle holder: Place the needle back into the needle holder and secure it by tightening the needle clamp.
- Test the machine: Plug in or turn on the sewing machine and run a few test stitches on scrap fabric to ensure the needle holder is functioning correctly.
Conclusion
Congratulations! You’ve successfully learned how to change the needle on your Brother sewing machine. Regular maintenance and proper needle care will ensure your sewing projects are a breeze, with smooth and professional-looking stitches.
Remember to use the correct needle for each project, and don’t forget to change the needle regularly for the best sewing experience.
Now go ahead, experiment with different fabrics, and let your creativity shine with your well-maintained Brother sewing machine!
FAQs
Can a bent needle damage my sewing machine?
Yes, a bent needle can cause damage to your sewing machine. Replace it immediately if you notice any bending.
Is it necessary to change the needle if I only sew occasionally?
Yes, even if you sew occasionally, it’s still important to change the needle regularly to ensure smooth stitching.
Can I use universal needles on my Brother sewing machine?
While some universal needles may work, it’s best to use needles specifically designed for Brother machines to ensure compatibility and optimal performance.
Can I change the needle while the machine is on?
No, for safety reasons, always turn off and unplug the machine before changing the needle.
How can I tell if my needle is dull and needs replacement?
If you notice skipped stitches, frayed threads, or difficulty sewing through the fabric, it’s a sign that your needle may be dull and needs replacement.


9 Comments