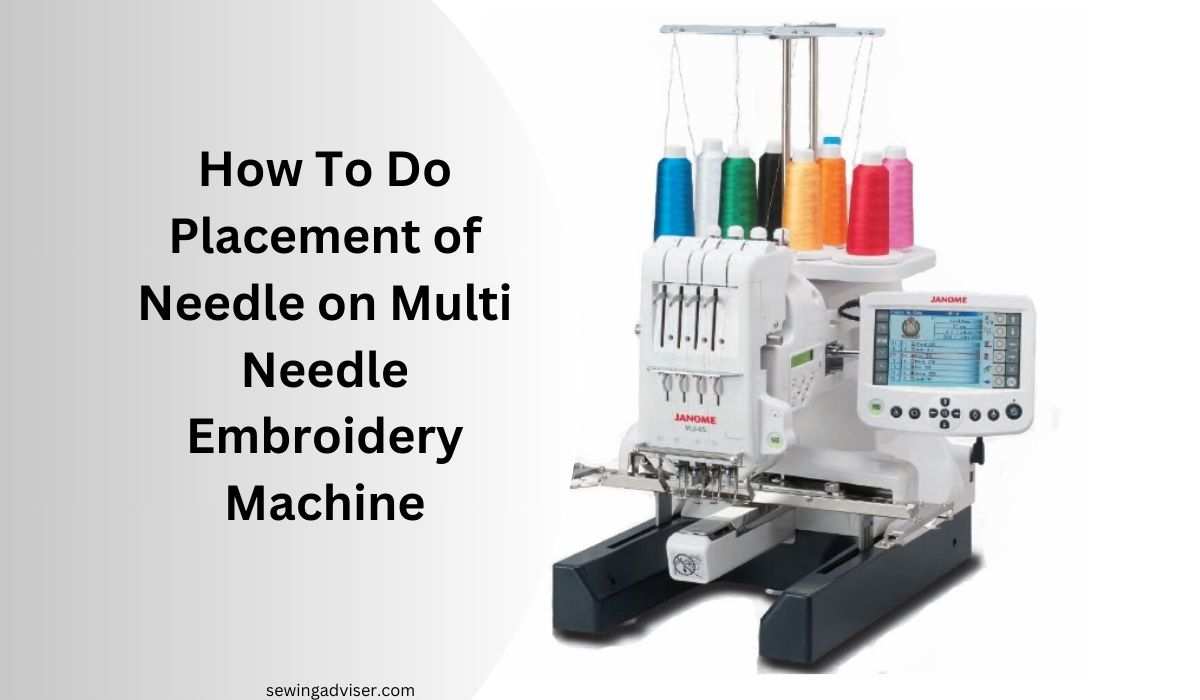
How To Do Placement of Needle on Multi Needle Embroidery Machine
Ever found yourself puzzled over how to perfectly position needles on a multi-needle embroidery machine?
This blog post will unravel the mystery and equip you with essential tips for mastering this crucial aspect.
Whether you’re a seasoned embroiderer or just starting out, understanding needle placement is vital for achieving impeccable results.
We’ll delve into practical techniques, common challenges, and expert insights to streamline your embroidery process.
From optimizing hoop selection to troubleshooting misalignment issues, we’ve got you covered.
Embark on this journey with us as we demystify the art of needle placement and empower you to elevate your embroidery game.
Get ready to unlock the potential of your multi-needle machine and take your creations to new heights!
Key Takeaways
- Proper needle placement is crucial for achieving high-quality embroidery on multi-needle machines.
- Understanding the different needle placement techniques and precision tools can significantly improve embroidery outcomes.
- To enhance embroidery skills, explore advanced placement strategies and master the art of multi-needle placement.
- Troubleshoot common needle placement issues to ensure smooth and flawless embroidery processes.
- Practice and preparation are key to mastering needle placement and enhancing overall embroidery proficiency.
- Applying the right needle placement techniques can elevate the quality and intricacy of embroidery designs.
See Also: Best Multi Needle Embroidery Machines
How To Do Placement of Needle on Multi Needle Embroidery Machine
Here’s a step-by-step guide on how to do the placement of needles on a multi-needle embroidery machine:
- Prepare the Machine: Begin by ensuring that the embroidery machine is powered off and unplugged for safety. Clear any debris or leftover threads from the needle area to prevent interference during the placement process.
- Refer to the Manual: Consult the manufacturer’s manual or guidebook that came with your multi-needle embroidery machine. Each model may have slightly different procedures for needle placement, so it’s crucial to follow the specific instructions provided.
- Identify Needle Positions: Most multi-needle embroidery machines have designated positions for each needle. These positions are typically labeled numerically or alphabetically for easy identification. Locate the needle slots or holders where the needles will be inserted.
- Choose Needle Types and Sizes: Depending on your embroidery project and fabric type, select the appropriate needles and sizes. Different needles are designed for various fabrics and thread weights, so ensure you have the correct ones for your specific needs.
- Insert the Needles: Carefully insert each needle into its corresponding slot or holder according to the designated positions. Take care to align the needles correctly and gently push them in until they are securely seated.
- Check Needle Alignment: Once all needles are inserted, visually inspect them to ensure they are aligned properly. Misaligned needles can cause stitching errors or fabric damage during embroidery.
- Secure Needles: Some multi-needle embroidery machines may require additional steps to secure the needles in place. Follow any locking mechanisms or tightening procedures outlined in the manual to prevent the needles from coming loose during operation.
- Test Needle Placement: Before starting your embroidery project, conduct a test run to ensure that the needles are properly placed and functioning correctly. Use scrap fabric and a simple design to verify that each needle is stitching as intended.
- Adjust as Needed: If you encounter any issues during the test run, such as skipped stitches or thread breaks, recheck the needle placement and make any necessary adjustments. Fine-tuning may be required to achieve optimal results.
- Begin Embroidering: Once you’re satisfied with the needle placement and test results, you’re ready to start your embroidery project. Load your design onto the machine, thread the needles, and begin stitching according to your desired pattern and settings.
By following these steps, you can effectively place needles on a multi-needle embroidery machine and embark on your creative embroidery endeavors with confidence.
Understanding Multi-Needle Machines
Machine Basics
Multi-needle embroidery machines are equipped with numerous needles that allow for simultaneous color changes. Each needle can hold a different colored thread, enabling intricate and colorful designs to be embroidered seamlessly.
The machine’s frame plays a crucial role in securing the fabric in place during the embroidery process, ensuring precision and accuracy.
These machines offer versatility by allowing different thread colors to be loaded onto individual needles, eliminating the need to manually change threads throughout the embroidery process.
This not only saves time but also enables more complex designs to be created without interruptions for thread changes. Multi-needle machines come with frames that securely hold the fabric in place while it is being embroidered, preventing any movement or distortion during stitching.
Needle Functions
The primary function of needles on a multi-needle embroidery machine is to pierce the fabric and create stitches according to the programmed design.
Different needle sizes are used based on the type of fabric being embroidered; thicker fabrics require larger needles while delicate fabrics necessitate finer ones. Adjusting needle placement is essential for achieving precise and accurate embroidery results.
For instance, when embroidering thick denim material, larger-sized needles are utilized to penetrate through its density effectively. Conversely, when working with delicate silk or satin fabrics, finer needles ensure minimal damage while creating intricate designs.
By adjusting needle placement as per the specific requirements of each design and fabric type, embroiderers can achieve impeccable results without compromising on quality or durability.
Fabric Hooping
Fabric hooping is an essential step in preparing for embroidery as it ensures that the fabric remains taut throughout the stitching process.
Proper hooping prevents any possibility of distortion or puckering in the finished design by maintaining consistent tension across all areas of the fabric being embroidered.
When using a multi-needle machine for embroidering large-scale designs such as quilt blocks or tablecloths, proper hooping becomes even more critical as it secures expansive pieces of fabric firmly in place for accurate needle placement across every section of the design.
Preparing for Embroidery
Design Size Check
When preparing for embroidery on a multi-needle machine, it’s crucial to check the design size. This ensures that the chosen design fits within the dimensions of the hoop and needle embroidery machine.
Over sized designs may necessitate re hooping or resizing, which can disrupt the embroidery process and lead to inconsistencies in the final product. On the other hand, small designs might require stabilizer to prevent shifting during embroidery.
For instance, if you’re working with a large-scale design on an embroidery machine, it’s essential to verify that it doesn’t exceed the hoop’s capacity. Otherwise, you may encounter challenges such as incomplete stitching or misalignment with the needle embroidery machine.
Conversely, when dealing with smaller designs, using stabilizer is vital to maintain stability and prevent any unwanted movement during embroidery.
Template Usage
Utilizing templates and needle embroidery machine plays a pivotal role in achieving precise placement of your design on the fabric.
Templates provide visual aid by outlining where exactly your design should be placed on the fabric before commencing embroidery. They also assist in aligning specific points of your design with corresponding features on your fabric.
For example, when using a template on an embroidery machine, you can easily visualize how your chosen design will appear once embroidered onto the fabric.
Templates aid in ensuring consistent placement of designs across multiple pieces of fabric by providing a reference point for accurate alignment each time.
Needle Placement Techniques
There are several techniques that can be employed. Two common methods include the 2-point method and the 4-point method.
2-Point Method
The 2-point method involves marking two points on the fabric where the design will be placed. This technique ensures accurate alignment of the embroidery design, making it a simple and effective method for precise placement.
By identifying two specific points on the fabric, embroiderers can guarantee that their designs are positioned exactly where they want them to be.
For example, if you’re working with a garment or piece of fabric that has clear center lines or reference points, this method can be particularly useful in ensuring symmetry and balance in your designs.
This approach is especially helpful when dealing with straightforward designs or patterns that don’t require intricate adjustments. It’s an efficient way to achieve accuracy without over complicating the process of needle placement.
4-Point Method
The 4-point method takes needle placement to another level by utilizing four reference points on the fabric for design alignment.
Compared to the 2-point method, this technique provides increased accuracy, making it ideal for more intricate or detailed designs.
By establishing four distinct points on the fabric surface, embroiderers have greater control over aligning complex patterns and ensuring their precision throughout every step of stitching.
For instance, when working with elaborate motifs or highly detailed logos, using multiple reference points allows for meticulous adjustments and fine-tuning during needle positioning.
The added precision provided by this approach makes it suitable for projects requiring meticulous attention to detail.
Advanced Placement Strategies
Activating Motif Center
Activating the motif center is crucial. This feature simplifies aligning motifs with specific areas on the fabric, ensuring accurate positioning. By locating and activating the center point of a motif, embroiderers can easily position complex designs with precision.
Utilizing this technique is especially beneficial when working with intricate or detailed embroidery patterns. For example, when creating a design that needs to be perfectly centered on a garment or textile, activating the motif center ensures that the placement is accurate and visually appealing.
Laser guidance plays a pivotal role in achieving accurate placement of embroidery designs. This technology projects a visible line onto the fabric, aiding in aligning designs without requiring physical markings directly on delicate fabrics. It also assists embroiderers in ensuring that their embroidery work is straight and centered.
For instance, when working with sheer or delicate fabrics like organza or silk, laser guidance helps maintain accuracy without causing damage to the material. It simplifies the process of positioning embroidery patterns precisely along seams or edges for a professional finish.
Precision Tools for Needle Placement
Absolute Check Feature
The placement of the needle on a multi-needle embroidery machine is crucial for achieving precise and accurate designs. One essential feature that aids in this process is the Absolute Check function.
This feature allows users to verify the position of the needle before embroidering a design, ensuring that it aligns perfectly with the intended placement.
By preventing accidental stitching outside of the designated area, this tool minimizes errors and ensures flawless execution.
Moreover, by incorporating an Absolute Check feature into multi-needle embroidery machines, manufacturers prioritize precision and accuracy in design placement.
This functionality not only streamlines production but also enhances overall output quality by eliminating potential mistakes caused by misaligned needle placement.
Another advantage of utilizing an Absolute Check feature is its ability to minimize material wastage. When needles are accurately positioned, there’s less risk of stitching errors that could ruin materials or garments, ultimately reducing production costs and enhancing efficiency.
Zoom View Functionality
In addition to the Absolute Check feature, another valuable tool for optimizing needle placement on multi-needle embroidery machines is the Zoom View functionality.
This capability enables users to inspect design details up close before initiating the stitching process. By zooming in on intricate elements within a design, operators can ensure proper alignment and positioning to achieve flawless results.
Furthermore, Zoom View functionality empowers users to make real-time adjustments as needed to achieve their desired placement goals effectively.
Whether it’s repositioning elements within a complex pattern or fine-tuning specific details for optimal visual impact, this tool provides operators with greater control over their embroidery projects.
Embroidery Techniques Exploration
Endless Embroidery
Endless embroidery allows for continuous stitching across multiple hooping, which is perfect for creating seamless borders or large-scale designs. To achieve this, precise alignment between the hooping is crucial.
The placement of the needles on a multi-needle embroidery machine plays a vital role in ensuring that the design aligns seamlessly across each hooping. Without accurate needle placement, the design might not line up correctly, resulting in an inconsistent pattern.
When working with endless embroidery, it’s essential to consider how each section of the design will connect with the next one.
For instance, if you’re embroidering a floral border that needs to seamlessly flow from one end to another without interruptions or misalignment, precise needle placement becomes paramount.
This technique demands meticulous attention to detail and careful handling of the fabric and hoops.
Applique Methods
Applique methods involve layering fabric pieces to create dimensional designs within an embroidery project.
Accurate needle placement is critical for securing these applique pieces firmly onto the base fabric while maintaining their intended positioning throughout the stitching process.
Various techniques such as satin stitch, blanket stitch, and cut work are commonly used in applique work.
For example, when using satin stitch applique method where stitches completely encase the raw edges of fabric shapes to prevent fraying and ensure durability; precise needle placement ensures that every stitch falls exactly where it needs to be along the edge of each fabric piece.
Similarly, in cut work applique method where portions of fabric are cut away before being secured onto another piece of material; exact needle positioning guarantees clean and accurate cuts around intricate shapes without damaging surrounding areas.
Mastering Multi-Needle Placement
Top Tips
There are several top tips to ensure successful and high-quality embroidery. First, using high-quality embroidery thread is crucial for vibrant colors and durability.
The quality of the thread directly impacts the final appearance and longevity of the embroidered design. Opting for threads specifically designed for multi-needle machines can prevent breakage and ensure smooth stitching.
Always remember to test embroidery placement on scrap fabric before starting a project. This simple step allows you to assess how the design will look on the actual garment or item, ensuring that it’s centered and positioned correctly.
By testing on scrap fabric, you can also make any necessary adjustments to the design or placement without risking damage to your final piece.
Regularly cleaning and maintaining your multi-needle embroidery machine is essential for optimal performance.
Dust, lint, or residue from previous projects can affect needle placement by causing inconsistencies in stitching or even damaging delicate components within the machine.
A well-maintained machine not only ensures accurate needle placement but also extends its lifespan.
Troubleshooting Common Issues
Needle Misalignment
Misaligned needles on a multi-needle embroidery machine can lead to thread breakage and uneven stitching. To prevent this, it’s crucial to regularly check and adjust the needle positions as needed.
Ensure that all needles are correctly inserted and aligned in their designated slots. This simple step can make a significant difference in the quality of your embroidery work.
When one or more needles are misaligned, they can cause the threads to break during the embroidery process. This not only leads to frustration but also affects the overall quality of the finished design.
By taking a few moments to inspect and adjust needle alignment before starting each project, you can save time and minimize potential issues.
Enhancing Embroidery Skills
Learning Resources
There are various learning resources available. Online tutorials offer step-by-step guidance on operating multi-needle machines, including detailed instructions on needle placement and design alignment.
These tutorials can be found on platforms like YouTube or specialized embroidery websites, providing valuable insights into optimizing needle positions for different designs.
Embroidery forums are another excellent resource for enhancing your skills in needle embroidery. They offer a wealth of tips and troubleshooting advice from experienced embroiderers who have encountered various challenges with needle placement.
By participating in these forums, you can learn from others’ experiences and gain practical knowledge that can help you improve your technique.
Manufacturers’ websites play a crucial role in providing comprehensive support for users of multi-needle machines. They often feature instructional videos demonstrating proper needle placement techniques and frequently asked questions (FAQs) addressing common issues related to positioning the needles accurately.
These resources can be invaluable for both beginners and experienced embroiderers seeking to refine their skills.
Tutorials and Guides
Video tutorials serve as an indispensable tool for understanding the intricacies of multi-needle machine operation, including how to position the needles effectively.
These visual guides demonstrate various techniques for placing needles based on different design requirements, offering practical examples that users can replicate when working with their own projects.
In addition to video tutorials, step-by-step guides provide detailed explanations of hooping methods and design alignment processes essential for achieving precise needle placement during embroidery work.
Understanding these fundamental aspects is crucial in ensuring that every stitch is executed accurately according to the intended design specifications.
Troubleshooting resources are equally important. They provide solutions for common issues such as misaligned needles or inconsistent stitching patterns, empowering users to identify problems quickly and implement corrective measures effectively.
Closing Thoughts
You’ve now delved deep into the art of needle placement on multi-needle embroidery machines. From mastering the basic techniques to exploring advanced strategies, you’ve gained a wealth of knowledge that will undoubtedly enhance your embroidery skills. Remember, precision is key, and with the right tools and techniques, you can elevate your craft to new heights.
So, go ahead, put your newfound knowledge to the test. Grab your embroidery machine, experiment with different placement strategies, and don’t be afraid to troubleshoot common issues. The world of embroidery is at your fingertips, waiting for you to explore and conquer it.
FAQs – How To Do Placement of Needle on Multi Needle Embroidery Machine
How important is needle placement in multi-needle embroidery machines?
Proper needle placement is crucial for achieving precise and high-quality embroidery. It ensures that the design is accurately executed, preventing errors and fabric damage.
What are some advanced needle placement strategies to enhance embroidery results?
Implement techniques like pattern centering, corner alignment, and rotation adjustments for intricate designs. Utilize precision tools such as laser guides or digital positioning systems to achieve impeccable results.
How can I troubleshoot common needle placement issues on a multi-needle machine?
Check for bent needles, thread tension problems, or hoop misalignment. Ensure proper threading and bobbin insertion. Clean the machine regularly to prevent buildup affecting needle movement.
Are there specific tools designed to aid in precise needle placement on multi-needle machines?
Yes! Precision tools like laser guides and digital positioning systems provide accurate guidance for placing needles with utmost accuracy, resulting in flawless embroidery output.
What are some effective ways to enhance my overall embroidery skills using a multi-needle machine?
Practice different embroidery techniques such as layering threads, creating textures, and experimenting with various stitch patterns. Mastering these skills will elevate your proficiency in utilizing a multi-needle embroidery machine.


One Comment