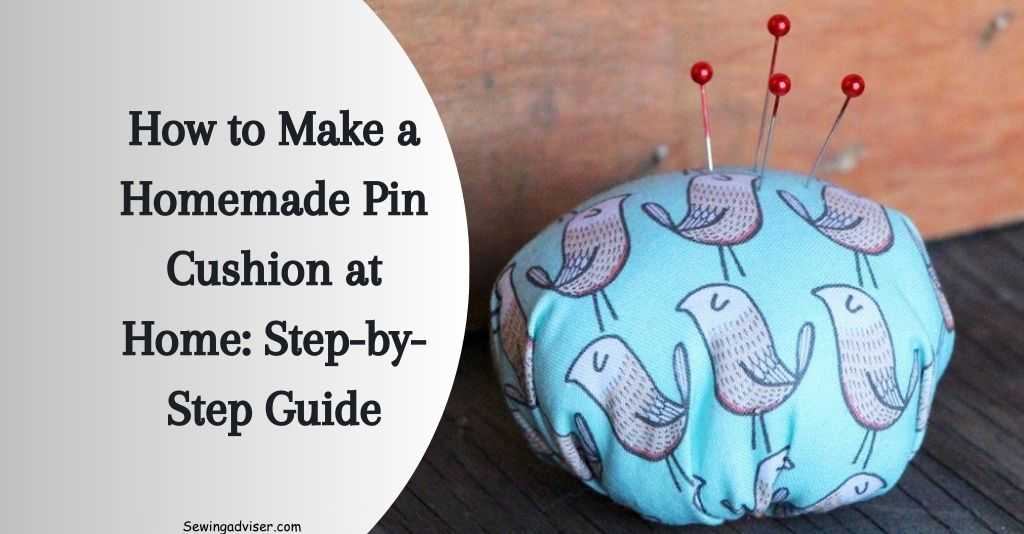
How to Make a Homemade Pin Cushion: 2024 Step-by-Step Guide
Ever found yourself scrambling to find a safe place for your pins and needles while sewing? In this guide, we’ll delve into the art of crafting your very own homemade pin cushion using fabric squares and hot glue.
Whether you’re an experienced crafter or just starting out, creating a custom pin cushion can add a touch of personality to your sewing kit and keep those sharp little tools in one convenient spot.
From selecting the perfect fabric to choosing filling materials that suit your needs, we’ve got you covered with simple step-by-step instructions. So, are you ready to infuse some creativity into this essential tool?
Key Takeaways
- Choosing the right materials is crucial for a durable and functional homemade pin cushion. Opt for sturdy fabrics and quality filling materials to ensure longevity.
- Preparing your materials by cutting and measuring them accurately will contribute to the overall success of your pin cushion project. Attention to detail is key.
- Following the step-by-step construction process outlined in the article will help you create a well-crafted and effective pin cushion tailored to your needs.
- Get inspired by the creative pin cushion ideas and upcycling techniques discussed to personalize your design and make it unique to you.
- Implement expert tips for functional pincushions, such as incorporating extra storage or using specialized fabrics for different types of pins, to enhance the practicality of your creation.
- Pay attention to decorative techniques and finishing touches to add a personal and visually appealing element to your homemade pin cushion, elevating its aesthetic value.
Choosing the Right Materials
Fabric Options
When creating a homemade pin cushion, it’s essential to consider the fabric you’ll sew. The fabric choice can impact both the functionality and aesthetics of your pin cushion.
Factors like durability, thickness, and ease of cleaning should guide your decision. For instance, if you’re aiming for a durable option that can withstand frequent use, consider using denim or canvas fabric.
The type of fabric also affects how easy it is to insert pins into the cushion and keep them securely in place. Thicker fabrics like wool or felt provide resistance for pins, preventing them from slipping out easily.
On the other hand, silk or satin fabrics may be more challenging to keep pins in place due to their slippery texture.
When selecting a fabric for your pin cushion, think about its ability to hold up over time while maintaining its appearance. Consider cotton prints with small patterns as they can effectively hide any marks left by pins and needles.
Filling Varieties
Exploring different filling options is crucial when making a homemade pin cushion. Each filling material comes with its own set of pros and cons that directly influence the functionality of the pin cushion.
For example, polyester fiberfill offers resilience and maintains shape well over time but may not provide enough resistance for holding thinner sewing pins securely.
Alternatively, crushed walnut shells are an eco-friendly option that adds weight to the pin cushion while allowing sharp objects like needles to penetrate easily without dulling their points.
Considerations such as allergies should also play a role in choosing filling materials; some individuals may have sensitivities to certain fillings like wool roving or kapok fiber stuffing commonly used in crafts.
Decorative Elements
Personalizing your homemade pin cushions with decorative elements adds flair and uniqueness to each piece. Using embellishments such as lace trims or colorful buttons can enhance visual appeal while reflecting your personal style preferences.
In addition to aesthetic enhancement, decorative elements serve functional purposes too; attaching ribbons around the edge allows you to tie off loose threads conveniently during sewing projects.
Preparing Your Materials
Fabric Cutting
Precision and accuracy are crucial. You want to ensure that the fabric pieces are cut neatly and accurately to create a professional-looking pin cushion.
Careful measurements play a vital role in achieving this, as they help you avoid uneven edges or misshapen pieces. To achieve precise cuts, use sharp fabric scissors and consider using pins or fabric markers to mark your cutting lines.
Proper techniques for cutting fabric pieces involve laying the fabric flat on a clean, smooth surface, ensuring there are no wrinkles or folds that could distort your measurements.
When measuring and marking the fabric, make sure to use a ruler or measuring tape for accurate dimensions. For instance, if you’re creating a square pin cushion, measure each side precisely before cutting.
Filling Preparation
Before assembling your homemade pin cushion, it’s essential to prepare the filling materials properly. Ensuring cleanliness and proper handling of fillings is key to preventing any dirt or debris from getting inside the pin cushion.
One technique for fluffing and distributing fillings evenly involves gently pulling apart any clumps in materials like polyester fiberfill or wool roving before adding them to the pin cushion cover.
Preparing filling materials also involves choosing suitable options such as polyester fiberfill, crushed walnut shells, sawdust, cotton batting, or wool roving based on personal preference. Each material has its own unique characteristics which can affect how firm or soft your finished pin cushion will be.
Tool Organizing Organizing tools for easy access during assembly plays an important role in streamlining the process of making a homemade pin cushion.
By having all necessary tools within reach at your workspace such as scissors, sewing needles, and thread spools you can work more efficiently without interruptions due to constant searching for misplaced items.
The importance of a well-prepared workspace cannot be overstated; having ample lighting along with adequate space allows you to spread out fabrics comfortably while avoiding unnecessary clutter that could lead to confusion during assembly.
Step-by-Step Pin Cushion Construction
Sewing Techniques
It’s essential to start with a strong foundation. Begin by threading your needle and tying a knot at the end of the thread. The most commonly used basic stitch is the running stitch, which involves passing the needle in and out of the fabric in a straight line.
Understanding different types of stitches is crucial for creating diverse patterns on your pin cushion. For instance, you can use a backstitch for added durability or experiment with cross-stitches for decorative elements.
It’s important to ensure that your stitches are secure and tight to prevent any unraveling over time. This will help maintain the integrity of your pin cushion throughout its usage.
In terms of decorative sewing, you can explore various techniques such as embroidery or appliqué to add an artistic touch to your pin cushion. These decorative elements not only enhance the visual appeal but also showcase your creativity.
By incorporating decorative stitches like French knots or blanket stitches, you can elevate the aesthetic value of your pin cushion, making it unique and visually appealing.
Filling Insertion
Proper methods for inserting fillings into the pin cushion involve ensuring even distribution within its structure.
Whether using polyester fiberfill or crushed walnut shells, evenly distributing these fillings ensures consistent support for pins and needles across the entire surface area.
Securing these fillings effectively within the cushion is vital to prevent shifting or clumping over time. This step contributes significantly to maintaining both functionality and longevity in everyday use.
To achieve this, consider using small amounts of filling at a time while gently pressing them into place until achieving the desired fullness without overstuffing.
Final Assembly
Assembling all components marks an exciting phase toward completing your homemade pin cushion project. During this stage, it’s crucial to pay close attention to detail as any imperfections may affect both aesthetics and functionality.
Smoothen out any imperfections during assembly by carefully adjusting fabric tension around fillings while ensuring uniformity in appearance from all angles.
Creative Pin Cushion Ideas
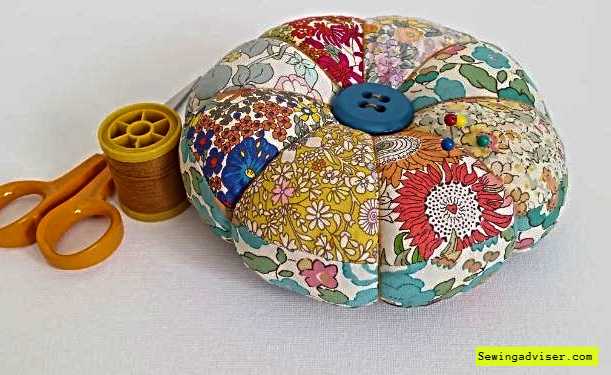
Flower Petal Design
Creating a flower petal design for a homemade pin cushion adds a unique and charming touch to your sewing essentials. To achieve an intricate petal pattern, consider using different colored fabrics or felt to make each petal stand out.
By layering the petals and securing them in place, you can create dimension and texture that will make your pin cushion visually appealing and functional.
For instance, you can cut out multiple teardrop-shaped pieces of fabric or felt in varying sizes to represent the petals. Layer these pieces on top of each other, starting with the largest at the bottom and gradually decreasing in size as you move up.
Stitch them together at the center to secure the layers while leaving enough space around the edges for stuffing. This technique not only creates a beautiful flower-like appearance but also offers practical benefits by providing different areas for pin insertion.
Another tip is to add decorative elements such as embroidery stitches or buttons at the center of the flower design to enhance its overall look. These details can further elevate your homemade pin cushion’s aesthetic appeal while allowing you to showcase your creativity through personalized touches.
Teacup Pincushions
Crafting teacup-inspired pincushions presents an opportunity to repurpose old teacups into functional and decorative sewing accessories. By making use of vintage or mismatched teacups, you can create charming pincushions that serve as eye-catching additions to your crafting space while offering practical utility.
To start this project, select a teacup with an appealing design or color scheme that complements your personal style or sewing room decor. Then, fill it with soft padding material such as polyester fiberfill until it reaches just below the rim of the cup. Next, cover this padding with fabric secured tightly over it before adding pins and needles.
Repurposing teacups for pincushions not only gives new life to old items but also allows you to express individuality through creative combinations of cups and fabrics. These handmade creations make thoughtful gifts for fellow crafters who appreciate unique and useful sewing accessories.
Mason Jar Sewing Kit
Transforming a mason jar into a multifunctional sewing kit provides both storage space for sewing essentials along with an integrated pincushion on top—creating compact organization solutions for sewers on the go or those working within limited spaces.
Upcycling for Unique Designs
Jar Lid Pincushions
Crafting homemade pin cushions using jar lids is a fantastic way to upcycle and create something functional from recycled materials. By repurposing jar lids, you can contribute to reducing waste while also crafting unique and portable pincushions.
Picture this: transforming an ordinary jar lid into a colorful and handy pincushion that you can easily carry around when sewing.
To make these jar lid pincushions, start by gathering some fabric scraps, filling material like cotton or wool, a needle, thread, and of course, the jar lids. You’ll cut the fabric into circles larger than the lid’s diameter.
Then sew around the edges leaving a small opening to fill it with your chosen material before closing it up neatly. Finally, glue or sew the filled fabric onto the inside of the jar lid.
Upcycling isn’t just about sustainability; it’s also about creativity! For instance, if you have old jars lying around waiting to be thrown away, consider using their lids to create adorable pincushions instead!
Quilted Leaf Pincushions
Another innovative way to craft homemade pin cushions is by making quilted leaf-shaped designs that are not only visually appealing but also nature-inspired.
Imagine having beautifully crafted leaf-shaped pincushions adorning your sewing space they add an element of charm while being fully functional.
To make these quilted leaf pincushions at home, gather some vibrant fabric in different shades resembling leaves and cut them into leaf shapes as per your desired size.
Sew two pieces together (inside out), leaving a small opening to turn them right side out before stuffing them with filling material such as polyester fiberfill or crushed walnut shells for added weight.
By incorporating nature-inspired designs into your homemade pin cushions through quilted leaf patterns, you’re not only adding uniqueness but also infusing elements of nature into everyday items.
Scandi Pillow Pincushions
Crafting stylish pillow-shaped homemade pin cushions inspired by Scandinavian design elements adds modernity and functionality to your sewing essentials collection.
These trendy pillow pincushions don’t just serve their purpose; they also elevate your workspace aesthetics with their clean lines and minimalist appeal.
Expert Tips for Functional Pincushions
Needle Storage Solutions
When creating a homemade pin cushion, it’s crucial to consider needle storage options. Incorporating compartments or pockets into the design can help keep needles organized and easily accessible.
By adding designated spaces within the pincushion, you can ensure that different types of needles, such as sewing or embroidery needles, have their own secure spots.
To maintain organization and accessibility for needles, consider using various sections within the pincushion to separate different needle sizes or types.
This way, when working on a project, you can quickly locate the specific needle needed without having to sift through all your supplies.
For instance:
- Adding small fabric pouches onto the surface of the pincushion allows for easy separation of needles.
- Utilizing different colored fabrics or threads in each compartment helps visually distinguish between various needle types.
Best Fillings for Durability
Selecting durable fillings is essential for ensuring that your homemade pin cushion lasts a long time. When considering filling options, prioritize materials with resilience and longevity factors. Materials like wool roving or polyester fiberfill are excellent choices due to their ability to retain shape over time.
By making informed choices regarding durable fillings, you’ll create a pincushion that remains functional even after prolonged use. These resilient fillings provide ample support for securing needles in place while resisting wear and tear.
For example:
- Wool roving offers natural durability and maintains its shape well.
- Polyester fiberfill is known for its longevity and ability to withstand repeated use without compressing too much.
Size and Shape Considerations
The size and shape of your homemade pin cushion play a significant role in its functionality. When determining these aspects, factor in how they will impact your sewing projects’ convenience and efficiency.
Customizing the size and shape based on specific needs ensures an optimal experience while working on various crafts.
Consider tailoring the pincushion dimensions based on where it will be used most frequently whether at home by a sewing machine or during travel with portable crafting kits.
Additionally:
- A rectangular-shaped pincushion may fit better next to a sewing machine than around other tools.
- Smaller circular shapes are ideal for compact travel-friendly designs.
Decorative Techniques and Finishing Touches
The batting plays a crucial role in ensuring comfort for your pins and needles. The batting, which is the soft inner layer of the pincushion, provides a cushioning effect, making it easier to insert and remove pins without damaging them. To achieve this, use materials like cotton or wool as they offer both softness and durability.
For a polished look on your pincushions, consider employing professional-quality top-finishing techniques.
This involves neatly closing up the opening used for turning the pincushion right side out after stuffing. A seamless closure can be achieved using ladder stitch or invisible stitch methods, resulting in a clean and refined appearance.
Incorporating embellishments such as ribbons, lace, buttons, or beads can greatly enhance the visual appeal of your homemade pin cushions.
When selecting trims for decoration purposes, ensure that they are suitable for sewing onto fabric without causing fraying or unraveling over time.
Personalizing your pincushions with creative embellishments allows you to add unique touches that reflect your personal style and preferences.
Thematic decorations provide an excellent opportunity to infuse creativity into your homemade pin cushions by incorporating elements inspired by various themes such as holidays or seasons.
For instance, you could adorn your pincushions with miniature pumpkins for fall-themed decor or tiny snowflakes for winter-inspired designs.
By personalizing your pincushions with thematic elements based on occasions or interests close to your heart, you can create meaningful pieces that resonate with you.
Caring for Your Homemade Pin Cushion
Maintenance Tips
To maintain the quality and functionality of your homemade pin cushion, it’s essential to adopt a few maintenance tips. Firstly, regularly inspect the pincushion for any signs of wear and tear, such as loose seams or fabric fraying.
By identifying these issues early on, you can promptly address them and prevent further damage. Consider using a gentle brush or lint roller to remove any accumulated dust or debris from the surface of the pincushion.
Furthermore, preserving the longevity of your homemade pin cushion involves employing regular care practices. For instance, avoid exposing it to direct sunlight for prolonged periods as this can cause fading and deterioration of the fabric.
Similarly, store it in a clean and dry environment to prevent mold or mildew growth. By following these essential maintenance tips, you can ensure that your homemade pin cushion remains in optimal condition over time.
Storage Advice
Consider utilizing storage solutions that protect its condition. One effective method is to place the pincushion in a small container with a lid when not in use. This helps safeguard it from dust accumulation while also preventing accidental damage.
Alternatively, if you have multiple sewing supplies stored together, consider allocating a separate compartment specifically for the pin cushion within your storage container.
Moreover, preserving the condition of your homemade pin cushion during storage requires maintaining proper airflow around it. Avoid sealing it in an airtight bag or container as this can lead to moisture retention and potential damage to the fabric over time.
Instead, opt for breathable storage options such as fabric pouches or open containers that allow air circulation while providing protection against environmental elements.
Longevity Practices
To ensure long-lasting homemade pin cushions, there are several best practices worth considering. Firstly, choose high-quality materials when creating your pincushion as they contribute significantly to its extended longevity.
Additionally, regularly rotating where you place pins on the pincushion ensures an even distribution of pressure, preventing premature wear on specific areas. By adopting these longevity practices, you can maintain both quality and functionality over time.
Summary – How to Make a Homemade Pin Cushion
Congratulations on making it through the entire process of crafting your homemade pin cushion! You’ve learned about choosing the right materials, preparing and constructing your pin cushion, exploring creative ideas, expert tips, decorative techniques, and caring for your creation.
Now it’s time to put your newfound knowledge into action. Gather your materials, set aside some time, and start creating your very own unique pin cushion. Don’t be afraid to experiment and let your creativity shine through.
Remember, practice makes perfect, so don’t get discouraged if your first attempt isn’t exactly as you envisioned. Enjoy the process and have fun with it!
Now go ahead and show off your handmade pin cushion to your friends or family. Share your experience and inspire others to embark on their crafting journey. Happy pin cushion making!
Frequently Asked Questions
How can I choose the right materials for making a homemade pin cushion?
When choosing materials, prioritize durability and comfort. Opt for sturdy fabrics like cotton or linen and soft fillings such as wool or polyester. Consider your personal style and sewing expertise to select the best materials for your unique pin cushion.
What are some creative ideas for designing a homemade pin cushion?
You can get creative with various shapes, colors, and embellishments. Think beyond the traditional tomato-shaped pincushion and explore fun designs like cupcakes, animals, or miniature landscapes. Incorporating embroidery, buttons, or lace can also add an artistic touch to your creation.
Are there any expert tips for creating functional pincushions?
To make functional pincushions, focus on practicality by incorporating features like storage pockets or built-in needle sharpeners. Consider using magnetic elements to keep needles secure. Prioritize usability without compromising on aesthetic appeal when crafting your pincushion.
What are some decorative techniques that I can use to enhance my homemade pin cushion?
Embellish your pin cushion with decorative stitches, appliques, or fabric manipulation techniques such as pleating or smocking. You could also experiment with beading or sequins to add sparkle and personality to your creation while showcasing your sewing skills.
How do I properly care for my homemade pin cushion?
Regularly clean your pin cushion by gently removing any lint buildup using a sticky roller brush or masking tape. Avoid washing unless absolutely necessary; if you must wash it due to stains, hand wash gently in mild detergent and air dry thoroughly before use again.