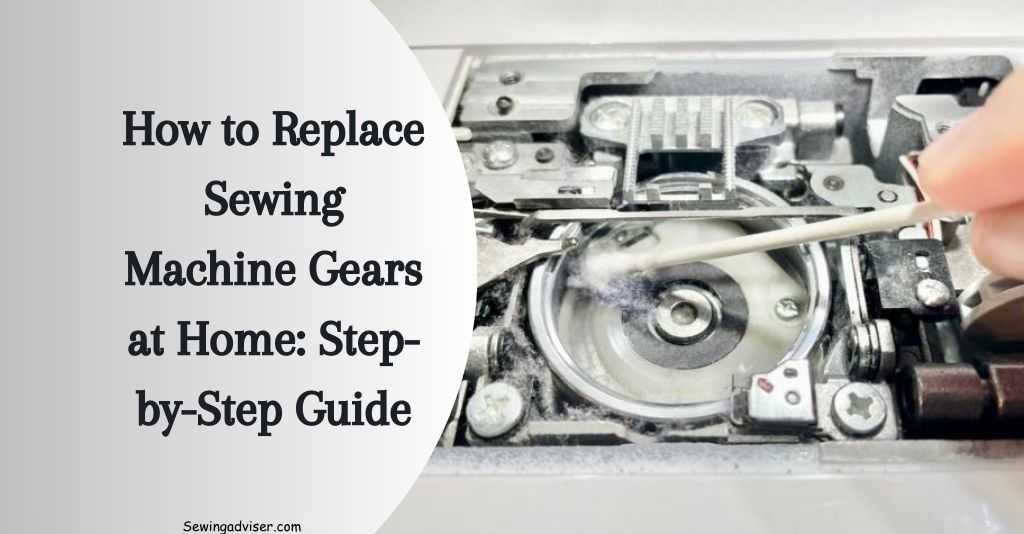
How to Replace Sewing Machine Gears: 2024 Step-by-Step Guide
Is your sewing machine making unusual noises or failing to stitch correctly? It may be time to replace the gears. Don’t fret; while the idea of delving into your sewing machine might seem intimidating, it’s a straightforward process that you can easily tackle with some guidance.
In this post, we’ll walk you through the simple steps of replacing sewing machine gears, equipping you with the knowledge and confidence needed to keep your beloved machine in top working condition.
Whether you’re an experienced seamstress or just starting out, understanding how to replace sewing machine gears is a valuable skill that will save you both time and money.
By learning this essential repair technique, you’ll avoid costly professional repairs and extend the lifespan of your trusty sewing companion’s needle and bobbin.
Key Takeaways
- Understanding the different sewing machine gears is essential before attempting any replacement.
- Preparing for the gear replacement process by gathering the necessary tools and ensuring a clean workspace can streamline the task.
- Carefully accessing and removing the old gears, while paying attention to their placement and orientation, is crucial for a successful replacement.
- When selecting replacement gears, ensure compatibility with the specific sewing machine model and consider the material and durability of the gears.
- Proper installation of the new gears and synchronization of the machine timing are critical to ensure smooth and accurate sewing operations.
- After reassembling the machine, it’s important to troubleshoot any issues that may arise post-replacement to ensure optimal functionality.
Understanding Sewing Machine Gears
Gear Types
Sewing machines use different types of gears to transfer power from the motor to the needle and hook. There are three main types: spur, helical, and bevel gears. Spur gears have straight teeth and are commonly used in sewing machines due to their simplicity and efficiency.
On the other hand, helical gears have angled teeth, which provide smoother and quieter operation but may require more maintenance. Bevel gears have cone-shaped teeth and are often used when a change in direction is needed.
Each gear type has its own set of advantages and disadvantages. For instance, spur gears are durable and cost-effective but can produce more noise during operation compared to helical gears.
Helical gears offer smoother movement but may generate axial thrust, requiring additional design considerations for sewing machine applications.
Specific applications for different gear types within a sewing machine depend on factors such as noise tolerance, space constraints, load requirements, or the need for directional changes in power transmission.
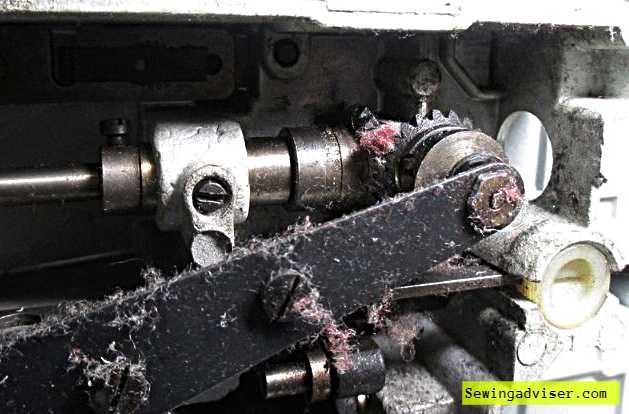
Common Issues
One issue is wear due to regular use over time. This wear can lead to decreased performance or even complete failure of the gear system within the machine.
The impact of these issues on overall machine performance includes slower stitching speed, irregular stitching patterns, or unusual sounds during operation.
Gear issues can significantly affect stitching quality by causing skipped stitches or uneven tension on fabric layers being sewn together. These problems not only disrupt workflow but also result in subpar finished products that do not meet quality standards.
Preparing for Replacement
Safety Precautions
When replacing sewing machine gears, safety is paramount. Always unplug the machine before starting any work. To prevent accidents, wear protective gear such as gloves and safety goggles. Avoid touching moving parts to reduce the risk of injury.
Potential hazards during gear replacement include sharp edges and electrical components. Be cautious when handling these parts to avoid cuts or electric shock. Be mindful of loose screws or small pieces that could pose a choking hazard if accidentally ingested.
To ensure a safe working environment, it’s essential to keep the workspace well-lit and organized. Clear any clutter around the sewing machine to minimize tripping hazards.
By following these precautions, you can complete the gear replacement process safely and efficiently.
Machine Disassembly
Before delving into gear replacement, it’s crucial to disassemble the sewing machine carefully. Start by removing the needle plate and bobbin case to access the inner workings of the machine.
Next, detach any auxiliary components such as presser feet or thread guides that may obstruct your access to the gears.
As you disassemble the machine, handle each component with care to prevent damage. Keep track of all removed parts by organizing them in a designated area or using labeled containers for easy reassembly later on.
Remember that careful disassembly is key to successful gear replacement without causing further issues with your sewing machine’s functionality.
Discover The Value: How Much Is My Sewing Machine Worth?
Accessing the Gears
Removing Covers
Removing the covers is a crucial first step. These covers shield the internal components, so taking them off allows access to the gears for replacement. However, it’s essential to handle this step with care to avoid causing any damage.
To safely detach the covers without causing harm, start by consulting the sewing machine manual for specific instructions on cover removal. Some machines may have screws securing the covers in place, while others might have clips or latches.
Gently remove these fastenings using appropriate tools like screwdrivers or pliers, ensuring not to force anything that seems stuck.
One common challenge associated with cover removal is dealing with delicate parts such as wires and connectors inside modern computerized sewing machines.
It’s important to take note of their positions before detaching any covers and carefully disconnect them if necessary. Some older machines may have brittle or fragile covers due to age and wear, requiring extra caution when handling them.
Locating Gears
After successfully removing the covers, locating the sewing machine gears becomes the next critical task in gear replacement. The precise location of these gears varies depending on different models and types of sewing machines.
Visual references or diagrams provided in the user manual can be incredibly helpful in identifying where exactly each gear is situated within your specific machine model.
If visual aids are unavailable, observing how various parts move when manually turning mechanisms such as handwheels or balance wheels can also help pinpoint gear locations.
Accessing hard-to-reach gears within a sewing machine often involves disassembling certain components further beyond just removing basic external covers.
This may entail unscrewing additional panels or even accessing through an aperture specifically designed for maintenance purposes.
Removing Old Gears
There are several methods that can be employed. One common approach is to carefully disassemble the machine, taking note of the position and orientation of each gear as it is removed.
This meticulous process ensures that the new gears can be installed correctly later on. However, some machines may have specific mechanisms for gear removal, such as access panels or removable components designed for this purpose.
During gear extraction, it’s essential to exercise patience and precision. Some potential obstacles during this step include seized or stuck gears due to rust or debris buildup.
In such cases, gentle tapping with a rubber mallet or applying a penetrating lubricant can help loosen the gears without causing damage to other components.
It’s important to avoid using excessive force during extraction as this could lead to further damage and complications in the repair process.
Another crucial aspect of preparing for gear replacement is cleaning the gear area thoroughly before installing new components. Any debris or residue left behind from old gears must be removed completely as they can affect the performance and longevity of the new gears if not addressed properly.
Utilizing suitable cleaning products like degreasers and lint-free cloths can aid in effectively removing any remnants from the previous gear.
For instance, using a small brush or compressed air can help dislodge stubborn particles from hard-to-reach areas within the sewing machine mechanism.
Residue build-up around these parts has been known to cause issues with smooth gear operation over time if not cleaned adequately before installing replacements.
Selecting Replacement Gears
Ensuring that the replacement gears are compatible with your specific sewing machine model is crucial. Aftermarket or generic replacement gears may not always fit perfectly, leading to operational issues.
To avoid this, it’s essential to consider factors such as the make and model of your sewing machine before purchasing replacement gears.
For example, some machines have unique gear specifications that might not be readily available in generic replacements.
To ensure compatibility, you can consult the sewing machine’s manual or contact the manufacturer for information on compatible replacement parts.
Some online forums and communities dedicated to sewing enthusiasts often provide valuable insights into which aftermarket gears work best with certain models.
By doing thorough research and seeking expert advice when necessary, you can minimize the risk of purchasing incompatible replacement gears.
When assessing the quality of replacement gears, look for indicators of durability and performance. High-quality replacement gears are typically made from durable materials such as metal alloys or reinforced plastics.
They should also exhibit precise engineering with smooth teeth and minimal wear marks. Inspecting these details can help determine if a replacement gear is built to last under regular usage conditions.
Furthermore, authenticity plays a significant role in ensuring quality; genuine parts from reputable manufacturers are more likely to offer consistent performance compared to counterfeit alternatives.
Verifying the source of the replacement part through authorized dealers or trusted suppliers can help guarantee its reliability and longevity.
Installing New Gears
Alignment
Proper alignment during gear replacement is crucial to ensure the smooth operation of your sewing machine. When replacing gears, it’s essential to align them correctly to avoid any potential issues in the future.
To align new gears within the machine, start by carefully examining the positioning of each gear and ensuring that they fit perfectly into their designated spaces. Next, gently adjust the gears until they sit flush and mesh properly with one another.
Once you have aligned the new gears, rotate them manually to confirm that they move smoothly without any resistance or grinding noises. This step is vital as it helps identify any misalignments before fully securing the gears in place.
Incorrect alignment can lead to uneven wear and tear on the gears, resulting in reduced efficiency and potential damage to other components of the sewing machine.
Securing Gears
After aligning the new gears, securely fastening them within the sewing machine is paramount for long-term functionality. Use appropriate tools such as screwdrivers or wrenches to tighten all fasteners holding the gears in place. It’s important not to over-tighten these fasteners as it may cause unnecessary strain on the gears, leading to premature wear.
Proper fastening prevents future issues by ensuring that the newly installed gears remain stable during operation. Common mistakes during this crucial step include uneven tightening of fasteners or neglecting certain screws altogether, which can result in loose-fitting parts and subsequent malfunctions.
Synchronizing Machine Timing
Timing Techniques
Sewing machine gears play a crucial role in the operation of the machine, especially concerning the timing mechanism. The timing mechanisms ensure that various parts of the sewing machine work together seamlessly to create precise and accurate stitches. When replacing sewing machine gears, it’s essential to understand their relationship with the overall timing of the machine.
During gear replacement, adjustments to the timing mechanism are often necessary to ensure that everything continues to function correctly.
For example, if you’ve just installed new gears, you might need to realign them properly so that they mesh perfectly and maintain synchronization during operation. Without proper alignment, your stitches may be irregular or even cause damage to your fabric.
Troubleshooting tips related to timing issues post-gear installation are also important for ensuring smooth operation after replacing sewing machine gears.
This involves checking for any signs of misalignment or irregular stitching patterns and making necessary adjustments until optimal performance is achieved.
Test Stitches
After replacing the sewing machine gears and adjusting the timing mechanism as needed, conducting test stitches is crucial in determining whether everything has been set up correctly. Test stitches serve as an indicator of successful gear replacement by revealing how well all components are working together.
When conducting test stitches, pay close attention to factors such as stitch length consistency and thread tension. These aspects can provide valuable insights into whether your gear replacement was successful or if further adjustments are required.
It’s important to address potential issues that may arise during initial testing after gear replacement. For instance, if you notice skipped stitches or uneven tension during testing, this could indicate lingering problems with either the replaced gears or their alignment within the timing mechanism.
Reassembling the Machine
Covers Replacement
After successfully replacing the sewing machine gears, it’s crucial to reattach the covers properly. Begin by ensuring that the covers are aligned correctly with the machine.
Secure them in place using the appropriate screws or fasteners, as per the manufacturer’s guidelines. Proper alignment and securing methods are essential to prevent any operational issues caused by misaligned or loose covers.
When replacing covers, it’s important to consider any specific instructions provided in the sewing machine manual. Some machines may have unique cover replacement procedures due to their design or features.
For instance, certain models might require additional steps for aligning electronic components within the covers. Always refer to the manual for model-specific guidance on cover replacement.
For example:
- If you’re working on a computerized sewing machine, you may need to ensure that delicate electronic components within the covers are not disturbed during reattachment.
- Older mechanical machines might have simpler cover replacement processes but still require careful alignment and securing methods.
Final Checks
Once all necessary components have been replaced and secured, perform a comprehensive inspection of critical areas before reassembling your sewing machine. Check for any signs of damage or wear on parts such as belts, pulleys, and other related mechanisms after gear replacement is complete.
Inspect all moving parts thoroughly to ensure they operate smoothly without any unusual sounds or resistance. Any red flags such as grinding noises or difficulty in turning handwheels could indicate incomplete gear replacements or faulty assembly procedures post-replacement.
Additionally:
- Verify proper tension adjustment of belts if applicable.
- Test each stitch type and examine stitch quality for consistency.
- Ensure correct threading throughout different sections of your sewing machine.
Troubleshooting Post-Replacement Issues
After replacing sewing machine gears, it’s crucial to address any potential issues that may arise. One common problem is excessive noise, which can be caused by various factors such as misalignment or lack of lubrication.
To minimize noise levels, start by ensuring proper alignment and applying lubricant to the gears. This will help reduce friction and subsequently lower the overall noise produced by the machine.
Identifying abnormal noises post-gear replacement is essential for troubleshooting. Unusual sounds could indicate issues with gear meshing, worn-out components, or improper installation.
By carefully listening to the machine while it’s in operation, you can pinpoint any irregularities and take corrective measures promptly to prevent further damage.
To achieve smooth operation after replacing sewing machine gears, focus on addressing operational issues effectively.
If the machine exhibits jerky movements or uneven stitching patterns, check for any residual debris from the gear replacement process that might be interfering with its functionality. Ensure that all components are securely fastened and properly adjusted to facilitate seamless operation.
Maintaining smooth operation over time requires consistent care and attention. Regularly inspecting the sewing machine for signs of wear and tear can help prevent future operational issues stemming from gear replacement.
Implement a routine maintenance schedule that includes cleaning, lubricating moving parts, and checking for any loose connections or abnormalities in performance.
Closing Thoughts – How to Replace Sewing Machine Gears
You’ve now mastered the art of replacing sewing machine gears. By understanding the intricacies of the gears, preparing meticulously, and skillfully executing each step, you’ve become a sewing machine gear replacement pro.
Remember, practice makes perfect, so don’t be discouraged if it feels daunting at first. Troubleshooting post-replacement issues may arise, but armed with your newfound knowledge, you’ll tackle them with confidence.
Now it’s time to roll up your sleeves and give it a try. Grab your tools, take a deep breath, and dive into the world of sewing machine gear replacement. Your newly acquired expertise will not only save you money but also empower you to keep your beloved sewing machine running smoothly for years to come.
Frequently Asked Questions
How do I know if my sewing machine gears need replacement?
If your sewing machine is making unusual noises, skipping stitches, or the handwheel is difficult to turn, it may indicate issues with the gears. Also, visible wear and tear on the gears are signs that they might need replacement.
Can I replace the sewing machine gears by myself?
Yes, you can! With some basic knowledge of your sewing machine and following a step-by-step guide like ours, you can successfully replace the gears. Just make sure to have the necessary tools and take your time to avoid mistakes.
What tools do I need to replace sewing machine gears?
You will typically need screwdrivers (flathead and Phillips), needle-nose pliers, tweezers, a lint brush or cloth for cleaning debris, and replacement gears specific to your sewing machine model. Having a small flashlight handy can also be helpful for better visibility in tight spaces.
How long does it usually take to replace sewing machine gears?
The time required for gear replacement varies depending on your familiarity with the process and any complications that may arise. It could range from 1-3 hours. Taking it slow and being meticulous during each step will ensure a smooth gear replacement process.
Are there any common issues after replacing sewing machine gears?
Some common post-replacement issues include timing problems leading to uneven stitching or jamming. However, following our troubleshooting tips in this guide should help address these issues effectively.

One Comment