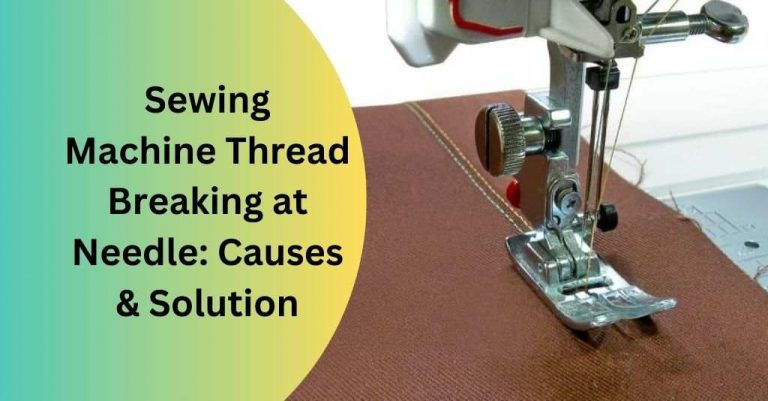
How to Thread a Tailor Professional Sewing Machine: 2024
Looking to master the art of threading your tailor’s professional sewing machine? Whether you’re a novice or an experienced seamstress, mastering this skill is crucial.
Imagine the frustration of having to pause your creative flow just because you can’t thread the machine! Fear not, as we’ve got you covered with simple step-by-step instructions that will have you threading like a pro in no time.
In this comprehensive guide, we’ll walk you through each step, highlighting the contrast between traditional and modern techniques.
You’ll learn how to navigate through the intricacies of different models and understand why proper threading is essential for achieving flawless stitches.
So, grab your spool of thread, and let’s dive into the world of seamless sewing mastery.
Key Takeaways
- Understanding the components of your sewing machine is crucial for successful threading.
- Gather all necessary threading supplies before starting to ensure a smooth process.
- Properly preparing the bobbin and threading the lower half of the machine sets the foundation for seamless stitching.
- Pay attention to the upper half preparation, including tension and thread guides, for optimal threading results.
- Threading the upper half of the sewing machine requires precision and attention to detail to avoid issues during sewing.
- Finalize the threading process by securing loose ends and conducting a thorough check before starting to sew.
Understanding Your Sewing Machine
Machine Anatomy
It’s crucial to familiarize yourself with its various components. The tailor professional sewing machine comprises several key parts, such as the needle, presser foot, bobbin case, and spool pin.
Each of these elements plays a vital role in ensuring smooth and efficient stitching. For instance, the needle is responsible for creating the stitches by piercing through the fabric and interfacing material.
The presser foot holds the fabric in place while allowing it to move smoothly under the needle. Familiarizing yourself with these components will help you operate your tailor professional sewing machine more effectively.
Bobbin Basics
Bobbin basics are essential knowledge for anyone using a sewing machine. The bobbin holds the lower thread that interlocks with the upper thread from the needle to create a secure stitch.
Understanding how bobbins contribute to this stitching process is crucial for achieving high-quality results in your sewing projects.
Moreover, knowing how to properly insert and wind bobbins ensures seamless stitching without any disruptions or tangles during use.
By mastering bobbin basics, you can enhance your overall proficiency in operating a tailor professional sewing machine.
Thread Types
Different thread types are compatible with tailor professional sewing machines based on their specific uses and the materials being sewn. Threads come in various materials such as cotton, polyester, silk, or nylon each suitable for different fabrics like denim or silk.
Understanding these variations allows you to select an appropriate thread type that complements your project requirements.
For example: when working on heavy-duty fabrics like denim or canvas, using a sturdy polyester thread would be ideal; whereas delicate fabrics like silk may require a finer silk thread for optimal results.
Maintenance Tips
Proper maintenance is essential for keeping your tailor professional sewing machine in optimal condition throughout its lifespan.
Regular cleaning of lint buildup within the bobbin area and oiling moving parts are fundamental practices that prevent malfunctions and ensure smooth operation.
In addition to routine maintenance tasks like cleaning and oiling, regularly checking tension settings, and replacing needles when necessary contributes significantly to prolonging your sewing machine’s longevity.
Gathering Threading Supplies
Thread Selection
When threading a tailor professional sewing machine, it’s crucial to understand the factors that influence thread selection.
Different threads can impact your sewing results, so making informed decisions is essential.
Consider the weight and fiber content of the fabric you’ll be using for your project. For heavier fabrics like denim, opt for thicker threads, while lighter fabrics require finer threads.
Match the color of the thread to your fabric for seamless stitching. This ensures that any visible stitches blend in with the material rather than standing out.
Always check if your chosen thread is compatible with your sewing machine by referring to its manual or consulting a professional.
For instance:
- When working on a lightweight cotton dress, select a fine cotton thread that matches the fabric’s color.
- If you’re creating denim jeans, choose a heavy-duty polyester or cotton-wrapped polyester thread in a shade similar to the denim.
Bobbin Preparation
Mastering bobbin preparation is vital for achieving seamless stitching with your tailor professional sewing machine.
Before starting any project, ensure that bobbins are properly wound and inserted into their designated compartments within the machine. To achieve this:
- Wind each bobbin evenly and smoothly using high-quality thread.
- Insert each prepared bobbin into its housing according to your sewing machine’s instructions.
- Check that there are no tangles or loose ends before beginning to sew.
Properly prepared bobbins contribute significantly to efficient sewing by preventing snags and uneven stitching during use.
Preparing the Bobbin
Winding Process
To effectively wind a bobbin on a tailor professional sewing machine, start by placing the spool of thread on the designated spindle.
Then, take the thread and guide it through the bobbin winding tension disc before positioning it on the bobbin winder shaft.
Once that’s done, push this shaft to engage it with the handwheel and begin winding by pressing down on the foot pedal.
As you do this, ensure that you maintain steady and even pressure to achieve a uniformly wound bobbin.
Mastering this technique is crucial for ensuring smooth stitching as an unevenly wound bobbin can lead to inconsistent tension in your stitches. Always remember to stop winding when there’s about 1/8 inch space left at the outer edge of the bobbin.
- Place a spool of thread on the spindle
- Guide thread through winding tension disc
- Position thread onto winder shaft
- Maintain steady pressure while winding
Bobbin Insertion
Correctly inserting bobbins into your tailor professional sewing machine is essential for uninterrupted stitching.
After turning off your machine, open its slide plate cover located beneath or beside its needle plate.
Next, hold your wound bobbin so that its tail points clockwise then drop it into place within its designated compartment.
Understanding precise placement is key as incorrect insertion may lead to tangling or breaking of threads during sewing.
Once inserted properly, pull out around 4 inches of thread from under your slide plate cover before closing it securely.
Threading the Lower Half
Shuttle Area
The shuttle area in a tailor professional sewing machine is a crucial component for the stitching process. It houses the bobbin, which holds the lower thread and works in coordination with the upper thread to create stitches.
Understanding this area’s significance allows you to master the art of threading and ensures smooth stitching operations.
When you prepare your bobbin, it directly impacts how smoothly the shuttle area functions. Ensuring that the bobbin is correctly wound and inserted into the shuttle area prevents any potential disruptions during your sewing process. For instance, if the bobbin is not inserted properly, it can lead to uneven or tangled stitches.
Exploring this aspect also helps you comprehend how different types of threads interact within this space.
Whether you’re using polyester, cotton, or silk threads, understanding their compatibility with this area ensures efficient stitching without compromising on quality.
Tension Assembly
Adjusting tension assembly plays a pivotal role in achieving impeccable stitch quality on a tailor professional sewing machine. Each fabric type requires specific tension settings for optimal results; mastering these adjustments enhances your ability to work with various materials seamlessly.
Understanding how tension assembly impacts stitch appearance empowers you to achieve consistent and aesthetically pleasing results across different projects.
For example, when working on delicate fabrics like chiffon or silk, adjusting tension assembly prevents puckering or pulling of fabric layers while ensuring neat and even stitches.
Mastering proper tension settings also enables you to experiment with diverse stitch styles such as straight stitches, zigzag stitches, or decorative patterns without compromising on quality. This knowledge allows you to unleash your creativity while maintaining precision in every project.
Upper Half Preparation
Spool Placement
Spool placement plays a crucial role in ensuring smooth and efficient thread delivery during the stitching process.
Placing the spool correctly on a tailor professional sewing machine can prevent thread tangles and breakage, leading to a seamless sewing experience.
For instance, if the spool is not placed properly, it can cause uneven tension in the threads, resulting in irregular stitches or even jamming of the machine.
Optimizing spool placement involves positioning the spool pin so that it aligns with the thread guide for consistent and even thread flow.
This alignment ensures that the thread unwinds smoothly without any resistance, preventing potential issues such as looping or knotting during stitching.
By understanding effective spool placement techniques, you can enhance your overall sewing experience by eliminating common threading problems before they occur.
Tension Mechanism
Understanding and adjusting tension mechanisms on a tailor professional sewing machine is essential for achieving high-quality stitch formation.
The tension mechanism controls how tightly the upper and lower threads are pulled together within each stitch, directly impacting the appearance and strength of your seams.
Improper tension adjustment can result in loose or tight stitches, making your sewing projects look unprofessional.
Mastering proper adjustment of tension mechanisms based on specific stitching requirements allows you to achieve precise control over stitch formation and quality.
For example, when working with different fabric types or thicknesses, knowing how to adjust the tension accordingly ensures that your stitches remain consistent and balanced throughout your project.
By exploring how tension mechanisms affect stitch formation and quality, you gain valuable insights into optimizing this aspect of your tailor professional sewing machine for various sewing tasks.
Threading the Upper Half
Take-Up Lever
The take-up lever is a crucial part of a tailor professional sewing machine. It plays a vital role in ensuring smooth and even stitching. When the needle penetrates the fabric, the take-up lever pulls the thread up and down, creating evenly spaced-stitches. Mastering this component is essential for achieving high-quality sewing results.
Understanding how to utilize the take-up lever effectively can significantly improve your sewing projects. By coordinating your movements with the take-up lever’s function, you can ensure that each stitch is consistent and precise.
For example, when threading the upper half of your tailor professional sewing machine, it’s important to guide the thread through this component correctly to enable it to perform its task seamlessly.
Properly threading your tailor professional sewing machine involves guiding the thread through various components, including the take-up lever.
This process ensures that each element works harmoniously during stitching operations. By mastering techniques for utilizing this crucial part of your machine, you can enhance both efficiency and stitch quality.
Needle Eye
Threading needles through their eyes on a tailor professional sewing machine requires precision and attention to detail. The needle eye is where you insert your threaded needle before beginning any stitching work. Understanding how to correctly tackle this step is fundamental for setting up your machine accurately.
When learning how to thread a tailor professional sewing machine’s needle eye, it’s important to ensure that you have cut an appropriate length of thread and secured one end properly within its designated slot or holder on your machine.
Then carefully guiding the free end through specific points near or around the needle area will help facilitate seamless threading.
Mastering correct techniques for maneuvering threads into these tiny spaces will make preparing your tailor professional sewing machine much easier.
Finalizing the Threading
Thread Tightness
To ensure optimal thread tightness during stitching, it’s essential to adjust the tension discs and the presser foot properly. The tension discs control how tightly the upper thread is pulled while sewing.
When threading a tailor professional sewing machine, make sure to pass the thread through all necessary hooks and guides before reaching the tension discs. Once you’ve reached this point, gently pull on the thread to engage it in these discs.
Next, raise your presser foot using its lever or dial; this action releases pressure on the tension discs, allowing for smooth threading of the lower part of your machine.
After completing this step, remember to lower your presser foot back into position before starting any stitching. This ensures that proper thread tightness is maintained throughout your sewing process.
In addition to adjusting upper thread tightness, understanding how different fabric types require varying levels of tautness can greatly improve stitch quality. For instance, lightweight fabrics like silk may need looser upper thread tension compared to heavier materials such as denim or canvas.
Test Stitching
Conducting test stitches after threading is crucial for ensuring proper thread alignment and tension in a tailor professional sewing machine. By doing so, you can observe if there are any issues with bobbin or top threads pulling too tightly or loosely within each stitch formation.
When conducting test stitches on a tailor professional sewing machine, start by selecting an appropriate fabric scrap similar to what you will be working with for your project. Then sew a few inches while observing how well both threads interlock within each stitch formation.
Afterward, inspect both sides of your test stitch sample and examine whether there are any visible loops on either side of the fabric which could indicate improper thread alignment or uneven tensions between the top and bottom threads.
Remember that regular maintenance of your machine can also contribute significantly towards achieving consistent test stitching results; cleaning lint from bobbin cases and changing needles regularly are simple yet effective ways to maintain optimal performance.
Troubleshooting Common Issues
Skipped Stitches
Skipped stitches can be frustrating, but understanding the common causes and solutions can help you address this issue. One of the main reasons for skipped stitches is using a dull or bent needle.
When the needle is not sharp enough, it fails to catch the thread properly, resulting in skipped stitches. To resolve this problem, make sure to replace your needle regularly, especially if you notice any signs of damage.
Another cause of skipped stitches could be incorrect threading. If the thread isn’t properly threaded through the machine’s various components, it may lead to stitching irregularities.
Ensure that you follow the manufacturer’s instructions carefully when threading your tailor professional sewing machine to avoid this issue.
Adjusting the tension might also solve this problem. If your machine’s tension is too tight or too loose, it can cause skipped stitches during sewing.
Experiment with small adjustments to find the optimal tension setting for your specific fabric and thread combination.
Thread Bunching
Thread bunching is another common issue that sewers encounter while using a tailor professional sewing machine. This occurs when there are tangles or knots in the bobbin area of your machine, leading to uneven and messy stitching on your fabric.
To prevent thread bunching, start by ensuring that you are using high-quality thread suitable for your fabric type.
Moreover, keeping your bobbin area clean and free from lint buildup is essential in preventing thread bunching issues. Regularly remove lint and debris from this area using a small brush or compressed air.
Furthermore, checking whether the bobbin is correctly inserted into its case can also help prevent thread bunching problems.
Tension Problems
Tension-related issues are often at the core of many sewing problems encountered with tailor professional sewing machines. Understanding how to troubleshoot tension problems can significantly improve stitch quality and overall sewing experience.
One way to address tension issues is by rethreading both the top thread and bobbin threads carefully according to your machine’s manual instructions.
Advanced Threading Techniques
Twin Needle Setup
Mastering the twin needle setup on a tailor professional sewing machine allows you to create parallel lines or decorative effects.
To set up the twin needles, start by ensuring that your sewing machine is compatible with twin needles.
Next, insert the twin needles into the machine, making sure they are of equal size and type. Then, thread each needle individually using two separate spools of thread.
Once threaded, adjust the tension settings accordingly to prevent any thread breakage during stitching.
Using a twin needle can add a professional touch to hems and seams on garments like t-shirts or knitwear.
It’s also ideal for creating decorative topstitching on various projects such as quilts or home decor items like pillow covers and table runners.
Decorative Stitches
Exploring different decorative stitch options available on a tailor-professional sewing machine opens up endless creative possibilities for your sewing projects.
These machines offer an array of built-in decorative stitches including scallops, waves, hearts, stars, and more.
To utilize these stitches effectively, familiarize yourself with your specific model’s stitch selection process by referring to the user manual.
Decorative stitches can elevate simple garments into stylish pieces or add intricate embellishments to crafts and home decor items.
For instance, you could use a heart-shaped decorative stitch along the hemline of a child’s dress or apply wave-like patterns onto napkins for an elegant touch at dinner parties.
Summary – How to Thread a Tailor Professional Sewing Machine:
Congratulations! You’ve now mastered the art of threading your Tailor Professional sewing machine. Understanding your machine’s components, gathering the necessary supplies, and following the step-by-step process have equipped you with the skills to thread like a pro.
But remember, even experts encounter hiccups, so don’t fret if you face challenges. Refer to the troubleshooting section for quick fixes and explore advanced techniques to elevate your sewing game. Now, go ahead, thread that machine, and let your creativity soar!
FAQs: How to Thread a Tailor Professional Sewing Machine
How important is it to understand my sewing machine before threading?
Understanding your sewing machine is crucial for successful threading. It’s like trying to drive a car without knowing where the pedals are located. Familiarize yourself with the components and functions to ensure smooth sailing during the threading process.
What supplies do I need for threading my sewing machine?
Gather essential supplies such as good quality thread, bobbins, and a small brush for cleaning lint. Having these items at hand will streamline the threading process and help maintain your machine’s performance.
Why is preparing the bobbin an important step in threading?
Preparing the bobbin correctly ensures that your stitches are even and secure. Think of it as laying a strong foundation for a building – if it’s not solid, everything else could collapse.
What should I do if I encounter common issues while threading?
If you encounter common issues like tangled thread or skipped stitches, don’t panic! Refer to troubleshooting tips in our blog post or consult your sewing machine manual. Often, minor adjustments can resolve these pesky problems.
Are there advanced techniques for threading that I should know about?
Once you’ve mastered basic threading, explore advanced techniques to enhance your sewing skills. These techniques may include specialty threads or intricate patterns that can take your projects to the next level.