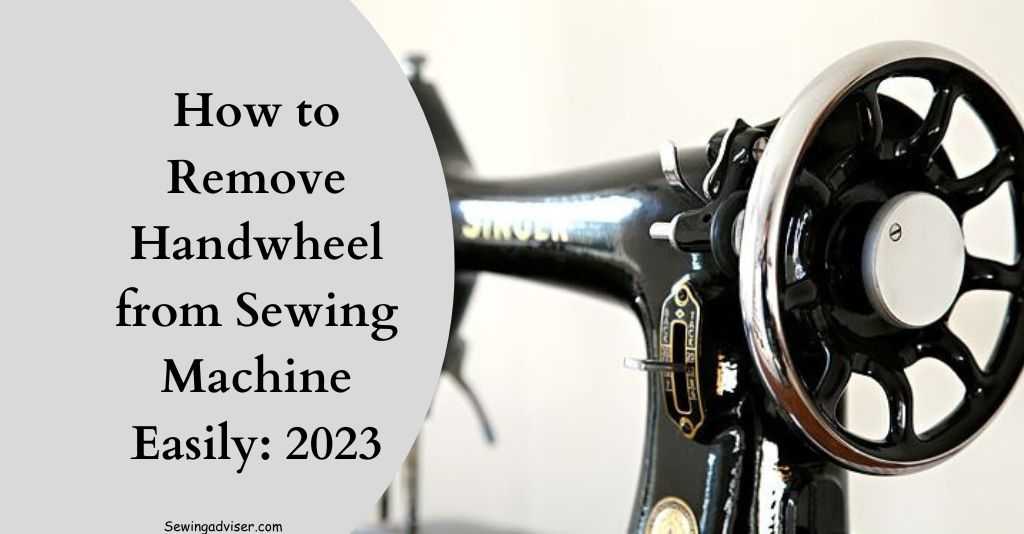
How to Remove Handwheel from Sewing Machine: 2024 Hack
Welcome to our comprehensive guide on how to remove handwheel from sewing machine. If you’re looking to undertake this task, you’re in the right place.
We understand that certain sewing machine maintenance tasks can seem a bit daunting at first, but fear not we’re here to guide you through the process step by step.
Why Would You Want to Remove the Handwheel?
Before we jump into the nitty-gritty, let’s talk about the why. Sometimes, you might need to remove the handwheel to clean out lint and debris that have made themselves at home inside your trusty sewing companion.
Maybe you’re upgrading parts, or perhaps you’re just curious to see the magic behind the scenes. Whatever the reason, removing the handwheel is a skill worth having.
Tools You’ll Need
Before we dive into the step-by-step process, let’s make sure you have all the necessary tools at your disposal. You’ll need:
- Screwdriver: Depending on your sewing machine model, you might need a flathead or Phillips screwdriver.
- Wrench: A small adjustable wrench should do the trick.
- Soft Cloth: To protect the surface of your sewing machine from any scratches.
- Needle-nose Pliers: These will come in handy for delicate tasks.
- Container: Have a small container nearby to keep track of the screws you remove.
How to Remove Handwheel from Sewing Machine: Step-by-Step Guide
Step 1: Preparation
Begin by turning off your sewing machine and unplugging it from the power source. This ensures your safety during the process. Place the machine on a clean and stable surface with ample lighting.
Step 2: Remove the Outer Casing
Using the appropriate screwdriver, carefully remove the screws holding the outer casing in place. Keep the screws in a safe container. Gently remove the casing to expose the inner workings of the machine.
Step 3: Locate the Handwheel
Locate the handwheel, which is usually situated on the right side of the sewing machine. It’s the large wheel that you turn manually to control the movement of the needle.
Step 4: Loosen the Center Screw
Using the wrench or screwdriver, loosen the center screw on the handwheel. This screw holds the handwheel in place on the machine’s shaft. Be sure to keep track of this screw as you’ll need it later.
Step 5: Gently Remove the Handwheel
With the center screw sufficiently loosened, you can now gently pull the handwheel away from the machine. It might require a bit of wiggling, but avoid using excessive force to prevent damage.
Step 6: Cleaning and Maintenance
While the handwheel is removed, take the opportunity to clean the surrounding area and inspect the handwheel itself. Remove any dust, lint, or debris that may have accumulated. If the handwheel shows signs of wear or damage, this could be a good time to replace it.
Step 7: Reassembly
Once you’ve completed the necessary maintenance, it’s time to reassemble the sewing machine. Carefully place the handwheel back onto the shaft, ensuring it fits snugly. Tighten the center screw using the wrench or screwdriver.
Step 8: Replace the Outer Casing
Gently slide the outer casing back into place and secure it with the screws you removed earlier. Make sure the casing is aligned properly before tightening the screws.
Tips and Tricks for Removing Handwheel from Sewing Machines
- Stay Organized: Keep a small container nearby to toss in the screws and other tiny parts you remove. This way, you won’t have to play detective later on.
- Gentle Hands: Be delicate with your movements. These parts are intricate, and rough handling might lead to complications.
- Snap Pictures: If you’re worried about forgetting where things go, take pictures as you go along. A visual reference can save you hours of head-scratching.
Why is My Sewing Machine Handwheel Stuck?
There could be a couple of reasons for this little hiccup. First off, check if there’s any fabric or thread jammed in the bobbin area. Sometimes those sneaky bits can mess things up.
If that’s not the culprit, take a peek at the belt connecting the handwheel to the motor. It might have slipped or gotten worn out, causing the wheel to give you the cold shoulder.
And don’t forget to give the machine a good cleaning dust and lint can be mischievous troublemakers too. So roll up those sleeves, grab your tools, and let’s show that stubborn handwheel who’s boss!
Conclusion
Removing the handwheel from your sewing machine might seem like a daunting task, but armed with the right knowledge, you can tackle it like a pro. Remember, every stitch counts, and knowing the inner workings of your machine can be a real game-changer. So go ahead, explore, clean, or upgrade your sewing adventures just got a little more exciting! Happy stitching, folks! 🧵🪡
FAQs: How to Remove Handwheel from Sewing Machine
Can I use soap and water to clean the handwheel?
It’s better to use specialized sewing machine lubricants and cleaners to ensure you don’t damage any internal components.
Is it okay to clean the handwheel before putting it back on?
Definitely! Cleaning and maintaining the handwheel can extend the life of your sewing machine.
Is it normal for the handwheel to be a bit stiff when turning?
Yes, especially if you haven’t used your sewing machine in a while. However, if the handwheel is extremely difficult to turn, it might be a sign that there’s a bigger issue at play. In that case, it’s best to consult your sewing machine’s manual or seek professional help.
Will removing the handwheel void my sewing machine’s warranty?
In most cases, no. Removing the handwheel for maintenance purposes shouldn’t affect your warranty. However, it’s always a good idea to double-check your machine’s manual or contact the manufacturer to be certain.
What if the handwheel feels stuck?
If the handwheel is stubborn, try applying a bit of gentle pressure while turning it. If it still won’t budge, consider seeking professional assistance.

7 Comments