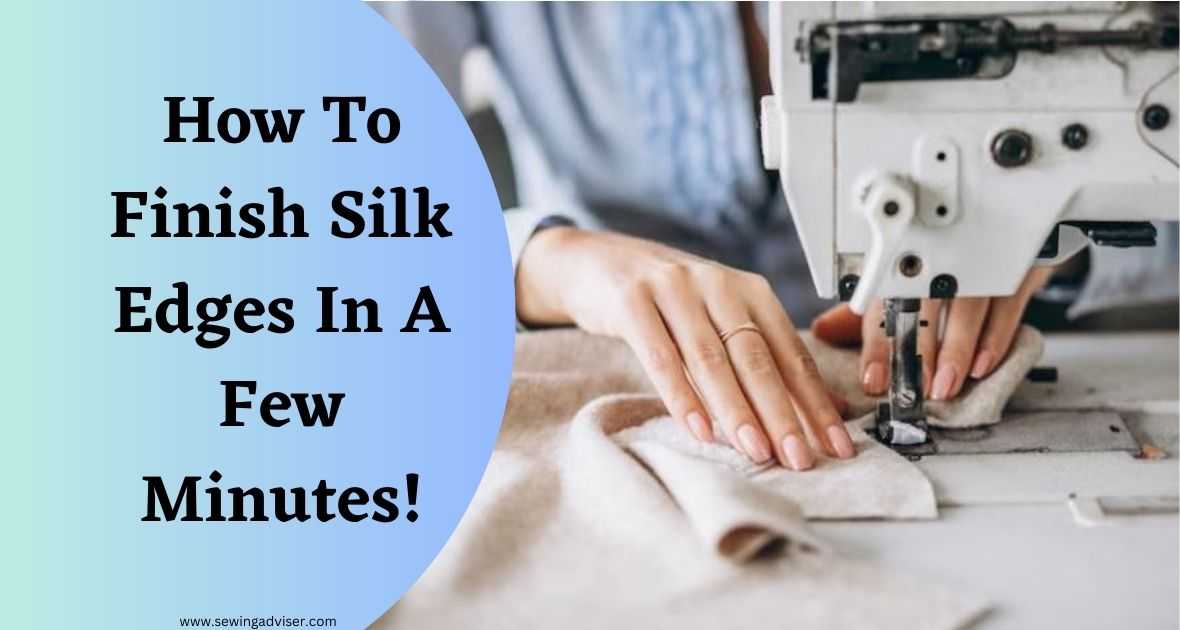
How To Finish Silk Edges In Few Minutes! 2024 Complete Guide
Hey there! Are you tired of your silk edges fraying and ruining the sleek finish of your favorite garments?
Well, you’re in luck because today I’m going to share my tried-and-true techniques on how to finish silk edges like a pro.
Whether you’re a sewing enthusiast or a fashionista looking to add a polished touch to your silk creations, this step-by-step guide will walk you through the process, leaving you with beautifully finished edges that will stand the test of time.
So, grab your sewing kit and get ready to master the art of silk edge finishing. Let’s dive right in!
How To Finish Silk Edges
To finish silk edges quickly, you can follow these steps:
- Prepare your materials: Gather a sewing machine, silk thread, a silk needle, and fabric shears.
- Trim the edges: Use the fabric shears to carefully trim any uneven or frayed edges of the silk fabric. Make sure to cut straight and maintain a consistent width along the edges.
- Set up the sewing machine: Thread the machine with silk thread and insert a silk needle appropriate for your fabric weight. Adjust the machine settings to a straight stitch with a medium stitch length.
- Fold and press: Fold the raw edge of the silk fabric towards the wrong side by about 1/4 inch (0.6 cm). Use a hot iron to press the fold, creating a crisp edge.
- Stitch the folded edge: Place the folded edge under the sewing machine’s presser foot, aligning the edge with the center of the foot. Begin stitching slowly, backstitching at the beginning and end to secure the stitches. Keep the stitches straight and close to the folded edge.
- Trim excess thread: After sewing along the entire edge, cut the thread, leaving a tail of about 3-4 inches. Use a hand-sewing needle to pull the thread tail through the stitches to the wrong side of the fabric.
- Knot the thread: Once the thread tail is on the wrong side, tie a small knot close to the fabric to secure it. Trim any excess thread.
- Repeat for remaining edges: Repeat the above steps for all the remaining edges of your silk fabric, ensuring consistent width and quality of stitching.
How to Finish Silk Edges With The French Seam
Here are the steps to finish the silk edges with the French Seam
- Place the wrong sides of the fabric together.
- Stitch a narrow seam along the raw edge, about 1/4 inch from the edge.
- Trim the seam allowance close to the stitching line.
- Fold the fabric along the seam line, bringing the right sides together.
- Press the seam flat.
- Stitch another seam about 3/8 inch from the folded edge, enclosing the raw edge within the seam.
- Press the seam flat again.
How To Finish Silk Edges With The Flat Felled Seams
Here are the steps to finish the silk edges with the Flat Felled Seams
- Place the wrong sides of the fabric together.
- Stitch a narrow seam along the raw edge, about 1/4 inch from the edge.
- Trim one side of the seam allowance close to the stitching line.
- Fold the other side of the seam allowance over the trimmed edge, encasing it.
- Press the folded edge flat.
- Stitch another seam close to the folded edge to secure it in place.
- Press the seam flat.
How to Finish Silk Edges By Pinking
Here are the steps to finish the silk edges by Pinking
- Use pinking shears to trim the raw edge of the fabric in a zigzag pattern.
- Make sure the cuts are evenly spaced and do not extend too far into the fabric.
- This method helps prevent fraying and gives a decorative edge to the fabric.
How To Finish Silk Edges With Hong Kong Finish
Here are the steps to finish the silk edges with Hong Kong Finish
- Cut bias strips of lightweight fabric.
- Align the raw edge of the bias strip with the raw edge of the silk fabric.
- Stitch the bias strip to the fabric, using a 1/4-inch seam allowance.
- Press the bias strip away from the fabric.
- Fold the bias strip over the raw edge of the fabric, enclosing it.
- Stitch another seam close to the folded edge to secure it in place.
- Press the seam flat.
How to Finish Silk Edges on a Sewing Machine
Here are the steps to finish silk edges on a sewing machine:
- Set up your sewing machine: Make sure your sewing machine is threaded correctly with matching thread colors. Use a fine needle appropriate for silk fabric.
- Prepare your silk fabric: Trim any loose threads or excess fabric from the edges. It’s recommended to interface the edges with lightweight fusible interfacing to prevent fraying.
- Select an appropriate stitch: Choose a narrow zigzag stitch or a satin stitch on your sewing machine. These stitches work well for finishing delicate fabrics like silk.
- Adjust the stitch settings: Set the stitch width and length according to your desired finish. Test the stitch on a fabric scrap to ensure it produces the desired result without pulling or puckering the fabric.
- Start sewing: Align the raw edge of the silk fabric under the sewing machine presser foot. Begin sewing slowly, guiding the fabric through the machine with even pressure. Make sure the zigzag or satin stitch catches the raw edge of the fabric without extending beyond it.
- Continue sewing: Sew along the entire edge of the fabric, keeping the stitch line consistent. Take your time to prevent any mistakes or uneven stitching.
- Backstitch at the end: Once you reach the end of the edge, backstitch a few stitches to secure the thread. Trim any excess thread.
- Inspect the finished edge: Examine the sewn edge to ensure it’s neat and secure. If there are any loose threads or uneven stitches, trim them carefully.
- Press the finished edge: Gently press the sewn edge with a cool iron to remove any wrinkles or creases. Be cautious not to apply excessive heat, as silk is delicate.
- Repeat for other edges: Repeat the above steps for all remaining edges of the silk fabric that require finishing.
How to Finish Silk Edges with a Serger
To finish silk edges with a serger, you will need a serger machine, silk fabric, matching thread, and scissors. Here’s a step-by-step guide on how to do it:
Related Post: Where To Buy A Serger Machine In 2023
- Set up your serger: Begin by threading your serger machine according to the manufacturer’s instructions. Make sure to use matching thread that complements your silk fabric.
- Prepare your silk fabric: Cut the silk fabric into the desired shape or size. It’s a good idea to practice on a scrap piece of silk fabric before working on your final project.
- Serge the edges: Place the silk fabric under the serger foot, aligning the raw edge with the blade. Start the serger and guide the fabric gently through the machine. The serger will trim the edge of the fabric and encase it in a neat, finished stitch.
- Maintain steady control: While serging, make sure to maintain a steady pace and apply gentle tension on the fabric. Avoid pulling or stretching the silk excessively, as it may cause distortion or puckering.
- Pivot at corners: When you reach a corner, stop the serger with the needle in the down position. Lift the presser foot, pivot the fabric, and lower the presser foot again. Continue serging along the next edge.
- Backstitch or secure the end: Once you have finished serging around all the edges of your silk fabric, backstitch or secure the thread ends to prevent unraveling. You can do this by sewing a few stitches in place or using a hand-sewing needle to weave the thread ends back into the serged stitches.
- Trim excess thread: Trim any excess thread tails close to the serged stitches using a pair of scissors. Be careful not to cut into the fabric.
- Press the finished edges: After serging, use a silk-friendly iron on a low heat setting to gently press the finished edges. This will help set the stitches and give a polished look to your silk fabric.
How to Finish Silk Edges with a Hand Sewing Machine
To finish silk edges with a hand-sewing machine, you can follow these steps:
- Prepare the sewing machine: Make sure your hand sewing machine is set up correctly with the appropriate thread and needle. Adjust the tension and stitch length according to the silk fabric you’re working with.
- Prepare the silk edges: Trim any loose threads or frayed edges from the silk fabric. It’s essential to have clean and even edges before sewing.
- Fold the edge: Fold the raw edge of the silk fabric to the wrong side by about 1/4 inch (6 mm) or as desired. Use your fingers to press the fold in place, ensuring it lies flat.
- Pin or baste the fold: To secure the folded edge, you can either pin it in place using straight pins or baste it with hand stitches. This step will help keep the fabric in position while you sew.
- Start sewing: Position the folded edge under the sewing machine foot, aligning it with the edge of the foot. Begin sewing slowly, guiding the fabric along the edge of the foot as you stitch. Use your other hand to support and guide the fabric smoothly.
- Backstitch or lock the stitches: When you reach the end of the fabric, you can either backstitch a few stitches to secure the seam or use a lockstitch function if your hand-sewing machine has that feature. This step will prevent the stitches from unraveling.
- Trim excess thread: Once you’ve finished sewing, trim the excess thread, leaving a small tail. You can use scissors or a thread snipper to cut the thread close to the fabric without accidentally cutting the fabric itself.
- Press the finished edge: After sewing, lightly press the finished edge with a warm iron set to the appropriate temperature for silk. Be cautious not to apply excessive heat that could damage the fabric. Pressing will help the folded edge lie flat and give a polished finish.
How to Finish Silk Edges with an Overlocker
To finish silk edges with an overlocker, also known as a serger, you can follow these steps:
- Prepare your overlocker: Make sure your overlocker is set up properly and threaded with the desired thread color. Refer to your overlocker’s manual for specific instructions on threading and adjusting settings for silk fabric.
- Test on a scrap fabric: Before working on your silk fabric, it’s always a good idea to test the overlocker on a scrap piece of silk to ensure the settings are correct and the finish is to your liking.
- Trim the edges: Start by trimming the raw edges of your silk fabric with sharp fabric scissors. Trim any uneven or frayed edges, leaving a small seam allowance.
- Position the fabric: Place the trimmed edge of your silk fabric under the presser foot of the overlocker, aligning the edge with the cutting blade and the needles.
- Start sewing: Gently guide the fabric through the overlocker, allowing the machine to trim the edge and create a neat finish. Make sure to maintain a consistent speed and avoid pulling or stretching the fabric.
- Finish the entire edge: Continue sewing along the entire edge of your silk fabric, keeping it aligned with the cutting blade and the needles. Be cautious not to let the fabric slip or bunch up, as this can result in uneven or distorted stitching.
- Backstitch or tie off the threads: Once you’ve finished serging the edge of the fabric, either backstitch at the end of the seam or manually tie off the threads to secure them in place. Trim any excess thread.
- Press the finished edge: After serging, it’s recommended to press the finished edge of the silk fabric with a cool iron to set the stitches and give a professional look. Use a pressing cloth or a piece of silk fabric over the edge to protect it from direct heat.
Remember, working with delicate silk fabric requires a gentle touch, and it’s always advisable to practice on a scrap piece first to ensure you achieve the desired results.
How To Finish Silk Edges Without Making Common Mistakes
When it comes to finishing silk edges, there are a few common mistakes that people often make. By avoiding these errors, you can achieve clean and professional-looking results. Here are some tips to help you avoid common mistakes when finishing silk edges:
- Ignoring the fabric type: Silk is a delicate fabric, so it’s important to choose the appropriate finishing method. Avoid using techniques that may damage or fray the fabric, such as using a serger or applying excessive heat.
- Skipping pre-treatment: Before finishing the edges, it’s advisable to pre-treat the silk fabric. This involves washing it gently by hand or using a delicate cycle in cold water with a mild detergent. Pre-treating helps to remove any sizing or residue from the fabric and allows for better absorption of finishing techniques.
- Not using a stabilizer: Silk is prone to shifting and stretching during the finishing process. To prevent this, use a stabilizer along the edge you intend to finish. You can use lightweight fusible interfacing or tear-away stabilizer to provide support and stability.
- Using the wrong thread: Opt for a fine, silk thread or a high-quality polyester thread when finishing silk edges. Avoid using thick or heavy threads, as they can create bulk and make the edges appear uneven. Match the thread color to your silk fabric for a seamless finish.
- Rushing through the process: Take your time when finishing silk edges. Rushing can lead to mistakes such as uneven stitching or accidentally cutting into the fabric. Be patient and work slowly, ensuring each step is executed with care.
- Not practicing on scraps: If you’re new to finishing silk edges or trying out a new technique, it’s always a good idea to practice on fabric scraps before working on your actual project. This allows you to familiarize yourself with the process and make any adjustments or corrections before working on the final piece.
- Neglecting to press the edges: Pressing the finished edges is an essential step to achieve a polished look. Use a low heat setting on your iron and place a pressing cloth or a piece of silk fabric between the iron and the silk edges to protect the fabric. Gently press along the finished edges to set the stitches and create a crisp finish.
Tips for Working with Silk:
- Use sharp, fine needles when sewing silk to avoid snags and visible holes.
- Consider using a lightweight silk thread or polyester thread for sewing.
- Use a lower tension setting on your sewing machine to prevent puckering.
- Test your stitches and seam finishes on a scrap piece of silk fabric before working on your final project.
- When pressing silk, use a low to medium heat setting and place a press cloth between the iron and the fabric to prevent damage.
- Store silk garments or fabric rolled rather than folded to prevent creasing.
- Dry clean or hand wash silk items to maintain their quality.
- Avoid exposing silk to direct sunlight for extended periods to prevent fading.
- If necessary, use a silk-specific detergent or mild soap when washing silk items.
Remember to always handle silk with care and follow the manufacturer’s instructions for any specific silk fabric you are working with.
Conclusion: How To Finish Silk Edges
In conclusion, mastering the art of finishing silk edges is essential for maintaining the longevity and elegance of your silk garments.
By following the simple steps outlined in this guide, you can achieve smooth and polished edges that enhance the overall look and feel of your silk creations.
Remember to trim, fold, and sew carefully, ensuring that you secure the edges with precision.
With practice and patience, you’ll become proficient in finishing silk edges, creating stunning pieces that showcase your craftsmanship and attention to detail.
So go ahead and start applying these techniques to elevate your silk sewing projects to new heights of beauty and professionalism. Happy sewing!
FAQs: How To Finish Silk Edges
Why is it important to finish silk edges?
Finishing silk edges helps prevent fraying, adds durability to the fabric, and gives a polished and professional look to your silk garments or projects.
What materials do I need to finish the silk edges?
You will need a few basic materials, including silk thread, a hand-sewing needle, sharp scissors, and possibly a sewing machine (optional).
What are the different methods to finish silk edges?
There are several methods you can use to finish silk edges, such as using a narrow hem, using a serger, applying bias binding, or using a rolled hem technique.
Can I use a serger to finish the silk edges?
Yes, a serger can be used to finish silk edges. Adjust the tension settings on your serger to prevent the fabric from puckering or getting damaged.
Do I need a sewing machine to finish silk edges?
While a sewing machine can make the process faster and more convenient, it is not necessary. You can finish silk edges by hand-sewing as well.


6 Comments